Please enjoy this Butterfly Brilliance free tutorial.
While the Butterfly Brilliance stamp set and coordinating Brilliant Wings Dies will be available in Stampin’ Up!’s brand-new catalog, the sneak peek is available now. Purchase the stamp set and dies as a bundle and receive a 10 percent discount. The coordinating 6 x 6 Butterfly Bijou Designer Series Paper and the Natural Touch Specialty Paper are available while supplies last. Be sure to watch the video (a Facebook Live replay) to see all of the pieces in action. I’m especially loving the Rainbow Glimmer Paper from Stampin’ Up!’s 2020-2021 Annual Catalog.
Butterfly Brilliance Free Tutorial
Stampin’ Up! Supplies:
STAMPS – Butterfly Brilliance (155092), Art Gallery (154421)
PAPER – Bermuda Bay (131197), Vellum Cardstock (101856), Rainbow Glimmer (153056)
OTHER –Stitched Shapes Dies (152323), Brilliant Wings Dies (155523), Classic Label Punch (141941), Pearl Basic Jewels (144219), Blackberry Bliss Stampin’ Blends Combo Pack (154877), Mini Glue Dots (103683), Stampin’ Seal (152813), Paper Snips (103579), Stampin’ Cut & Emboss Machine (149653)
Cutting & Scoring:
Bermuda Bay – 8 ½” 5 ½”, scored at 4 ¼”, 5 ¼” 4”, scrap
Vellum – 3 ½” x 3 ½”
Rainbow Glimmer – select pieces in desired color patterns
Instructions:
Fold the 8 ½” x 5 ½” Bermuda Bay cardstock in half.
Ink the Butterfly Brilliance stamp with Versamark and stamp on the 5 ¼” x 4” Bermuda Bay cardstock. Adhere to the card base.
Die cut the Vellum Cardstock with the largest circle from the Stitched Shapes Dies. Adhere to the card front with a few Glue Dots placed strategically so they can’t be seen when the butterfly is in place.
Die cut three of the butterflies from the Rainbow Glimmer Paper, including the largest one and two of the smaller ones.
Using the tip of the Paper Snips to put Glue Dots on the back side of the butterflies.
Place the largest butterfly on the Vellum circle. Arrange the other butterflies on the card.
Stamp the thank you sentiment with Blackberry Bliss ink onto the Bermuda scrap. Punch with Classic Label Punch.
Adhere the punched sentiment to the front of the card as shown above.
Color two small Pearl Basic Jewels with the Dark Blackberry Bliss Stampin’ Blend.
Place one each of the colored pearls on each side of the sentiment.
Thanks so much for stopping by today! Please let me know if you have questions about this project or any other. I’d love to help you in your papercrafting journey.
Did you know I send an email newsletter with free tutorials and videos two or three times a month? Click here to subscribe.
I have a confession! I’m a flamingo fanatic! Yes, these beautiful creatures speak to me. Well, not literally. But I love them. Of course, I’m excited about Stampin’ Up!’s new bundle, Friendly Flamingo. It’s available beginning today in the January-June 2021 Mini Catalog.
Today, I’m sharing cards samples and a video featuring this stamp set and its coordinating dies.
Usually, I’m a Pinterest girl. When I get a new stamp set, I go to Pinterest and see what cute things everyone else has made with the set. Then, I find a sample that inspires, and I get to work.
However, this time I just started created. I let the process work itself. One idea led to another, and soon I had a handful of cards ready to send. I’ve just scratched the surface with the cards I’m showing you today. In the next few months, look for additional techniques and cards featuring the fun bundle.
Friendly Flamingo Card Samples
Enjoy these samples. I used Stampin’ Up!’s colors of Flirty Flamingo, Melon Mambo, and Magenta Madness. Look for a shopping list at the end of this post. Please contact me if you have any questions about products or techniques.
The card above features Flirty Flamingo card stock and ink. I colored the pearls with Flirty Flamingo Stampin’ Blends. The Embossing Folder is Tasteful Textile 3D.
The above card is created on Stampin’ Up!’s note cards and envelopes (20 pre cut and scored note cards for $7). These are an awesome option when you need to create quick cards. The featured colors are Magenta Madness and Just Jade.
This card uses Melon Mambo as its base color.
Love that Designer Series Paper on the card above? Get it (and four other packages FREE) when you purchase Stampin’ Up!’s Start Kit for just $99 + tax. Shipping is free. Choose $125 worth of ANY product and get 200 sheets of free DSP.
Friendly Flamingo Card Samples Video
Thanks for stopping by today. I appreciate you!
Do you know I send email newsletters? Click here to subscribe.
Click on any the pictures below to shop directly from my online store. Please let me know if you have questions about the cards or other catalogs.
Welcome to our monthly Maui Achievers Blog Hop. We’re a group of Stampin’ Up! demonstrators from around the world who have achieved the Stampin’ Up! bonus of the Maui incentive trip. We celebrate this achievement by organizing a monthly hop which helps us continue to inspire you creatively.
You may be starting here or have come from someone else’s blog – either way there’s a list at the end of this post to help you move around all the different blogs and get many amazing ideas. We all have our country listed – so if you’re looking for a demonstrator, these are top demonstrators in their country and would love to help you with your Stampin’ Up! shopping or if you’d like to join our Stampin’ Up! teams. Visit all of the blogs and leave a comment. We love to hear from you.
Daisy Lane 2021 Calendar
These 2021 desktop calendars make great gifts. Easy to make, they can be adorned and embellished with any number of stamps, papers, dies, and/or punches.
These calendars make use of the Daisy Lane stamp found in Stampin’ Up!’s 2020-2021 Annual Catalog. I l love that this set also coordinates with the Daisy Punch and the Medium Daisy Punch. Also, the calendar on the right uses the Playful Alphabet Dies.
Both feature the Flower & Field 12 x 12 Designer Series Paper which is a free item you can earn from Stampin’ Up!’s upcoming Sale-A-Bration promotion. Beginning January 5, this package of 12 sheets (2 each of 6 double-sided) designs is available free with a $50 purchase. Look for a host of other stamp sets and papers available free with minimum $50 and $100 purchases before tax and shipping.
Measurements
Black base measures 11 x 4 1/2 inches, scored at 5 1/2 and 8 1/4
Flower and Field DSP measures 5 1/4 x 4
Bumblebee is cut at 5 1/4 x 4 for both the top and bottom pieces
Black mat for the Post It Note measures 3 1/2 x 3 1/2
Desktop Calendar Video
Thanks for stopping by today. Please leave a comment below and click to receive updates when I add a new post.
Be sure to visit all of the blog on the hop for a host of paper crafting inspiration.
Kim
List of Blog Hoppers
List of Products Used for Daisy Lane 2021 Calendar
Click on any of the graphics below to go directly to my online store to shop 24/7.
Showcasing #simplestamping using Designer Series Paper.
#simplestamping
Recently, Stampin’ Up! has focused on #simplestamping: the art of creating a handmade card with just rubber stamps, ink, and paper. After all, these provide the underpinnings of paper crafting. It allows us to focus on the basics of the craft, and we realize we can make beautiful projects with a handful of supplies. It’s a great place to start for beginning stampers, and it challenges seasoned stampers to step away from the extras.
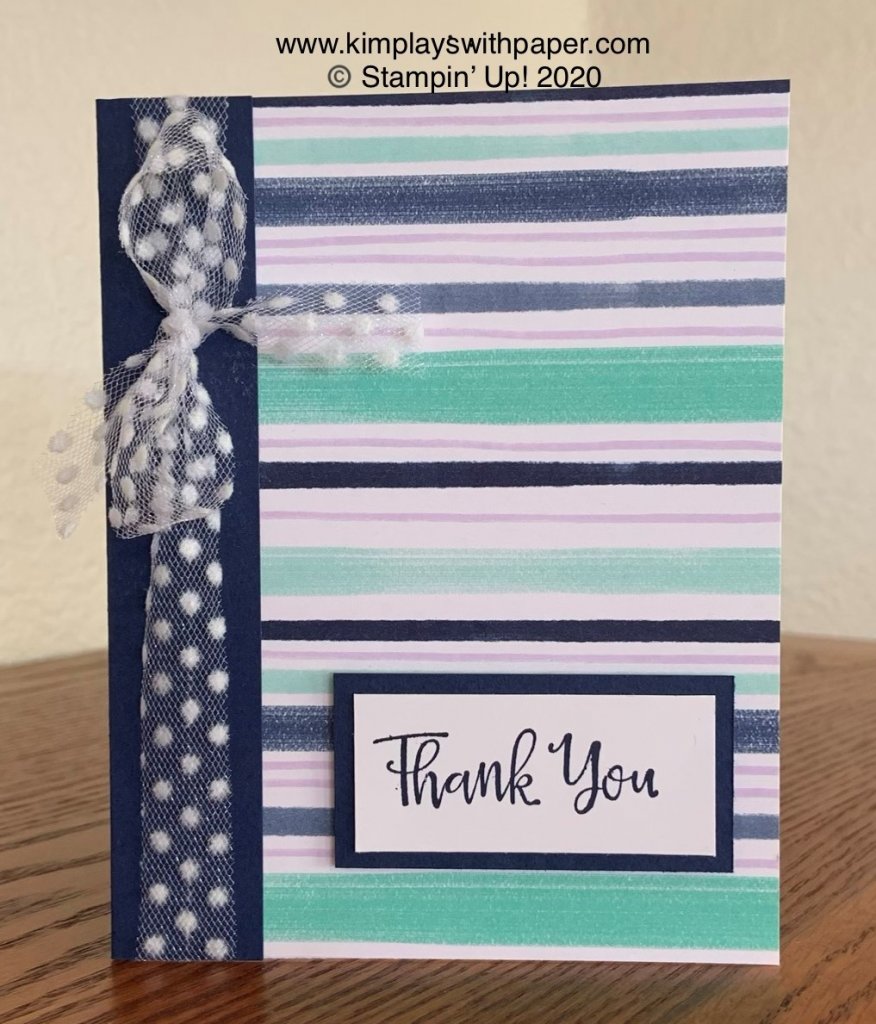
Each month, Stampin’ Up! issues a #simplestamping challenge. For October, it calls for using rubber stamps, ink, paper, and ribbon with a thank you card.
Designer Series Paper Sale
I combined the challenge with the Designer Series Paper sale effective through October 31, 2020. Fifteen of Stampin’ Up!’s double-sided, patterned papers are 15 percent off. It includes selections from both the 2020-2021 Annual Catalog and the August-December 2020 Mini Catalog. See the PDF here, or click on the photos at the end of the post to check them out and shop.
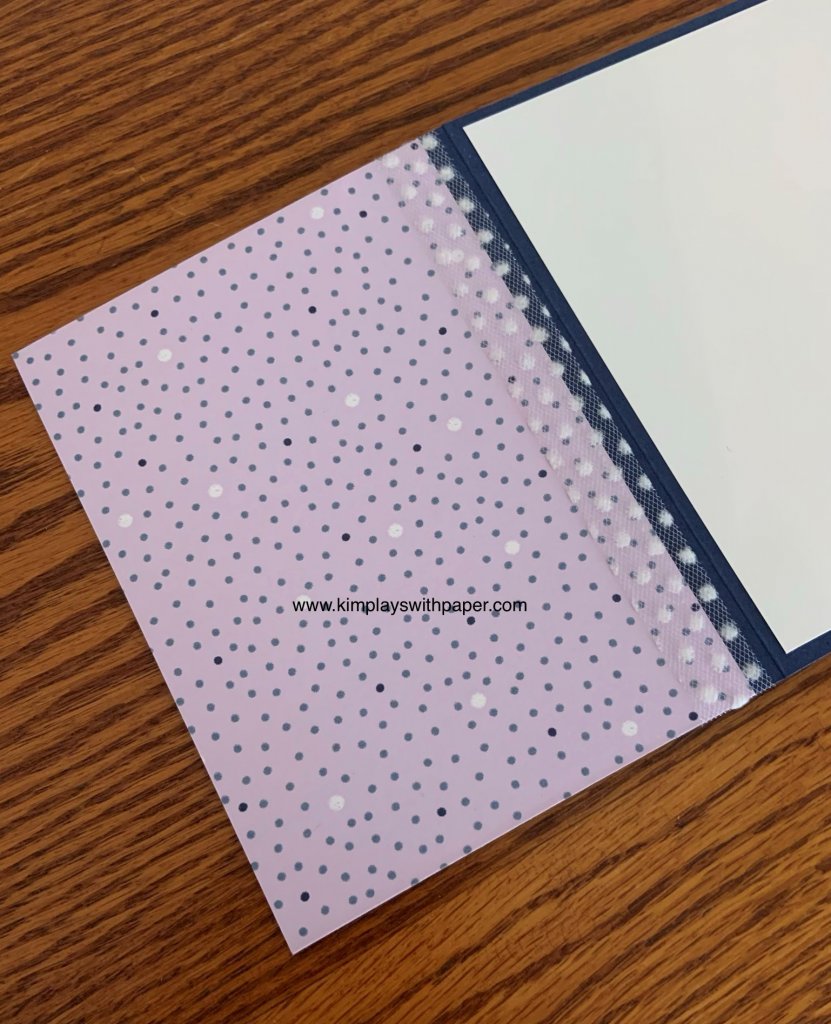
I love this card design because it showcases both sides of the paper. That’s often the most difficult part of crafting: choosing which side to use! Note: It uses the Playing with Patterns.
Here are a few cutting details. (Be sure to watch the video below showing how this design goes together. See other cards using the paper currently offered on the sale.)
Card stock for the base: 5 1/2 x 5 1/4 inches, scored at 1 inch on the 5 1/4-inch side.
A piece of patterned paper cut at 5 1/2 x 4.
Complementary ribbon.
A sentiment.
Thanks for stopping by today. Please message me or leave a comment if you have questions about today’s card or the paper sale. Click here to begin shopping. If you’re not currently working with another demonstrator, I’d love to help you with your card-making and memory keeping projects.
Join me Tuesday mornings at 8:30 a.m. Pacific Time for a Facebook Live on my Facebook business page. I show fun and easy stamping projects.
Learn how to create a seasonal frame! Keep reading to view a video tutorial on making this fun fall home decor item.
Stampin’ Up! products lend themselves perfectly to card making, memory keeping projects, treat packages, and even home decor. I created this fall seasonal frame to use as a decoration in my home.
(See this additional post featuring holiday frames. Do you prefer the traditional or whimsical?)
Here are some of the details about this fall-themed frame. Purchased at Ikea, the frame holds a 5 x 7 insert.
The bottom layer of Mango Melody card stock measures 5 x 7.
Next layer of Basic Black card stock measures 4 1/4 x 6 1/4 inches.
The patterned paper — Plaid Tidings — measures 4 x 6. (Note: This 6 x 6 Designer Series Paper is 15 percent off through October 31, 2020.)
Leaves cut with die from Gathered Leaves Dies in coordinating colors of (left to right): Cherry Cobbler, Cinnamon Cider, Mango Melody, and Cajun Craze.
Ribbon is a 7-inch piece of Black Glittered Organdy.
Embellishments are the Holiday Rhinestones.
Think about all of the different holidays where you could create a seasonal frame!
Check out this YouTube Video for a quick look at how this project comes together. Be sure to subscribe to my YouTube channel.
List of Products
Click on any of the graphics to shop directly from my online store.
Designer Series Paper Sale
Now through the end of October, 15 different packages of Stampin’ Up!’s Designer Series Paper are 15 percent off. Designs include everything from Magic in this Night for Halloween projects to Heartwarming Hugs for holiday cards. Stock up on your favorite patterns during this sale.
Sign up for my newsletter and get a free tutorial!
Get Updates!
Join our mailing list to receive the latest updates from Kim!
You have Successfully Subscribed!
Current Catalogs
Follow Me
Categories
Disclaimer
The content in this blog is the sole responsibility of Kim Quade as a Stampin’ Up!® Independent Demonstrator. The use of and content of classes, services or products offered is not endorsed by Stampin’ Up!