The Butterfly Brilliance Collection is here! Have you seen the card samples created with these new products? I received my bundle/suite of products Saturday, ripped open the box, and started creating! Let me show you some of what I made. Be sure to watch the video (a replay of a Facebook Live) to see how I put these cards together.
What is the Butterfly Brilliance Collection?
This brand-new selection of products features butterflies, lots of butterflies. It includes a stamp set, coordinating dies, 6 x 6 Designer Series Paper, and textured specialty paper. An early release of goodies that will be included in Stampin’ Up!’s new Annual Catalog, this bundle screams spring. I just love the product coordination of this sneak peek! (New Annual Catalog available May 4.)
Butterfly Brilliance cling stamp set. This large stamp makes a great background, but allows you to crop a bunch of butterflies quickly and easily. (I recommend buying an extra stamp set to cut apart; it allows you use to each butterfly individually.)
Brilliant Wings Dies. You have the option of simple die-cut butterfly shapes, intricately detailed die-cut butterfly wings, or layer both styles to create wonderful 3D dimension! Get creative with how you color the spectacular wings with a range of inks and sponge daubers.
Butterfly Bijou 6 x 6 Designer Series Paper. Choose from glorious butterfly patterns in shades of aqua, pink, and yellow or watercolored patterns that coordinate beautifully. You can’t go wrong with these unforgettable patterns. I love how some of the sheets coordinate with the die cuts. Only available while supplies last. Note: This 6 x 6 DSP will not be available in the upcoming catalog.
Natural Touch Specialty Paper. The pale wood grain is versatile enough for any project and any time of year. Emboss it and use it with dies. Use large pieces of it as a background or cut out pieces to use as accents. Only available while supplies last. Note: This specialty paper will not be available in the upcoming catalog.
Butterfly Brilliance Bundle. Receive a 10 percent discount when you purchase the stamp set and coordinating die cuts together.
I used a few other complementary products with this fun suite, including the Stamparatus, Art Gallery stamp set, and coordinating card stock colors.
Butterfly Brilliance Collection Video
Thanks for stopping by today. I hope you’re inspired to sit down and create today. Please let me know if I can help in any way as a Stampin’ Up! demonstrator.
Kim
Click on any of the photos below to shop directly from my online store 24/7.
Today’s cards combine new products from Stampin’ Up!’s January-June 2021 Mini Catalog with “seasoned” products from our Annual Catalog. I sometimes get caught up purchasing and playing with all of the brand-new goodies, And I forget about the stamps, papers, and tools available all the time.
Be sure to watch the video at the end of the post. A Facebook Live replay, it demonstrates the products and how I created today’s cards. I’d love you to subscribe to my YouTube channel. I add a video each week that demonstrates a different stamping technique or product.
Stitched with Whimsy Meets Daisy Lane
I created a set of cards in Balmy Blue and Daffodil Delight using:
Stitched with Whimsy Dies (JJ Mini) — I love the whimsical stitching;
Happy Thoughts stamp set (JJ Mini) — I love the variety of sentiments — perfect for creating a gift set;
Blending Brushes (JJ Mini) — these help create fun backgrounds;
Daisy Lane stamp set (Annual Catalog) — says “spring” and we’re all ready for that;
Daisy Punch (Annual Catalog) — a fun and easy coordinating product; and
the Stamparatus (Annual Catalog) — a stamp positioning tool helping you create quick and cute projects.
This post features four variations of one design. Do you like the Balmy Blue card base, the Daffodil Delight card base, or the white card base? I’d love to hear from you!
How to YouTube Video
Thanks so much for taking time to visit my blog. I hope you’ve enjoyed my cards and video. Be sure to take another look at your Annual Catalog. Dust off some of those sets and play around.
Please let me know if I can help you any way! I want to make your crafting experience fun and fulfilling!
On May 4, you’ll see a new copy of the Annual Catalog. I can’t wait to see what’s in store.
Kim
Product List
Click on any of the graphics below to shop directly from my online store 24/7.
If you’re like me, you always need a bunch of thank you cards. I like to thank people who support my small business. And, I believe it’s important to communicate my gratitude with a hand-written note. I love that Stampin’ Up!’s offers such a wide variety of rubber stamps, ink, paper, and other products to create beautiful handmade greeting cards.
In this post, I offer a free tutorial on creating a hand-stamped greeting card using Stampin’ Up!’s True Love Designer Series Paper, the Blending Brushes, Daisy Lane stamp set, Medium Daisy Punch, Here’s a Card stamp set, and the heat embossing technique. I’ve also included a video showing a variety of ways to use Stampin’ Up!’s Blending Brushes.
True Love Thank You Card Free Tutorial
Stampin’ Up! Supplies:
STAMPS – Daisy Lane (149325), Here’s a Card (149438)
PAPER – Basic White (159276), Basic Black (121045), True Love Designer Series Paper (154281)
INK –Bumblebee (153116), Versamark (102283)
OTHER – Medium Daisy Punch (149517), Blending Brushes (153611), Heat Tool (129053), White Embossing Powder (109132), Stitched Shapes Dies (152323), Matte Black Dots (154284), Mini Glue Dots (103683), Stampin’ Seal (152813), Stampin’ Dimensionals (104430)
Cutting & Scoring:
Basic White – 8 ½” 5 ½”, scored at 4 ¼”, 4” x 2”
Basic Black – 5 ¼” x 4”, 5” x ¾”, 2 ½” x 2 ½”
True Love DSP (small daisy design) – 5” x 3 ¾”
Instructions:
Using a Blending Brush, apply Bumblebee ink to the True Love DSP until you get the desired darkness.
Stamp the small daisy from the Daisy Lane stamp set twice with Bumblee ink on the 4” x 2” Basic White card stock.
Punch images out with Medium Daisy Punch. Layer them together to form a daisy, using a Glue Dot or two in the center of the flowers.
Ink the “thank you” sentiment with Versamark and stamp on the Basic Black 5” x ¾” strip on the right-hand side of the paper. Cover with White Embossing Powder. Shake off excess. Heat with Heat Tool until set.
Die cut the second to smallest Stitched Circle Die from the 2 ½” x 2 ½” black square.
Assemble card: Layer the 5 ¼” x 4” Basic Black piece onto the Basic White card base; add the blended DSP; and adhere the long sentiment on top of this about a third of a way down the card.
Add Stampin’ Dimensionals to the back of the black circle and place on the card on the left-hand side, straddling the sentiment piece.
Use Stampin’ Dimensionals to layer the daisy on top of the black circle.
Add a small Matte Black Dot to the center of the daisy.
Please enjoy this video demonstrating Stampin’ Up!’s Blending Brushes.
Thanks your for stopping by today. I’d love to help you on your paper crafting journey. Leave a comment or email me at kimqskards@gmail.com
Kim
List of Products Used
Click on any of the photos below to go directly to my online store to shop 24/7.
Stampin’ Up!’s January-June 2021 Mini Catalog has been live for one month already. It’s filled with an awesome variety of new stamp sets, die cuts, punches, Designer Series Paper, ribbon, and more. I hope you’ve had a chance to play with some of the products.
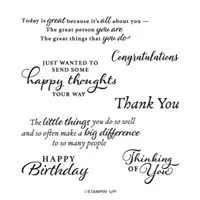
As you may know, my list of faves include the Flowering Cactus Medley and the Friendly Flamingo Bundle. (I’ve created and posted quite a few samples using these products.) Every so often, I need a bunch of cards — in a hurry. I really like the font showcased in the Happy Thoughts stamp set. The sentiments lend themselves well to all of the occasions I use the most: They include: Happy Birthday, Thinking of You, Thank You, and Congratulations.
I found a clean and simple sketch (inspired by Mary Bush), that allows me to use the above sentiments. The variety of Designer Series Paper also lets me change the look and feel of the card. I call it my Clean and Simple Happy Thoughts card.
Clean and Simple Happy Thoughts
Here are the basic cutting and card stock measurements. (Also, look for a how-to video at the end of the post):
Card stock base: 8 1/2 x 5 1/2
Card stock layer: 3 1/4 x 4 1/4
Designer Series Paper of your choice: 3 x 4 (the free Sale-A-Bration choices work well as do any of Stampin’ Up!’s patterned paper)
Label with Tasteful Labels Dies (the Stitched Rectangles also work well here)
Coordinating ribbon and embellishments
This card uses the Flower & Field Designer Series Paper you can earn free during SaleABration with a $50 order before tax and shipping.
This card features Stampin’ Up!’s Paper Blooms Designer Series Paper that you can earn free with a $50 purchase (before tax and shipping) during SaleABration.
Clean and Simple Happy Thoughts Video
Sale-a-Bration Runs through February 28
This is Stampin’ Up!’s most exciting sale of the year. Receive free product with minimum purchases of $50 and $100. Choose from nine different products, including stamp sets and Designer Series Paper. Take this opportunity to get free items and stock up an array of beautiful paper.
Thanks so much for stopping by today. I hope my ideas inspire you to create something today! If you’re not currently working with a Stampin’ Up! demonstrator, I’d love to help you in your paper crafting journey.
Join me today as I show you how to use ink refills and baby wipes. There’s even a video at the end of the post.
Stampin’ Up!’s ink refills serve the primary purpose of reinking Stampin’ Up!’s Classic Ink Pads when they become dry after many uses. However, the refills can be used for other crafting projects such as water coloring and the baby wipe technique. (I recommend purchasing the refill with the pad so you have it on hand. It’s a great value for $3.75 per bottle.)
The baby wipe technique isn’t new. But it’s a fun one to reintroduce each year, especially in the fall. I love the way the colors can be used to mimic the changing foliage.
How to Use Ink Refills
For this card, I used the coordinating and rich colors of: Crushed Curry, Old Olive, Pumpkin Pie, Blackberry Bliss, and Cherry Cobbler.
I squirted a little bit of each color onto a folded baby wipe (be sure to protect your table with wax paper or an Acrylic Mat). Watch the video below for visual instructions. Press your stamp (I used a leaf from Stampinin’ Up!’s Rooted in Nature Stamp Set) into the ink on the wipe. Then stamp the image onto the card stock. You can change the color of the leaf by moving the stamp around on the baby wipe ink pad.
Here are the paper measurements:
Blackberry Bliss: 8 1/2 inches x 5 1/2 inches scored at 4 1/4 inches for base, a 4 x 3 piece, and one cut with the Layering Ovals Die
Very Vanilla: 5 1/4 inch x 4 inch for inside
Cherry Cobbler: 5 1/4 x 4 inch, embossed with the Woodland Embossing Folder
Shimmery White: 3 3/4 x 2 3/4 inches and 3 x 2 inches
Linen Thread: 30 inches
This fun technique works with a variety of colors and stamp sets. Experiment and have fun. Please let me know if you have questions about this technique or other paper crafting cards. If you aren’t currently working with a Stampin’ Up! demonstrator, I’d love to be a part of your creative journey. Post a comment on this post or email me at: kimqskards@gmail.com.
Thank you,
Kim
List of Supplies
Click on any of the graphics below to shop directly from my online store 24/7. I appreciate your support.
Sign up for my newsletter and get a free tutorial!
Get Updates!
Join our mailing list to receive the latest updates from Kim!
You have Successfully Subscribed!
Current Catalogs
Follow Me
Categories
Disclaimer
The content in this blog is the sole responsibility of Kim Quade as a Stampin’ Up!® Independent Demonstrator. The use of and content of classes, services or products offered is not endorsed by Stampin’ Up!