At first glance, Stampin’ Up!’s Bright & Beautiful Suite looks like it only makes birthday cards. It does work well for creating birthday cards, but, I found it perfect for other occasions, too.
It’s that time of year to celebrate graduations of all kinds — from kindergarten, high school, college, and more. In today’s post, I share a handmade graduation card using elements from this brand-new suite. Find it beginning on page 14 of Stampin’ Up!’s 2023-2024 Annual Catalog. Be sure to watch the video (a Facebook live replay) to see step-by-step instructions for creating this card.
The sentiments “You Did It” and “Yay You” work perfectly to celebrate any and all achievements.
Here’s a breakdown of measurements and products:
Basic Black cardstock: 11 x 5 1/4, scored at 5 1/2: 5 1/4 x 4; 2 1/2 x 3/4
Gold Celebrations Specialty Designer Series Paper: 5 1/4 x 2 1/2
Gold Foil: 5 1/4 x 1/2 (2), a piece to die cut the large balloon (Beautiful Balloons Dies)
Gold Embossing Powder, Heat Tool, and Versamark to create sentiment (Beautiful Balloons stamp set)
Simply Elegant Trim (gold)
Basic White: 5 1/4 x 4 (inside of card)
The Gold Celebrations Specialty DSP adds a pop of fun into this card. You get three 12 x 12 sheets of different “celebrating” designs. I used just a small piece to make these great paper go a long way.
Below, I made another one of these in silver. I just flipped over the Gold Celebrations Specialty DSP. It works! I’m not sure if there is an official color for graduation cards? Would you choose gold or silver? With this design, you could also add colored card stock that matches the graduate’s school colors.
Beautiful Balloons Graduation Card Video
Thanks so much for visiting my blog today. I’ll be playing more with the Beautiful Balloons Bundle in the next couple of weeks so be sure to check back.
Need more inspiration? Sign up to receive my free, email newsletter. I send two to three newsletters each month that include a free card-making tutorial, a paper crating video, and updates on Stampin’ Up! news and specials. Click here.
Kim
Click on any of the pictures below to shop directly from my online store to purchase the products used to create this card.
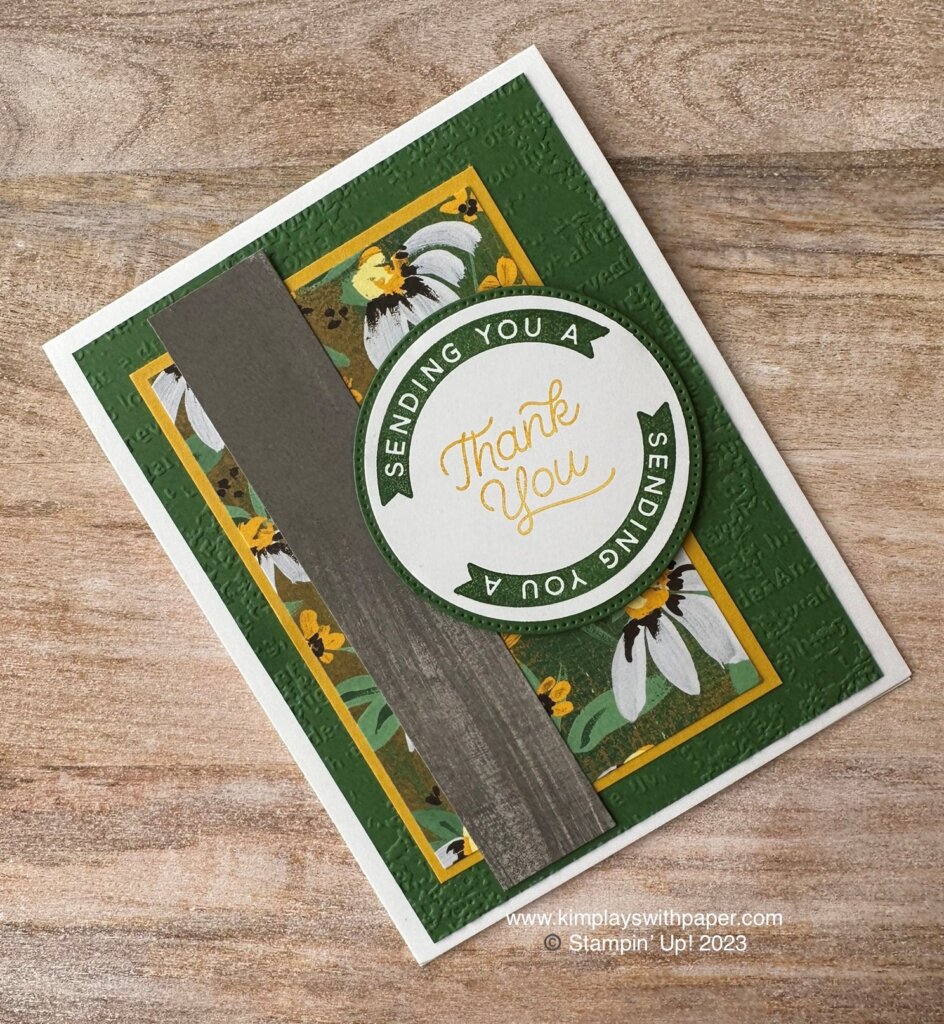
Do you look for different folds to add some spice and variety to your card making? A search of Pinterest yields so many options. When I spotted the Barn Door Fun Fold, I knew it would pair perfectly with Stampin’ Up!’s Circle Sayings Bundle. Find this bundle on page 19 on Stampin’ Up!’s brand-new 2023-2024 Annual Catalog. I’ve created many cards using this bundle which includes a versatile stamp set and a 2 3/8-inch circle punch. See more samples (another fun fold) by clicking here.
Circle Sayings Barn Door Fold
This fold is super easy. Be sure to watch the video included below to see step-by-step instructions for creating this card.
Card stock (Berry Burst) measuring 11 x 4 1/4, scored at 5 1/2
Trim a 1 1/2-inch x 5 1/2-inch pieces from the top front with your Stampin’ Trimmer
Adhere a piece of coordinating Designer Series Paper (Bright & Beautiful 6 x 6 DSP) 5 1/4 x 2 1/2 inches to the front panel that’s left.
Use the circle punch to cut a half circle from the “barn door” panel
Stamp your image on Basic White Card Stock measuring 5 1/4 x 4 inches. Be sure to align your image in the half circle so it shows through to the front of the card. Glue to the inside of the card. See the examples above and below.
Add embellishments as you wish.
Here’s the inside of the card:
In addition, I created a thank you card using the same fold and stamp set. The Designer Series Paper comes from the Countryside In 12 x 12 package.
Circle Sayings Barn Door Fold Video
Thanks so much for visiting my blog today. Need more inspiration? Sign up to receive my free, email newsletter. I send two to three newsletters each month that include a card making tutorial, paper crafting video, and updates to Stampin’ Up! news and specials. Click here to subscribe.
Kim
Click on any of the graphics below to shop directly from my online store to purchase the products used to create the birthday card.
Yay! Stampin’ Up!’s 2023-2024 is now live! See a PDF of it by clicking here. As demonstrators, we got to order early from a selection of products. Today, I share a handful of cards created with the Circle Sayings Bundle. Find this bundle on page 17 of the new catalog. Purchase the stamp set and 2 3/8″ circle punch as a bundle and save 10 percent.
This bundle s perfect for creating quick and easy cards. And it includes a variety of sentiments that work well for all occasions: thank you, birthday, hello, smile, thinking of you, and celebrate. Mix and match the images and sentiments with different papers and ink to create the perfect card.
Because You’re Awesome Card
Here are the measurements for the card featured at the top of this post. This is also a fun fold. (Be sure to watch the video to see step-by-step instructions for creating this card and to see the fun fold.)
Boho Blue Cardstock: 5 1/4 x 4 (scored at 3 1/8 and 2 1/2)
Night of Navy Cardstock: 4 x 2 3/4, 4 x 2 1/4, 4 x 1, 5 1/4 x 4
Countryside Inn 12 x 12 Designer Series Paper: 3 3/4 x 2 1/2, 3 3/4 x 2, 3 3/4 x 3/4
Basic White: 5 x 3 3/4
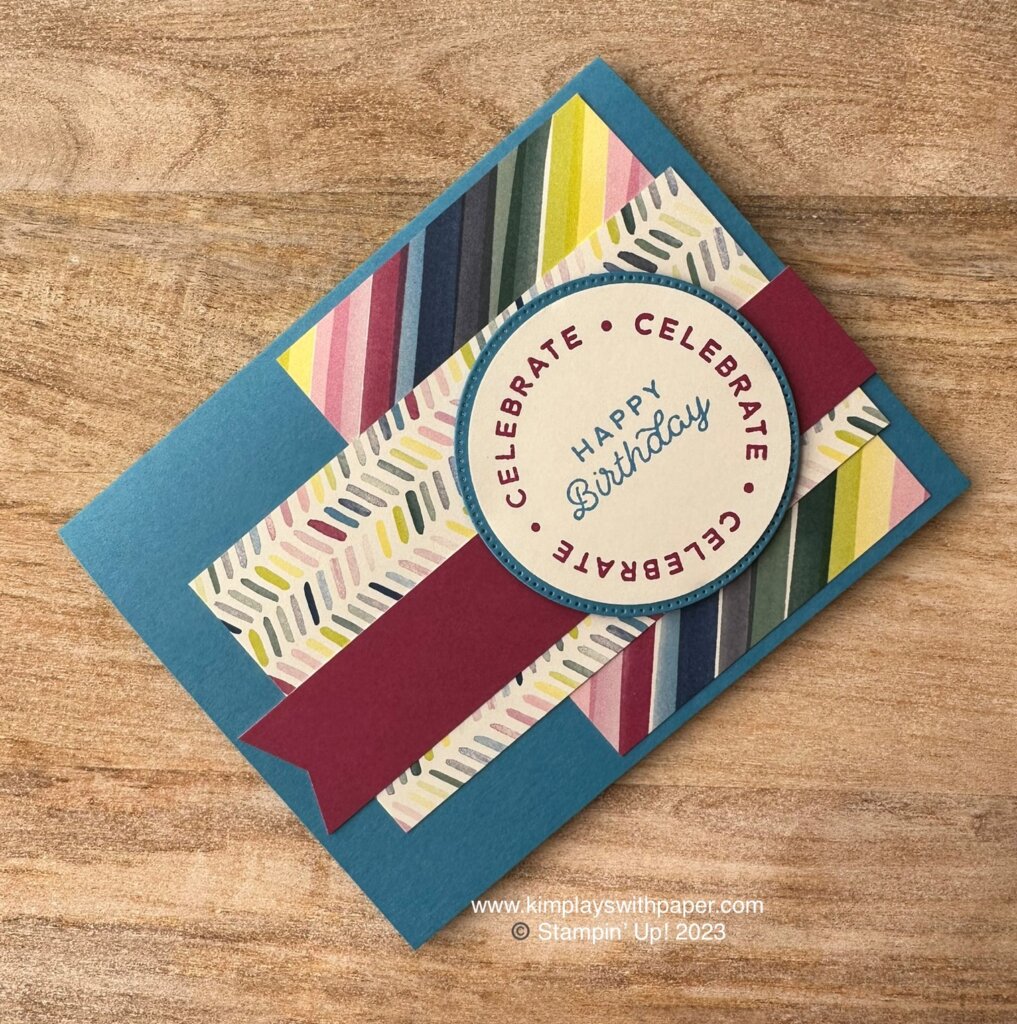
Here’s another sample created with the Circle Sayings Bundle. This birthday card uses a strip of 6 x 6 Brights (Granny Apple Green) Designer Series Paper and Berry Burst Card Stock embossed with the dot pattern from the Basics 3D Embossing Folder (an Online Exclusive). I love how the 2 3/8-inch circle punch fits perfectly in the second largest circle die from the Stylish Shapes Dies.
This bundle enables you to create a variety of cards and is compatible with different papers and colors. Here, it’s the Fresh as a Daisy 12 x 12 Designer Series Paper with the Timeworn Type 3D Embossing Folder.
And, one more. I love this flexible layout and used the brand-new Bright & Beautiful 6 x 6 Designer Series Paper.
Circle Sayings Card Samples Video
I hope you’ve enjoyed these card samples. Stay tuned for lots more as I play with this set and others from Stampin’ Up!’s brand-new 2023-2024 Annual Catalog.
Kim
Click on any of the photo graphics below to shop directly from my online store for the paper crafting products to create this card.
Each month, Stampin’ Up! issues a #simpletstamping challenge to its demonstrators. This month: Make a handmade card with a hello theme with just rubber stamps, ink, and paper and a punch. It’s all about getting back to the very basics of stamping.
Today, I share my card for this month’s challenge. I use the brand-new Circle Sayings Bundle. The bundle includes the Circle Sayings stamp set and a 2 3/8-inch circle punch. Buy the set and punch as a bundle and save 10 percent. Look for it in Stampin’ Up!’s brand-new 2023-2024 Annual Catalog on page 17. It goes live May 2. Be sure to put this bundle on your wish list.
It’s perfect for creating quick and easy cards. And it includes a variety of sentiments that work well for all occasions: thank you, birthday, hello, smile, thinking of you, and celebrate. Mix and match the images and sentiments to create the perfect card.
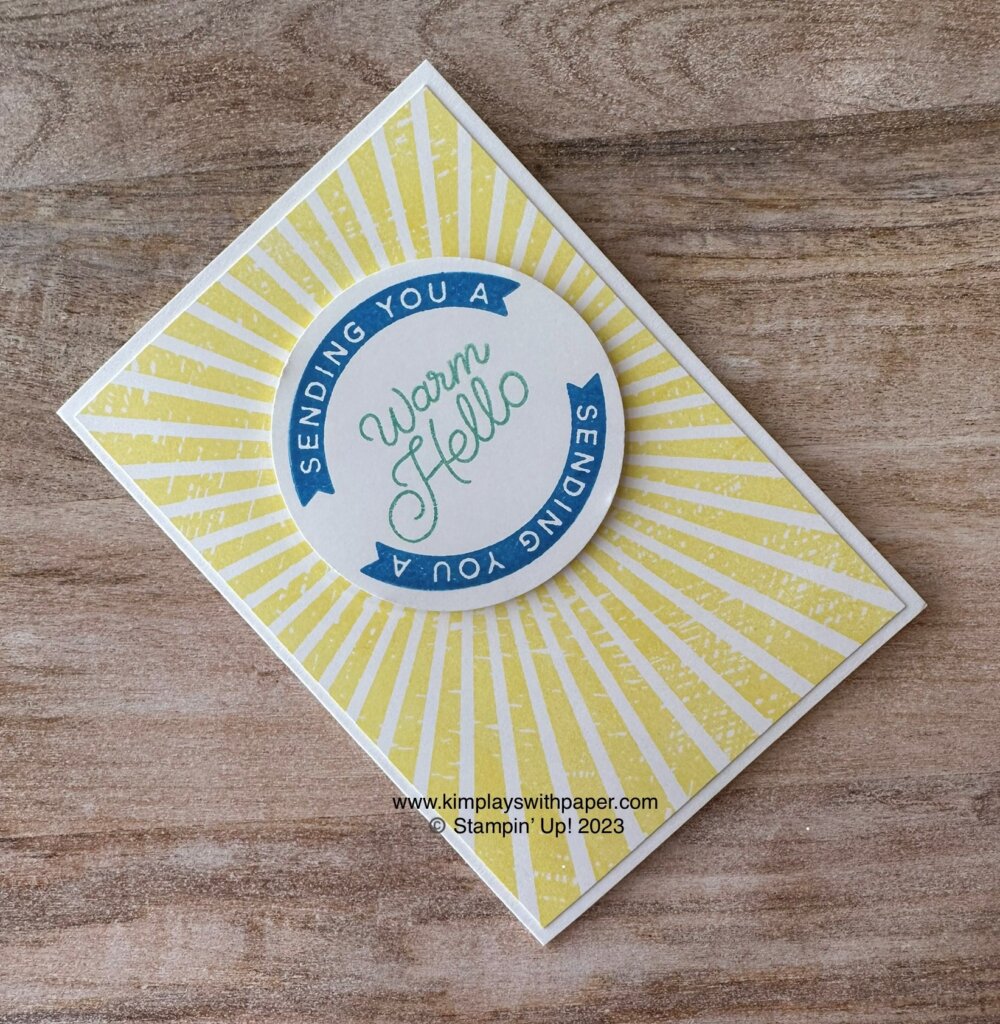
Circle Sayings #simplestamping Card
Here are a few details of this card:
Used Stampin’ Up!’s Basic White Notecards and Envelopes. You receive 20 pre-cut and scored notecards and 20 envelopes for $8. Not only are these a great value, but they save time, too.
Rays of Light Stamp Set for the background. Stamped with the new Lemon Lolly Classic Stampin’ Pad
“Sending You A” sentiment stamped with the new Azure Afternoon Classic Stampin’ Pad
“Warm Hello” sentiment stamped with Pool Party ink
Quick note: I punched the circle first (I generally stamp first, punch second) and then stamped the “Sending You ” sentiment. I found it easier to place the sentiment at the top and bottom. But do whatever works best for you.
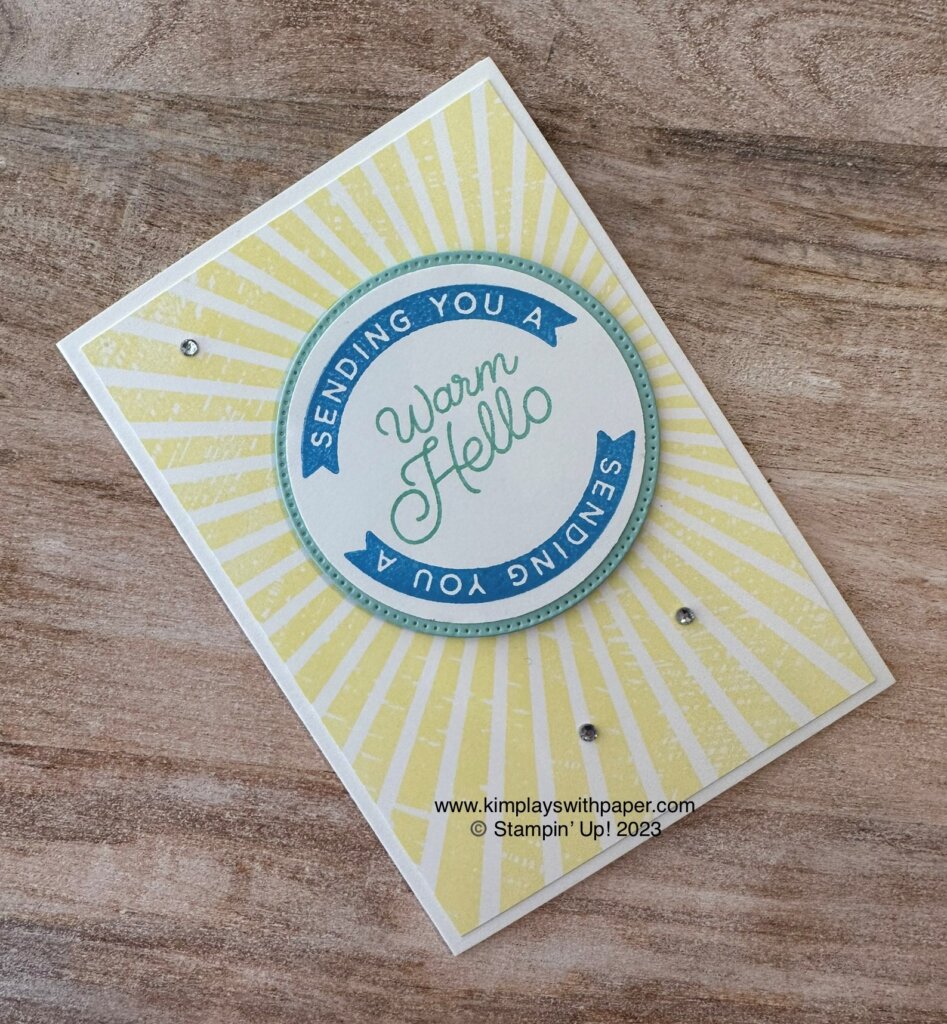
Here is a “stepped up” version of the card above. I added a Pool Party stitched circle from the Stylish Shapes Dies and some Basic Rhinestone Jewels.
Thanks so much for visiting my blog today. Enjoy this #simplestamping card and make some of your own to send.
Kim
Click on any of the links below to shop directly from my online store to purchase the products used to make this card. Just a note: If you’re visiting before May 2, remember that some of the items aren’t available until then.
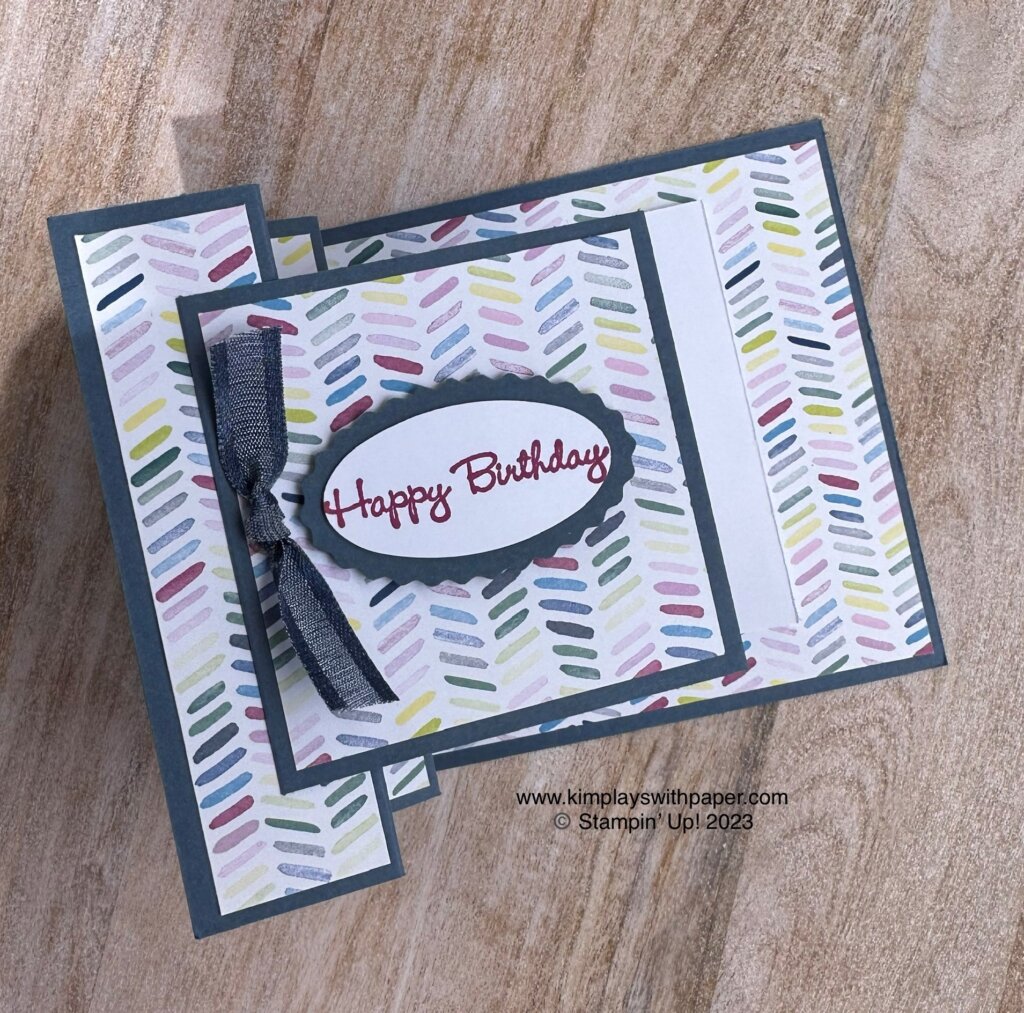
Today, I combine the fun new Bright & Beautiful 6 x 6 Designer Series Paper with the VW fun fold. (Purchase this double-sided, patterned paper when Stampin’ Up!’s 2023-2024 Annual Catalog goes live May 2.)
The next photo shows a view from above. Can you see the V and the W? At first, the design seems complicated. But it comes together quite easily.
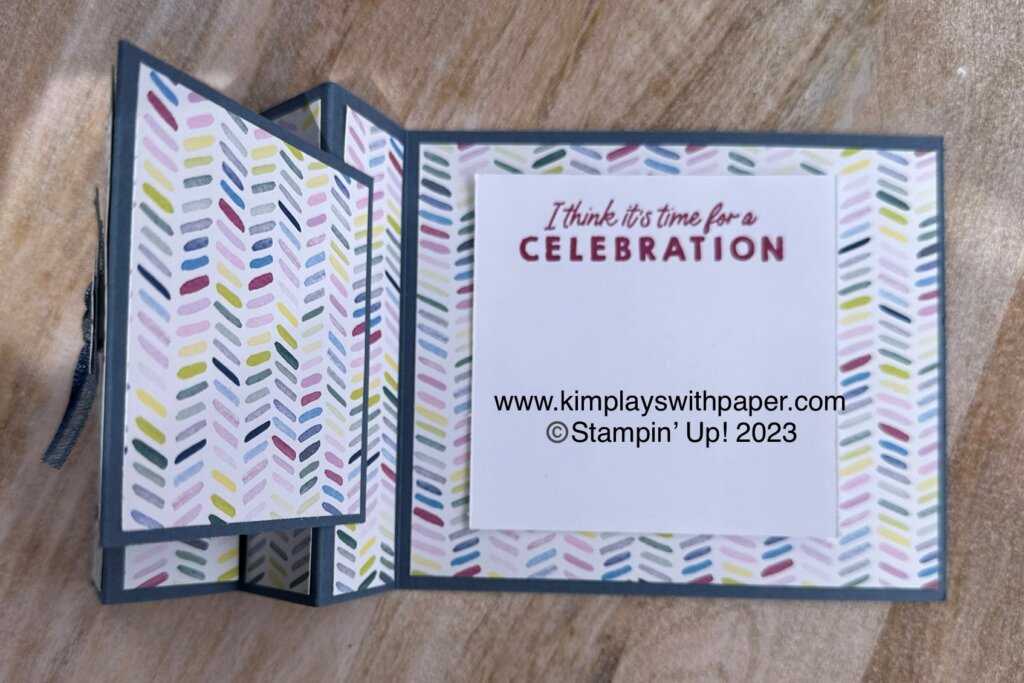
This next photo shows the inside of the card.
My team member, Sandy Graves, created a VW fun fold card for our recent team meeting. See her card below. Several people asked for directions to make this fold. So here it is!
Use these paper measurements to help you get started. Be sure to watch the video at the end of this post to see step-by-step instructions for creating this.
Base card stock: 10″ x 4 1/4 inches scored at 1 1/4, 2 1/2, 3 3/4, and 5
Base card stock: 6 x 3, scored at 3
Coordinating Designer Series Paper: 4 3/4 x 4, 2 3/4 x 2 3/4, and four pieces measuring 4 x 1
Basic White: 3 1/4 x 3 1/4
The front sentiment comes from Go to Greetings and is stamped in Berry Burst ink, punched with the Double Oval Punch. I grabbed the inside sentiment from the brand-new Beautiful Balloons stamp set (available in the new, upcoming Annual Catalog.)
Bright & Beautiful VW Fun Fold Video
Thanks so much for visiting my blog today. Need more inspiration? Sign up to receive my free email newsletter. Click here. I send two to three newsletters each month that include a free card making tutorial, paper crafting video, and updates on Stampin’ Up! new and specials.
Kim
Click on any of the graphics below to shop directly from my online store. Please keep in mind that some products are available when the catalog goes live, Tuesday, May 2.
Sign up for my newsletter and get a free tutorial!
Get Updates!
Join our mailing list to receive the latest updates from Kim!
You have Successfully Subscribed!
Current Catalogs
Follow Me
Categories
Disclaimer
The content in this blog is the sole responsibility of Kim Quade as a Stampin’ Up!® Independent Demonstrator. The use of and content of classes, services or products offered is not endorsed by Stampin’ Up!