Welcome to the Stampers Dozen monthly blog hop. We’re so glad you joined us. This month, we feature handmade cards and projects featuring items that will be retiring from Stampin’ Up!’s 2022-2023 Annual Catalog and the January-April 2023 Mini Catalog. If you see something you want, get it sooner rather than later. Retiring products won’t be available after Monday, May 1. Some of the items are reduced in price up to 60 percent. Click here to visit the online store.
Be sure to visit all of the participating blogs to gain paper crafting inspiration. Look for the list near the end of this post.
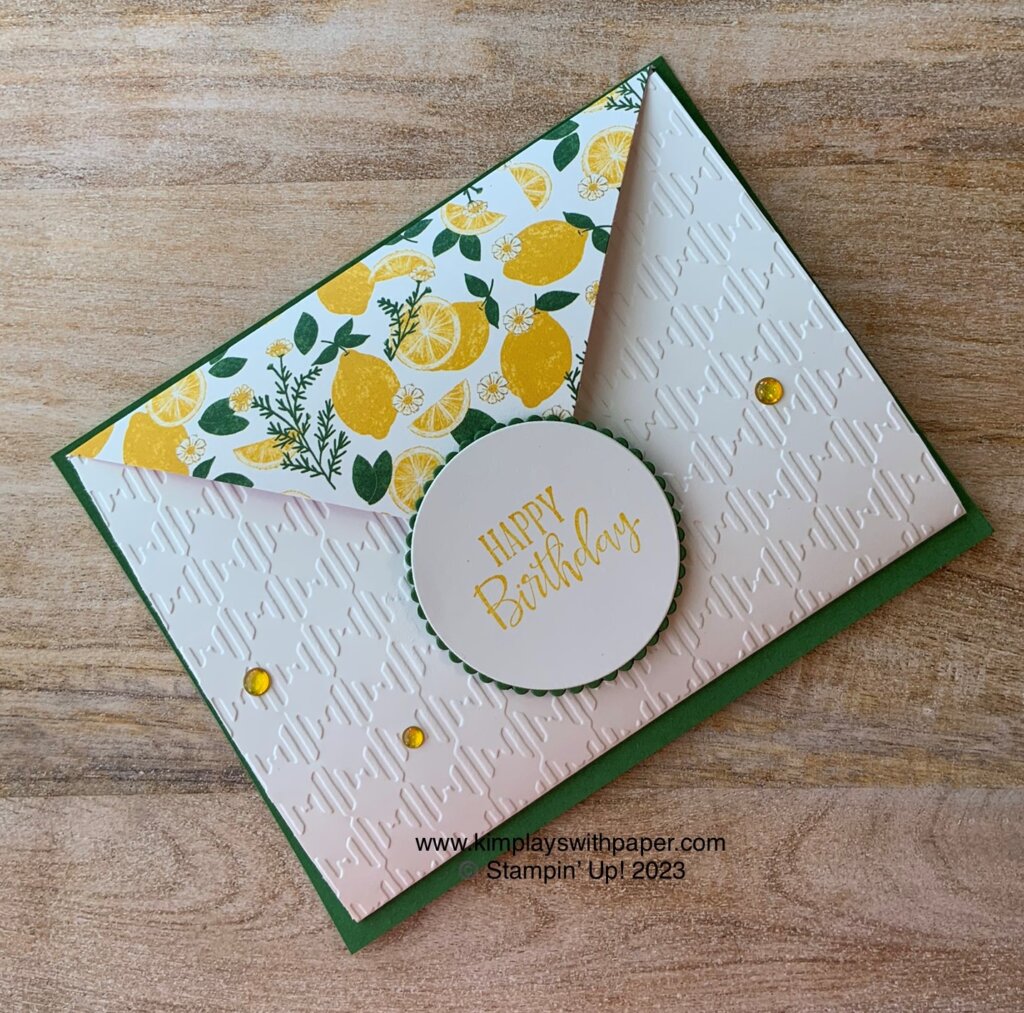
Peaceful Moments Envelope Fun Fold
I combined a host of retiring products with the Envelope Fun Fold. See this post for other examples of this unique fold.
Tea Boutique 6 x 6 Designer Series Paper (retiring), 3 3/4″ x 3 3/4″, scored on the diagonal
Basic White card stock measuring 8 x 51/4, scored at 4
One half of the white embossed with the Gingham Embossing Folder (retiring)
Garden Green card stock measuring 5 1/2 x 4 1/4
Basic White circle die cut with Layering Circles Dies (retiring)
Birthday sentiment from Peaceful Moments Stamp Set (retiring), stamped in Crushed Curry
Garden Green scallop circle from Layering Circles Dies (retiring)
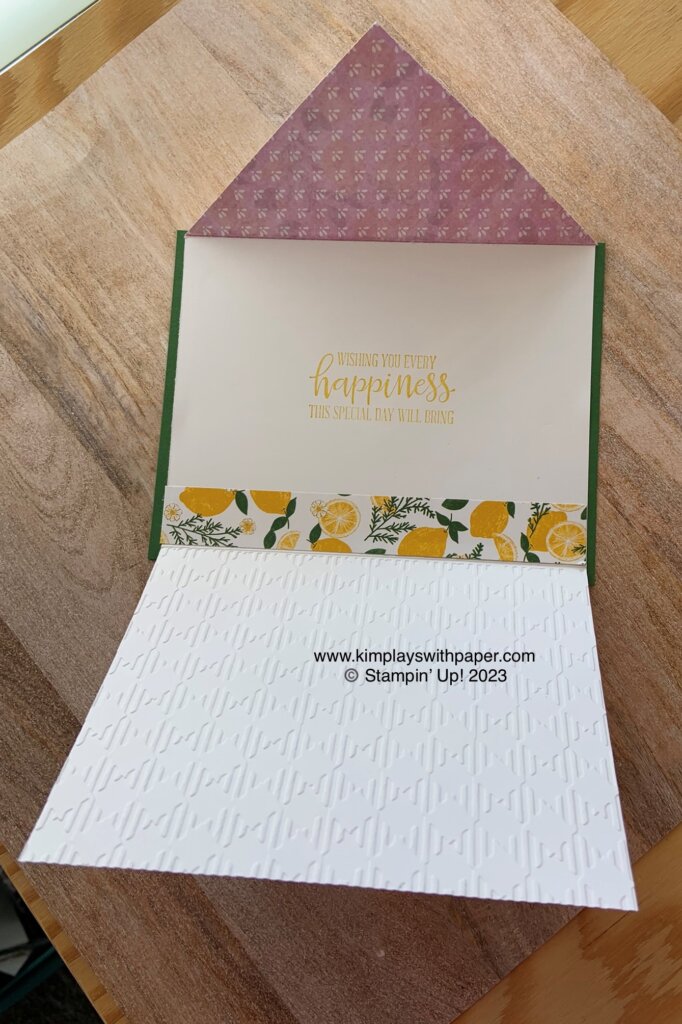
Here’s a look at the inside:
Watch the video below to see step-by-step instructions for making the unique Envelope Fun Fold (Note: I don’t create this specific card on the video, but you’ll get the idea.)
Thanks so much for visiting my blog today and for following along on the hop. Enjoy
Click on any of the pictures below to shop directly from my online store. Some of the items may sell out. Please contact me to find an appropriate substitute.
Who doesn’t love a shaker card? They’re a fun and interactive card for kids and adults alike.
In today’s post, I share a cute shaker card using Stampin’ Up!”s whimsical Silly Goose stamp set (from the January-April 2023 Mini Catalog) and the Radiating Stitches Dies. (Find these brand-new dies on the Online Exclusives, not available in catalogs.) Be sure to watch the video at the end of this post to see step-by-step directions for creating this card at home.
Silly Goose Shaker Card
Melon Mambo cardstock base, 8 1/2 x 5 1/2 , scored at 4 1/4
Night of Navy 5 1/2″ x 4 1/4″ cut with the largest Radiating Stitches Dies. Die cut the center with the next largest Radiating Stitches Dies. Remove the center. Use this as the window for the shaker card.
Melon Mambo cardstock (4 3/4″ x 3 1/2″) die cut with Stitched Rectangle Dies. Die cut center with next size smaller Stitched Rectangle Dies. Layer over top of Night of Navy window.
Window Sheet measuring 4 3/4″ x 3 1/2″
Basic White measuring 4 3/4 x 3 1/2″
Sparkle and Shine Sequin Assortment
Foam Adhesive Strips
Goose image stamped with Memento and colored with Stampin’ Blends.
Looking for other ways to use the Radiating Stitches Dies? Click here to see another card idea.
How-To Video
Thanks so much for visiting my blog today. Please let me know if you have questions about this card or other paper crafting projects.
Get more inspiration by signing up to receive my free, email newsletter. I send two to three newsletters each month that include a free card making tutorial, a paper crafting video, and updates on Stampin’ Up! news. Click here. Then check your InBox for a message from Aweber. They want to be sure you really wan to receive my emails.
Kim
Click on any of the graphics below to shop directly from my online store for the paper crafting products used to create this shaker card.
Do you like to stretch the limits of a bundle? If you’re like me, you love it when you can use a stamp set and the coordinating dies for more than one reason. The Ginkgo Branch Bundle has been on my craft table for the last couple of weeks. Initially, it looks as if it’s geared only toward thinking of you and sympathy cards. And, it works great for that. Click here to see a post that showcases three of these cards using this bundle.
But I’ve also used it to create birthday cards. See another example here. And, today, I share a free birthday card tutorial featuring the Ginkgo Branch Bundle. Please enjoy the step-by-step instructions for creating this gorgeous, handmade birthday card.
Ginkgo Branch Free Tutorial
Stampin’ Up! Supplies:
STAMPS – Peaceful Moments (151595)
PAPER – Tahitian Tide Cardstock (159261), Petal Pink (146985), Basic White Cardstock (159276), 2022-2024 In Color Glimmer Paper (159246), Country Gingham 6 x 6 Designer Series Paper (DSP) (160388)
INK – Versamark (102283)
OTHER – Ginkgo Branch Dies (160468), Tahitian Tide 1/8” Metallic Woven Ribbon (159197), Stylish Shapes Dies (159183), Enamel Dot Essentials (160751), Basics Embossing Powder (155554), Heat Tool (129053), Stampin’ Seal (152813), Mini Glue Dots (103683), Multipurpose Liquid Glue (110755), Take Your Pick Tool (144107), Stampin’ Cut & Emboss Machine (149653)
Cutting & Scoring:
Tahitian Tide Cardstock — 8 ½” x 5 ½” (scored at 4 ¼”) and 4 ¼” x 3 ¼”
Tahitian Tide Glimmer Paper – 4 ¼” x 3 ¼”
Basic White Cardstock – 5 ¼” x 4”
Petal Pink Cardstock – 2” x 2”
DSP – 5 ¼” x 4” (Petal Pink design), 4” x 3” (a different Petal Pink design)
Ribbon – 12”
Instructions:
Die cut the open flower die from the Ginkgo Branch Bundle from the Tahitian Tide Glimmer Paper.
Attach to Petal Pink 4” x 3” DSP panel by placing Glue Dots beneath the solid flowers.
Glue this piece to the Tahitian Tide 4 ¼” 3 ¼” piece.
Wrap the ribbon around this layer and tie a bow.
Stamp the birthday sentiment in Versarmark on the 2” x 2” square and heat emboss with white embossing powder. Die cut with a circle from the Stylish Shapes Dies.
With Stampin’ Dimensionals, attach the sentiment on top of the leaves die cut and ribbon on the right-hand side, as shown above.
Attach the 5 ¼” x 4” DSP to the card front.
Place the image layer on the card front with your choice of adhesive.
Add three white Enamel Dot Essentials to the card front with the Take Your Pick Tool.
Adhere the 5 ¼” x 4” Basic White panel to the inside of the card.
I hope you enjoyed this tutorial. Need more inspiration? Sign up to receive my free, email newsletter. I send two to three newsletters each month that include a free card making tutorial, paper crafting video, and updates on Stampin’ Up! news and specials. Click here. Then check your email for a message from AWeber. They want to confirm you wish to receive my messages.
Kim
Click on any of the graphics below to shop directly from my online store:
Welcome to the Stampers Dozen March Blog Hop! Thanks so much for joining us. This month, we feature handmade greeting cards and projects with a birthday theme. Be sure to visit all of the stampers participating in the hop to get great paper crafting inspiration. Find the list of hoppers at the end of this post.
Where do you gain your paper crafting inspiration? Pinterest? YouTube? Blogs? Magazines? For today’s card, I was inspired by a mystery card created by my team member and friend, Theresa Huffman. At our recent virtual team meeting, she gave us the measurements to create a card similar to the one below. (Scroll down to see the masculine card I created during the event.)
Brilliant Wings Birthday Card
This fun sketch lends itself to a variety of stamp sets, dies, punches, and Designer Series Papers.
While perusing Stampin’ Up!’s January-April 2023 Mini Catalog, you might think the Ginkgo Branch Bundle (page 57) is only suitable for sympathy and thinking of you cards. It certainly has all the elements to create heartfelt cards. Click here to see samples of some of the cards I created.
I like to find ways to get more out of a bundle. So I also created a birthday card, inspired by a sample in the back of the catalog. (Keep watching this blog for other ideas using this bundle.)
Ginkgo Branch Birthday Card
Here are the Stampin’ Up! products I used to create this birthday card.
Ginkgo Branch Bundle
Go To Greetings (sentiment)
White heat-embossed sentiment
Die cut from Fragrant Flowers
Subtles 6 x 6 Designer Series Paper
Vellum Basic 12 x 12 Specialty Designer Series Paper (page 46 January-April 2023 Mini Catalog)
Pearl Basic Jewels colored with Stampin’ Blends
I think you’ll appreciate how this card can use a variety of Stampin’ Up! colors and coordinating patterned papers.
You can see how this handmade birthday card goes together by watching this video below. I start creating the birthday card at the 14-minute mark.
Thanks so much for visiting my blog today. Need more inspiration? Sign up to receive my free email newsletter. I send two to three newsletters each month that include a free card making tutorial, a paper crafting video, and updates on Stampin’ Up! news and specials. Click here. Then check your inbox for a message from AWeber. They want to confirm you wish to receive my messages.
Kim
Click on any of the graphics below to shop directly from my online store.
Sign up for my newsletter and get a free tutorial!
Get Updates!
Join our mailing list to receive the latest updates from Kim!
You have Successfully Subscribed!
Current Catalogs
Follow Me
Categories
Disclaimer
The content in this blog is the sole responsibility of Kim Quade as a Stampin’ Up!® Independent Demonstrator. The use of and content of classes, services or products offered is not endorsed by Stampin’ Up!