How are you liking Stampin’ Up!’s Beautiful Balloons Bundle? I find it fun and easy to work with. Look for it beginning on page 14 of the new 2023-2024 Annual Catalog. Today, I share another free tutorial for creating a card with the elements from this suite of products.
PAPER – Berry Burst Cardstock (144243) Thick Basic White Cardstock (1592296), Basic White Cardstock (159276), Bright & Beautiful 6 x 6 Designer Series Paper (161449)
INK – Bubble Bath (161664), Berry Burst (147143)
OTHER – Baker’s Twine Essential Pack (155475), Stampin’ Seal (152813), Mini Glue Dots (103683), Multipurpose Liquid Glue (110755), Stampin’ Cut & Emboss Machine (149653)
Cutting & Scoring:
Berry Burst Cardstock – 3 ¼” x 4 ¾”, 4 ¼” x ¾”
Thick Basic White Cardstock – 8 ½” x 4 ¼”, scored at 4 ¼”
Basic White Cardstock – 3” x 2”
DSP – 4 ½” x 3”
White Bakers’ Twine – 6”
Instructions:
With the Thick Basic White Cardstock base folded in half, stamp the long ribbon stamp four times, staggering, with the Bubble Bath ink.
Attach the DSP to the Berry Burst 3 ¼” x 4 ¾” Cardstock. Glue all to card front, centering this piece.
Die cut the 4 ¼” x ¾” Berry Burst Cardstock with the fringe die. Attach to card front, as shown above.
Stamp the large balloon image with Bubble Bath ink on the 3” x 2” Basic White Cardstock. Stamp the “You Did It” sentiment directly on top of the balloon with Berry Burst ink.
Die cut the balloon.
Using Stamin’ Dimensionals, attach the balloon to the card front on top of the fringe.
Tie a bow with the White Baker’s Twine and attach it to the balloon with a Glue Dot.
Thanks so much for visiting today. Love this bundle? Here are some other posts featuring it. Just click on the links below to visit the page.
Thanks so much for visiting my blog today. Need more inspiration? Sign up to receive my free, email newsletter. I send two to three newsletters each month that include a free card making tutorial, paper crafting video, and Stampin’ Up! news and updates. Click here. Then watch your inbox for a message from AWevber. They just want to confirm you want to receive my messages.
Kim
Click on any of the product photos below to shop directly from my online store to purchase the supplies needed to create this card.
Everyone celebrates birthdays! It’s a good thing, right? So everyone needs a birthday card to recognize their special day. Stampin’ Up!’s Beautiful Balloons Bundle works perfectly for creating a variety of festive, handmade cards. Find this suite of products beginning on page 14 of Stampin’ Up!’s Annual Catalog.
Keep reading to see a handful of other cards and a how-to video with step-by-step instructions for creating the card featured at the top of this post.
Here are a few details about the above card:
Lemon Lime Twist card base measuring 8 1/2 x 5 1/2, scored at 4 1/4
Blueberry Bushel layer measuring 5 1/4 x 4
Basic White card stock measuring 5 x 3 3/4
Vellum Basics Specialty Designer Series Paper (dot pattern) measuring 4 3/4 x 3 1/2
Tag die from Tailor Made Tags Dies
Bright & Beautiful 6 x 6 Designer Series Paper (1 1/4 x 3) die cut with fringe die
Balloons stamped in Blueberry Bushel, Berry Burst, and Lemon Lime Twist
Lemon Lime Twist ribbon from Ribbon Duo Combo Pack
More Beautiful Balloons Birthday Card Samples
The card above uses a fun fold — the envelope fun fold. See this post for directions and video showing how to create this fold.
The brand-new color, Bubble Bath, takes center stage on the card above with a little piece of the Bright & Beautiful 6 x 6 Designer Series Paper.
One last card above using one of the folders from the Basics 3D Embossing Folders. It’s part of a three-pack available through Stampin’ Up!’s Online Exclusives.
Beautiful Balloons Card Samples Video
Thanks so much for visiting my blog today. I hope you’re inspired to make and send some birthday cards.
Kim
Click on any of the graphics below to shop directly from my online store to purchase the products used to create the card at the beginning of this post.
Sometimes when you’re creating, you just want to have someone tell you what to do. You’re in luck! Today, I offer a free card-making tutorial using Stampin’ Up!’s Beautiful Balloons Bundle. Find it beginning on page 14 of Stampin’ Up!’s 2023-2024 Annual Catalog.
Beautiful Balloons Free Tutorial
Please enjoy these step-by-step instructions for creating the card featured at the top of the post.
OTHER – Rhinestone Basic Jewels (144220) Stampin’ Seal (152813), Mini Glue Dots (103683), Multipurpose Liquid Glue (110755)
Cutting & Scoring:
Berry Burst Cardstock – 11” x 4 ¼”, scored and folded at 5 ½”, 4, 1 1/4″´x 5 ¼” (2)
DSP — 1/2″ x 5 1/2″ (2)
Basic White Cardstock – 5 ¼” x 2 ½”, 5 ¼” x 4” (2)
Instructions:
Adhere each of the two DSP pieces to one of the 5 ¼” x 4” Basic White Cardstock pieces – flush with each edge. Glue the two small Berry Bursts strips next to each of the DSP pieces.
Glue this piece to the Berry Burst card base.
Begin stamping on the 5 ¼” x 2 ½” Basic White Cardstock. Start with the “Let’s get our celebration on” sentiment in Berry Burst and work your way down.
Next, stamp the large balloon with Misty Moonlight ink.
Stamp the tassel in Berry Burst ink.
And, last, stamp the “Happy Birthday Sentiment” from the Circle Sayings stamp set in Misty Moonlight.
Place Stampin’ Dimensionals on the back of this piece and place on card front, positioning it between the two Berry Burst strips.
Add a Rhinestone Back Jewel to the balloon, as shown above.
Glue remaining Basic White Cardstock to the center of the card so you can write a personal message.
Click here to see a graduation card created with this bundle.
Thanks so much for visiting today!
Kim
Click on any of the photos below to shop directly from my online store to create this handmade card.
Do you look for different folds to add some spice and variety to your card making? A search of Pinterest yields so many options. When I spotted the Barn Door Fun Fold, I knew it would pair perfectly with Stampin’ Up!’s Circle Sayings Bundle. Find this bundle on page 19 on Stampin’ Up!’s brand-new 2023-2024 Annual Catalog. I’ve created many cards using this bundle which includes a versatile stamp set and a 2 3/8-inch circle punch. See more samples (another fun fold) by clicking here.
Circle Sayings Barn Door Fold
This fold is super easy. Be sure to watch the video included below to see step-by-step instructions for creating this card.
Card stock (Berry Burst) measuring 11 x 4 1/4, scored at 5 1/2
Trim a 1 1/2-inch x 5 1/2-inch pieces from the top front with your Stampin’ Trimmer
Adhere a piece of coordinating Designer Series Paper (Bright & Beautiful 6 x 6 DSP) 5 1/4 x 2 1/2 inches to the front panel that’s left.
Use the circle punch to cut a half circle from the “barn door” panel
Stamp your image on Basic White Card Stock measuring 5 1/4 x 4 inches. Be sure to align your image in the half circle so it shows through to the front of the card. Glue to the inside of the card. See the examples above and below.
Add embellishments as you wish.
Here’s the inside of the card:
In addition, I created a thank you card using the same fold and stamp set. The Designer Series Paper comes from the Countryside In 12 x 12 package.
Circle Sayings Barn Door Fold Video
Thanks so much for visiting my blog today. Need more inspiration? Sign up to receive my free, email newsletter. I send two to three newsletters each month that include a card making tutorial, paper crafting video, and updates to Stampin’ Up! news and specials. Click here to subscribe.
Kim
Click on any of the graphics below to shop directly from my online store to purchase the products used to create the birthday card.
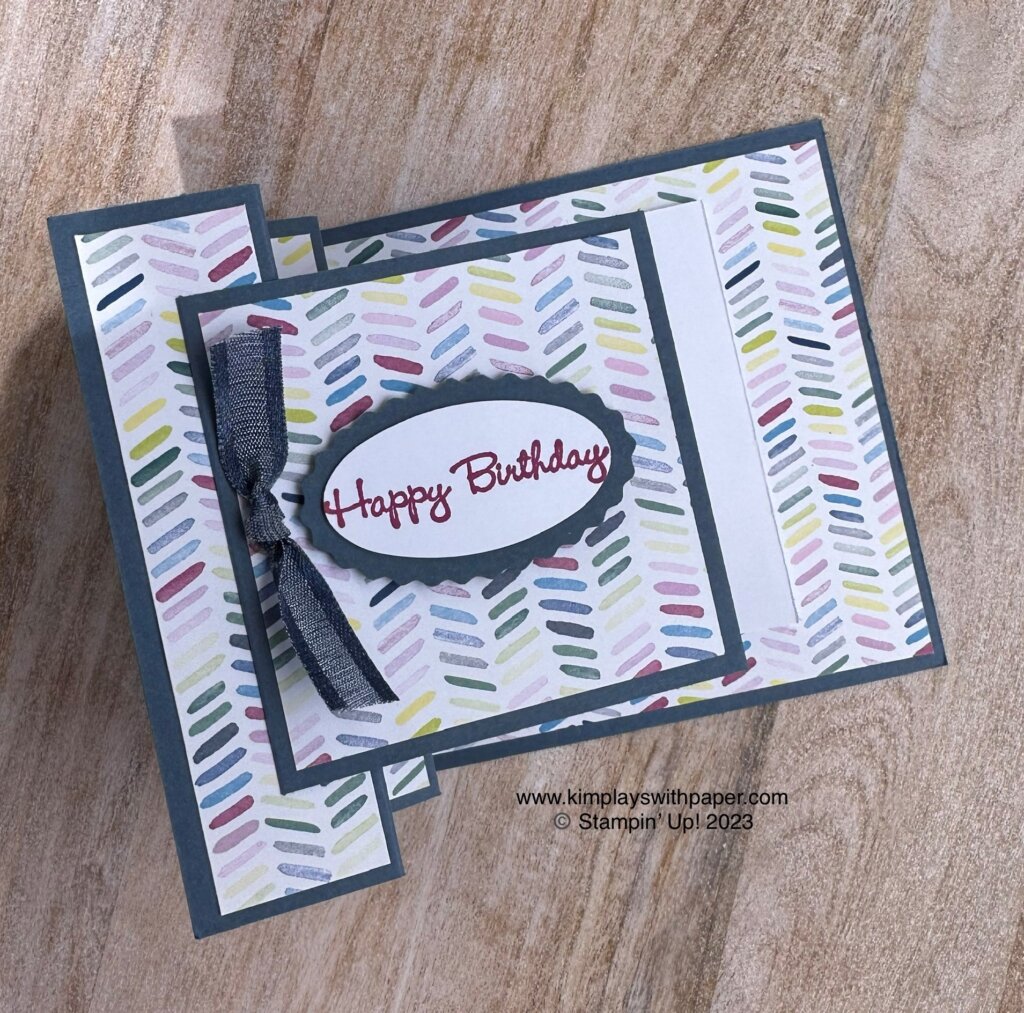
Today, I combine the fun new Bright & Beautiful 6 x 6 Designer Series Paper with the VW fun fold. (Purchase this double-sided, patterned paper when Stampin’ Up!’s 2023-2024 Annual Catalog goes live May 2.)
The next photo shows a view from above. Can you see the V and the W? At first, the design seems complicated. But it comes together quite easily.
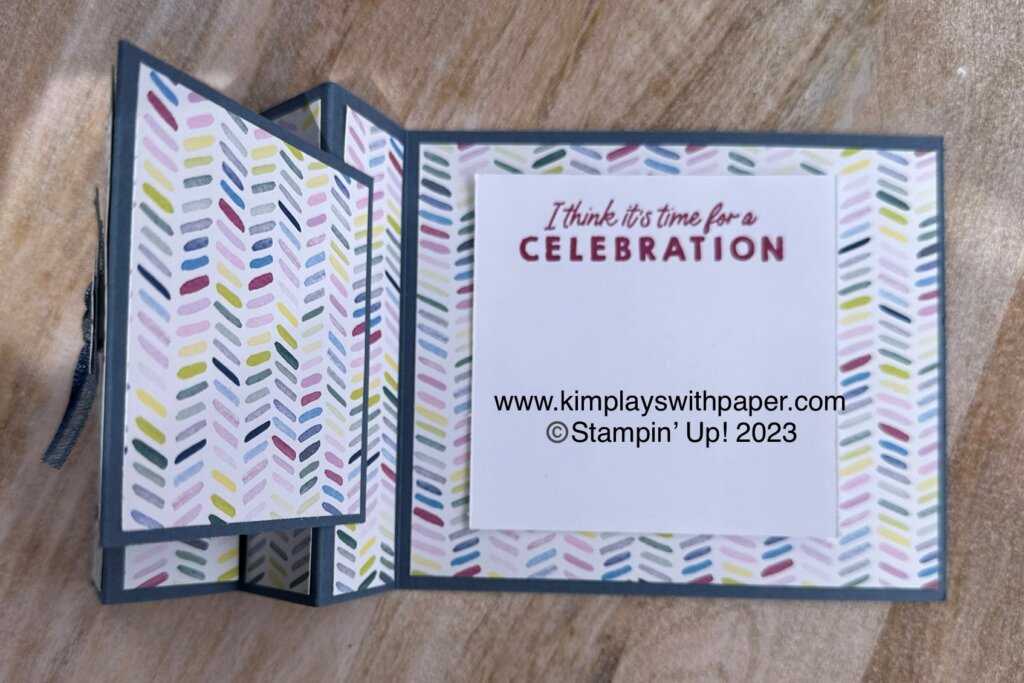
This next photo shows the inside of the card.
My team member, Sandy Graves, created a VW fun fold card for our recent team meeting. See her card below. Several people asked for directions to make this fold. So here it is!
Use these paper measurements to help you get started. Be sure to watch the video at the end of this post to see step-by-step instructions for creating this.
Base card stock: 10″ x 4 1/4 inches scored at 1 1/4, 2 1/2, 3 3/4, and 5
Base card stock: 6 x 3, scored at 3
Coordinating Designer Series Paper: 4 3/4 x 4, 2 3/4 x 2 3/4, and four pieces measuring 4 x 1
Basic White: 3 1/4 x 3 1/4
The front sentiment comes from Go to Greetings and is stamped in Berry Burst ink, punched with the Double Oval Punch. I grabbed the inside sentiment from the brand-new Beautiful Balloons stamp set (available in the new, upcoming Annual Catalog.)
Bright & Beautiful VW Fun Fold Video
Thanks so much for visiting my blog today. Need more inspiration? Sign up to receive my free email newsletter. Click here. I send two to three newsletters each month that include a free card making tutorial, paper crafting video, and updates on Stampin’ Up! new and specials.
Kim
Click on any of the graphics below to shop directly from my online store. Please keep in mind that some products are available when the catalog goes live, Tuesday, May 2.
Sign up for my newsletter and get a free tutorial!
Get Updates!
Join our mailing list to receive the latest updates from Kim!
You have Successfully Subscribed!
Current Catalogs
Follow Me
Categories
Disclaimer
The content in this blog is the sole responsibility of Kim Quade as a Stampin’ Up!® Independent Demonstrator. The use of and content of classes, services or products offered is not endorsed by Stampin’ Up!