Do you like to make items in addition to greeting cards with your paper crafting products? I know I love to make small treat packets and gift packaging. They’re fun to give out at classes and special events and to celebrate birthdays, say thank you, and more. These are also perfect for bridal or baby shower partyfavors.
These dies make great frames for cards, and they pair with the Countryside stamp set. But they’re also large enough to make a treat holder.
Countryside Corners Treat Holder
And, this design is easy peasy. Here are a few details. Be sure to watch the video below (a Facebook live replay) to see step-by-step instructions for making these fun treat packets.
Use the largest die to cut the image from card stock (5 1/2″ x 4 1/4″)
Score the die cut 2 1/4″ on each end
Choose the second largest die and cut some coordinating Designer Series Paper
Trim two inches off each end of the image.
Fold the card stock on the score lines
Glue the DSP to each side
Insert candy
Pinch the top of the packet together and punch a hole with a small hole punch
Add ribbon
Decorate as you wish
Enjoy these two additional samples. Which one is your favorite?
The above packets uses the Starry Sky design from the 2022-2023 In Color 6 x 6 Paper Pack with a sentiment from Country Bouquet and flower from Petal Park.
And this last sample uses the Bright & Beautiful 6 x 6 Designer Series Paper with a sentiment from the Circle Sayings Stamp Set.
How To Video
Thanks so much for visiting my blog today. Need more inspiration? Sign up to receive my free, email newsletter. I send two to three newsletters each month that include a free card-making tutorial, paper crafting video, and updates on Stampin’ Up! news and specials. Click here. Then check your email for a message from AWeber. They wan to be sure you want to receive my emails.
Thanks,
Kim
Click on any of the pictures below to shop from my online store for the products used to create this project.
Do you look for different folds to add some spice and variety to your card making? A search of Pinterest yields so many options. When I spotted the Barn Door Fun Fold, I knew it would pair perfectly with Stampin’ Up!’s Circle Sayings Bundle. Find this bundle on page 19 on Stampin’ Up!’s brand-new 2023-2024 Annual Catalog. I’ve created many cards using this bundle which includes a versatile stamp set and a 2 3/8-inch circle punch. See more samples (another fun fold) by clicking here.
Circle Sayings Barn Door Fold
This fold is super easy. Be sure to watch the video included below to see step-by-step instructions for creating this card.
Card stock (Berry Burst) measuring 11 x 4 1/4, scored at 5 1/2
Trim a 1 1/2-inch x 5 1/2-inch pieces from the top front with your Stampin’ Trimmer
Adhere a piece of coordinating Designer Series Paper (Bright & Beautiful 6 x 6 DSP) 5 1/4 x 2 1/2 inches to the front panel that’s left.
Use the circle punch to cut a half circle from the “barn door” panel
Stamp your image on Basic White Card Stock measuring 5 1/4 x 4 inches. Be sure to align your image in the half circle so it shows through to the front of the card. Glue to the inside of the card. See the examples above and below.
Add embellishments as you wish.
Here’s the inside of the card:
In addition, I created a thank you card using the same fold and stamp set. The Designer Series Paper comes from the Countryside In 12 x 12 package.
Circle Sayings Barn Door Fold Video
Thanks so much for visiting my blog today. Need more inspiration? Sign up to receive my free, email newsletter. I send two to three newsletters each month that include a card making tutorial, paper crafting video, and updates to Stampin’ Up! news and specials. Click here to subscribe.
Kim
Click on any of the graphics below to shop directly from my online store to purchase the products used to create the birthday card.
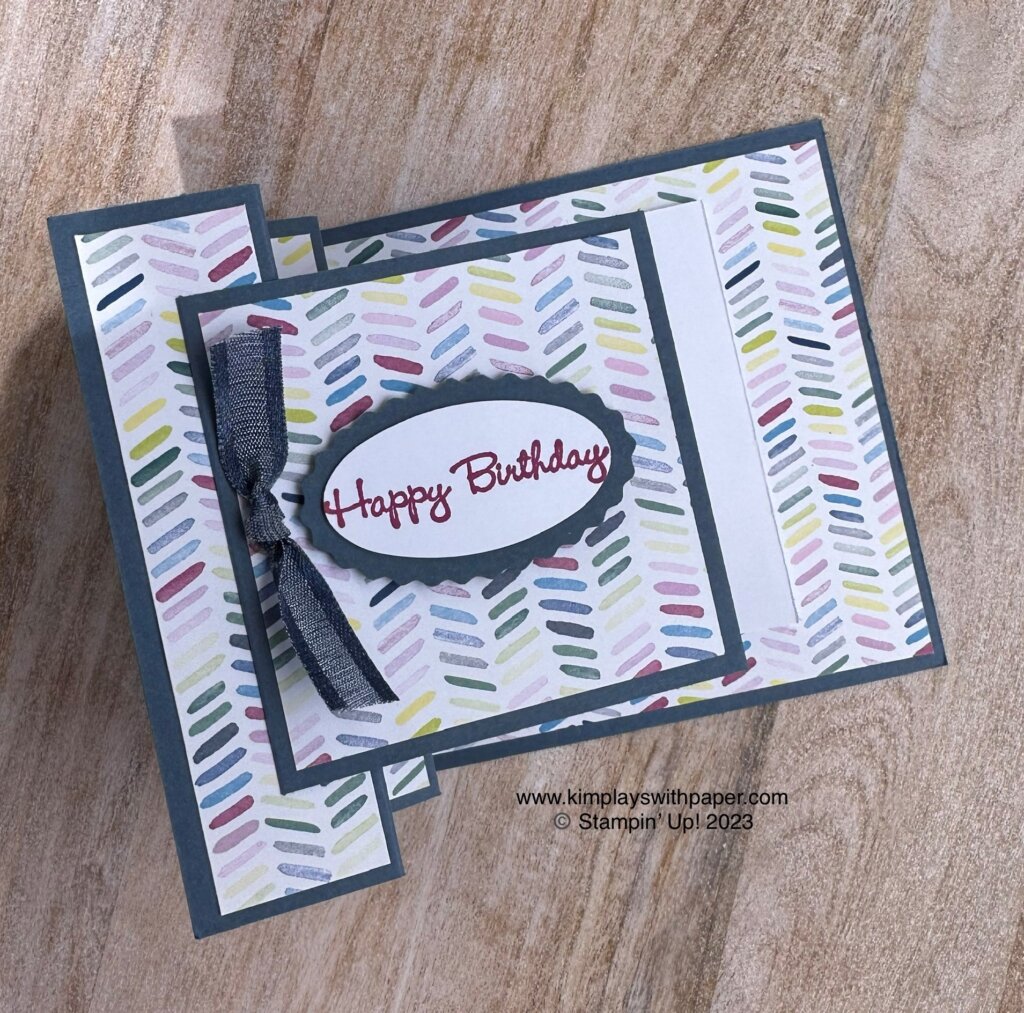
Today, I combine the fun new Bright & Beautiful 6 x 6 Designer Series Paper with the VW fun fold. (Purchase this double-sided, patterned paper when Stampin’ Up!’s 2023-2024 Annual Catalog goes live May 2.)
The next photo shows a view from above. Can you see the V and the W? At first, the design seems complicated. But it comes together quite easily.
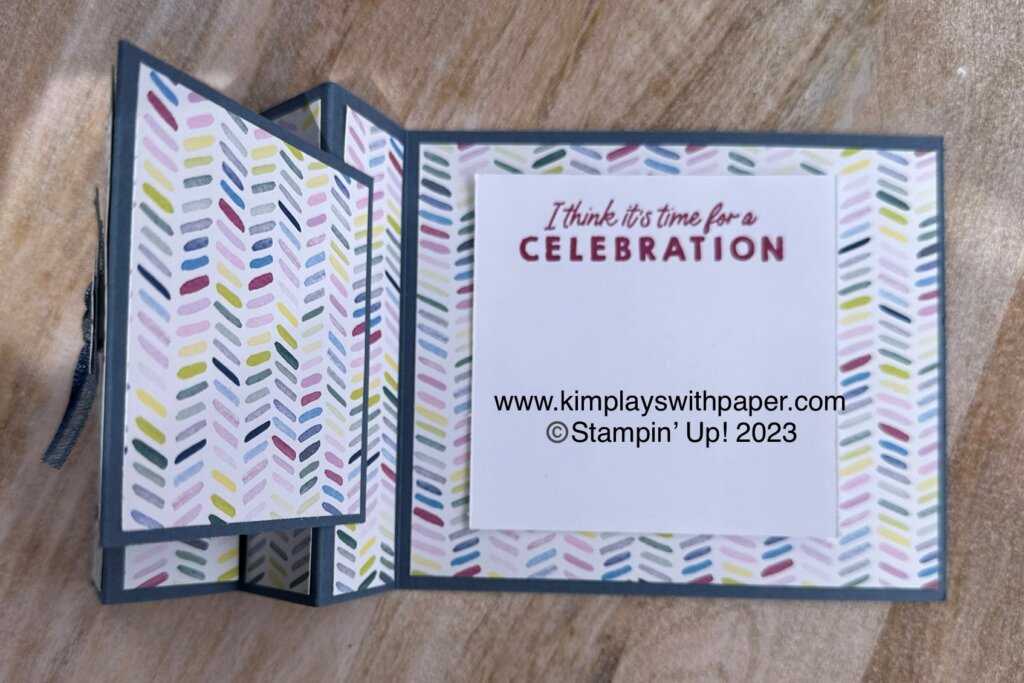
This next photo shows the inside of the card.
My team member, Sandy Graves, created a VW fun fold card for our recent team meeting. See her card below. Several people asked for directions to make this fold. So here it is!
Use these paper measurements to help you get started. Be sure to watch the video at the end of this post to see step-by-step instructions for creating this.
Base card stock: 10″ x 4 1/4 inches scored at 1 1/4, 2 1/2, 3 3/4, and 5
Base card stock: 6 x 3, scored at 3
Coordinating Designer Series Paper: 4 3/4 x 4, 2 3/4 x 2 3/4, and four pieces measuring 4 x 1
Basic White: 3 1/4 x 3 1/4
The front sentiment comes from Go to Greetings and is stamped in Berry Burst ink, punched with the Double Oval Punch. I grabbed the inside sentiment from the brand-new Beautiful Balloons stamp set (available in the new, upcoming Annual Catalog.)
Bright & Beautiful VW Fun Fold Video
Thanks so much for visiting my blog today. Need more inspiration? Sign up to receive my free email newsletter. Click here. I send two to three newsletters each month that include a free card making tutorial, paper crafting video, and updates on Stampin’ Up! new and specials.
Kim
Click on any of the graphics below to shop directly from my online store. Please keep in mind that some products are available when the catalog goes live, Tuesday, May 2.
Welcome to Team Stamp It’s April Blog Hop. Thank you so much for joining us. This month we feature all things Mother’s Day. Be sure to visit all of the blogs on the hop. Leave a comment with the hashtag #stampitcontest for a chance to win a Birthday Card Organizer Kit.
Today, I share a versatile and fun gift holder using the Countryside Inn Designer Series Paper, a brand-new 12 x 12 patterned paper available in the 2023-2024 Annual Catalog. You can begin ordering from that catalog May 2. Other ingredients include the Tailor Made Tags Dies, sentiment from Waves of Inspiration stamp set, and the Night of Navy Bordered Ribbon. I was inspired by a larger packet created by Diane Evans. I scaled mine to create a smaller version, perfect for little gifts. This pattern offers a great way to use some of the paper you’ve been hoarding!
This packet boasts three pockets — two small in the front that hold a tag and/or gift card and a chocolate. The large pocket works for a bookmark or coffee sticks. For stampers, it holds a blending brush or bone folder.
Designer Series Paper measuring 9″ x 6″
For belly band: one piece of DSP measuring 6″ x 3/4″
Score on the 6″–side at 1 3/4″ on each side
From the bottom, score 2 1/2″ up
Be sure to watch the video below to view step-by-step instructions for putting this Mother’s Day gift packaging together.
Mother’s Day Gift Packaging Video
Thanks so much for joining today. Check out all the other blogs for inspiration for your Mother’s Day projects. Remember to leave a comment.
Click on any of the photos below to shop directly from my online store to purchase the supplies to create this package. (Remember, the Designer Series Paper will be available May 2.)
Who doesn’t love a shaker card? They’re a fun and interactive card for kids and adults alike.
In today’s post, I share a cute shaker card using Stampin’ Up!”s whimsical Silly Goose stamp set (from the January-April 2023 Mini Catalog) and the Radiating Stitches Dies. (Find these brand-new dies on the Online Exclusives, not available in catalogs.) Be sure to watch the video at the end of this post to see step-by-step directions for creating this card at home.
Silly Goose Shaker Card
Melon Mambo cardstock base, 8 1/2 x 5 1/2 , scored at 4 1/4
Night of Navy 5 1/2″ x 4 1/4″ cut with the largest Radiating Stitches Dies. Die cut the center with the next largest Radiating Stitches Dies. Remove the center. Use this as the window for the shaker card.
Melon Mambo cardstock (4 3/4″ x 3 1/2″) die cut with Stitched Rectangle Dies. Die cut center with next size smaller Stitched Rectangle Dies. Layer over top of Night of Navy window.
Window Sheet measuring 4 3/4″ x 3 1/2″
Basic White measuring 4 3/4 x 3 1/2″
Sparkle and Shine Sequin Assortment
Foam Adhesive Strips
Goose image stamped with Memento and colored with Stampin’ Blends.
Looking for other ways to use the Radiating Stitches Dies? Click here to see another card idea.
How-To Video
Thanks so much for visiting my blog today. Please let me know if you have questions about this card or other paper crafting projects.
Get more inspiration by signing up to receive my free, email newsletter. I send two to three newsletters each month that include a free card making tutorial, a paper crafting video, and updates on Stampin’ Up! news. Click here. Then check your InBox for a message from Aweber. They want to be sure you really wan to receive my emails.
Kim
Click on any of the graphics below to shop directly from my online store for the paper crafting products used to create this shaker card.
Sign up for my newsletter and get a free tutorial!
Get Updates!
Join our mailing list to receive the latest updates from Kim!
You have Successfully Subscribed!
Current Catalogs
Follow Me
Categories
Disclaimer
The content in this blog is the sole responsibility of Kim Quade as a Stampin’ Up!® Independent Demonstrator. The use of and content of classes, services or products offered is not endorsed by Stampin’ Up!