Do you love to color your stamped images? Or do you prefer not to color stamped images? I’m usually in a hurry to make a stack of quick and easy cards, so I stay away from coloring. But, today, I show you a fun and beautiful coloring technique perfect for use with Stampin’ Up!’s Joy of Noel Bundle. Find it in Stampin’ Up!’s September-December 2023 Mini Catalog. If you love this bundle, be sure to grab it. It’s being retired and won’t be available much longer.
Stampin’ Up! offers so many ways to color images — from Stampin’ Blends to Watercolor Pencils to Blender Pens and more. But did you know you can watercolor with the Wink of Stella pen? This accessory is generally used to sparkle and shine to projects. Be sure to watch the video below to see exactly how I watercolor with Wink of Stella to create this gorgeous handmade Christmas card. (The picture doesn’t adequately show the shimmer of this beautiful card, so be sure to try it yourself.)
Joy of Noel Making Spirits Bright
Here are some details about this card:
Thick Very Vanilla Card Stock base measuring 11 x 4 1/4, scored and folded at 5 1/2
Joy of Christmas Designer Series Paper measuring 5 1/4 x 4
Very Vanilla Card Stock 4 1/4 x 3
Stamp image with Black Memento
Old Olive, Shaded Spruce, and Cherry Cobbler reinkers
Dip tip of Wink of Stella into reinkers and color image
Gold Foil accents measuring 1/2″ x 4 1/4″
Linen Thread
Gold Festive Pearls
How to Video
Enjoy this Facebook live replay from November 21, 2023. From my craft room in Mesa, Arizona, I give step-by-step instructions for creating this card.
Thanks so much for visiting my blog today. I hope you enjoyed this tutorial and fun coloring technique using Wink of Stella.
Subscribe to my free email newsletter to receive more paper crafting inspiration. I send two to three newsletters each month that include a card making tutorial, a paper crafting video, and updates on Stampn’ Up! news and specials. Click here to begin.
Kim
Click on any of the pictures below to purchase the products to make this card at home.
Every once in awhile, the scraps and leftover pieces on the craft table serve to inspire another project. I had a pile of little trees — remnants of Stampin’ Up!’s Tiny Christmas Trees Die — sitting on my table. A friend asked what I was going to do with all those little pieces. Create a shaker card, of course.
Today, I’m sharing that fun shaker card project with you.
Merriest Trees Shaker Card
Here are measurements for the projects and a recap of the Stampin’ Up! products I used:
Thick Basic White Card Stock measuring 8 1/2 x 5 1/2, scored and folded at 4 1/4
A Walk in the Forest Designer Series Paper (tree design), measuring 5 1/2 x 4 1/4
Thick Basic White Card Stock measuring 5 1/4 x 4, die cut with largest tree from Merriest Trees Dies, and embossed with Snowflake Sky 3D Embossing Folder
Window Sheets, 5 x 3 3/4 (2)
Sentiment from Merriest Trees heat embossed in gold
Foam Adhesive Strips
Festive Pearls (gold)
Gold 1/8″ Trim (Online Exclusive)
Mini die cuts trees from Tiny Christmas Tree Die (Old Olive)
Be sure to watch the video below. I give step-by-step instructions from my craft room in Mesa, Arizona, to help you create this project at home.
Shaker Card How to Video
Did you know the A Walk in the Forest Designer Series Paper (used in today’s shaker card project) s a “give back” product? That means that Stampin’ Up! donates $3 from the sale of each package will be donated to organizations helping kids having a good Christmas.
Need more inspiration? Subscribe to my free, email newsletter. I send two to three newsletters each month that include a free, card-making tutorial, a paper crafting video, and updates on Stampin’ Up! news and specials. Click here.
Thanks so much for visiting my blog today. I hope you’re inspired to go get into your craft room and create. Please let me know if you have any questions.
Thanks,
Kim
Click on any of the pictures below to shop for the products to create this card at home.
Have you seen cards created by others and posted online and just need to try them? That’s how I felt with the rocker cards. I’ve seen them posted on a lot of paper crafting web sites in the last few weeks. They look so fun and cute. My teammate, Dawn Seelhoff, shared a rocker card on her blog, Dawn’s Inklings. So today, I’m trying one. And, I have a video with step-by-step instructions from my craft room in Mesa, Arizona, where I’m a Stampin’ Up! demonstrator. Be sure to catch the Facebook live replay below.
A Walk in the Forest Rocker Card
This card uses a variety of current Stampin’ Up! product. I recap it for you below:
Second largest circle from the Deckled Circles Dies. Cut from Balmy Blue card stock measuring 5 1/2 x 5 1/2, folded in the middle. Burnish well with a Bone Folder.
Third largest circle from the Deckled Circles Dies. Cut from dotted white pattern from A Walk in the Forest Designer Series Paper — DSP measures 5 1/4 x 5 1/4. Cut this in half and will make two cards.
Basic White measuring 5 1/4 x 5 1/4 die cut with the third largest circle from the Deckled Circle Dies. Cut in half. Serves as middle piece for two cards.
Sentiment from Merriest Trees stamp set stamped in Garden Green ink on Basic White label die cut from Labels Aglow Dies.
Add some bling with Iridescent Rhinestone Jewels
This fun, handmade greeting card still fits in one of Stampin’ Up!’s Medium Envelopes. And it’s super cute to display!
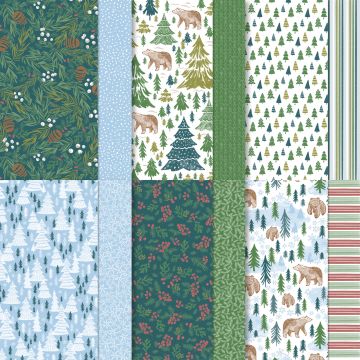
A Walk in the Forest Designer Series Paper
There’s a lot to love about this Designer Series Paper. Find it in Stampin’ Up!’s September-December 2023 Mini Catalog on page 5 for $12.50.
$3 from the sale of every package will be donated to support organizations dedicated to spreading cheer and providing support to those in need.
Some of the tree images coordinate with the die cuts from the Merriest Trees dies, allowing you to easily add these cuts to your projects.
The paper contains images that coordinate with the Beary Cute Punch.
How to Video
Thanks so much for visiting my blog today! I hope you enjoyed learning how to make this fun rocker card with A Walk in the Forest Designer Series Paper and the Deckled Circles Dies. Please let me know if you have questions.
Need more inspiration? Subscribe to my free, email newsletter. I send two to three newsletters each month that include a free card making tutorial, a paper crafting video, and updates on Stampin’ Up! news and specials. Click here.
Thanks,
Kim
Click on any of the pictures below to purchase the products used to create this card at home.
I’m always looking for lots of different ways to use my stamp sets. Since the Circle Sayings stamp set debuted in Stampin’ Up!’s 2023-2024 Annual Catalog, I’ve had fun using it with different layouts and funs, different patterned papers, for different seasons, and different sentiments. Find it on page 17. Bundle it with the coordinating 2 3/8-inch Circle Punch and save 10 percent.
Today, I show a couple of examples that feature the Circle Sayings stamp set to create fall cards with the hugely popular All About Autumn Designer Series Paper and the Autumn Leaves Bundle. Both of these cards showcase versatile layouts that work with a variety of stamp sets and paper.
Circle Sayings for Fall
The card at the top uses:
Pretty Peacock card base measuring 11 x 4 4 1/4, scored and folded at 5 1/2
Very Vanilla layer measuring 5 1/4 x 4, embossed with Fall Leaf 3D Embossing Folder
Two strips of All About Autumn Designer Series Paper measuring 2 x 4 3/4
Pretty Peacock circle die cut with Stylish Shapes
Very Vanilla card stock stamped with “Celebrate” sentiment from Circle Sayings in Pretty Peacock and cut with 2 3/8″ Circle Punch
Leaf die cut with Autumn Leaves Dies in All About Autumn DSP
Neutrals Adhesive Backed Sequins
This fun fold above uses:
Copper Clay card base measuring 7 1/2 x 5 1/5 scored at 3 1/4
All About Autumn Designer Series Paper one of each measuring 3 x 5 1/4 and 1 1/4 x 5 1/4
Shiny side of DSP measuring 1/2 x 5 1/4 (for inside)
Very Vanilla measuring 5 1/4 x 4
Stylish Shapes circle in Copper Clay card stock
Very Vanilla scrap for sentiment.
Stamp sentiment in Copper Clay. Punch with 2 3/8″ circle punch
Leaf die cut from Autumn Leaves Bundle
Neutrals Adhesive Backed Sequins
How to Video
Thanks so much for visiting my blog today. Need more inspiration? Sign up to receive my free, email newsletter. I send two to three newsletters each month that include a free card-making tutorial, a paper crafting video, and updates on Stampin’ Up! news and specials. Click here to subscribe.
Kim
Product Supply List
Click on any of the graphics below to shop for the paper crafting products to make this card at home.
Are you in the mood for another fall card? When Stampin’ Up! first introduced the new 2023-2025 In Colors, I just knew the color palette would work really well for fall-themed cards, especially the Wild Wheat.
With today’s card, I feature a flap fun fold, Stampin’ Up’s Cheers to the Season Stamp set (Stampin’ Up!’s September-December 2023 Mini Catalog), the Wild Wheat In Color Luster Specialty Paper (Annual Catalog), and Leaf Fall 3D Embossing Folder (Online Exclusive). Be sure to watch the video below to view step-by-step instructions for creating this handmade greeting card at home.
Cheers to the Season Flap Fold
Here are a few measurements to help you get started:
Early Espresso cardstock base measuring 5 1/2 x 6, scored at 1 3/4
Early Espresso 4″ x 4″, scored at 1/2
Copper Clay: 3 3/4 x 3 1/4 and 5 1/4 x 1 1/2
Wild Wheat In Color Luster Specialty Paper: 3 x 3 1/2 and 5 x 1 1/4, embossed with the Leaf Fall 3D Embossing Folder
Very Vanilla 5 x 3 3/4
Leaf image stamped with Copper Clay on Very Vanilla and cut by hand
Sentiment for inside (Pick of the Patch) stamped with Copper Clay
Gold Simply Elegant Trim
Copper Clay In Color Dots
Have a peek inside the card.
Flap Fold Video How To
Thanks so much for visiting my blog today. Need more inspiration? Subscribe to my free, email newsletter. I send two to three newsletters each month that include a free card-making tutorial, a paper crafting video, and updates on Stampin’ Up! news and specials. Click here. Then check your email for a confirmation. AWeber wants to be sure you really want to receive my messages.
Kim
Click on any of the pictures below to shop from my online store to purchase the products to create this card at home.
Sign up for my newsletter and get a free tutorial!
Get Updates!
Join our mailing list to receive the latest updates from Kim!
You have Successfully Subscribed!
Current Catalogs
Follow Me
Categories
Disclaimer
The content in this blog is the sole responsibility of Kim Quade as a Stampin’ Up!® Independent Demonstrator. The use of and content of classes, services or products offered is not endorsed by Stampin’ Up!