As the year 2023 draws to a close, we look forward to 2024. With most of our Christmas cards in the mail (if all went well), you can follow up with some fun new year cards. I appreciate that Stampin’ Up! offers a paper crafting products to help me do that.
The featured card uses Stampin’ Up!’s Cheers to the Season Stamp Set. Find it on page 63 of the September-December 2023 Mini Catalog. This stamp set is being retired and will not be available after January 3, 2024. In fact, this set is now on sale for $17.50 (originally $25). I love that it’s so versatile, and you can use it for a variety of occasions.
Cheers to the Season New Year Card
Here are a few details about the first card:
Basic Black Card Stock base measuring 8 1/2 x 5 1/2 scored and filed at 4 1/4
Gold Celebrations 12 x 12 Specialty Designer Series Paper measuring 5 1/4 x 4
Two “Cheers” goblets from Cheers to the Season Stamp Set heat embossed in gold on Very Vanilla Card Stock and cut by hand
“Happy New Year” sentiment from Brightest Glow Stamp set heat embossed in gold on Very Vanilla Card Stock and die cut with a circle from the Stylish Shapes Dies
Adhesive Backed Sparkle Gems
Circle Sayings New Year Card
Basic Black Card Stock base measuring 8 1/2 x 5 1/2, scored and folded at 4 1/4
Basic Black Card Stock measuring 5 1/4 x 4 embossed with Quatrefoil 3D Embossing Folder
“Celebrate” sentiment from Circle Sayings Stamp set heat embossed in gold and “Happy New Year” sentiment from the Brightest Glow Stamp Set heat embossed in gold and punched with 2 3/8″ circle punch. Layered on Gold Foil die cut with circle from the Stylish Shapes Dies
Adhesive Backed Sparkle Gems
How to Video
Be sure to watch the video (a Facebook live replay from my craft room in Mesa, Arizona, December 26, 2023) to get step-by-step instructions for created the featured card.
Thanks so much for visiting my blog today. Need more inspiration? Subscribe to my free, email newsletter. I send two to three newsletters each month that include a free paper crafting video, card-making tutorial, special offers, and updates to Stampin’ Up! news and specials. Click here.
Kim
Cheers to the Season New Year Card Product List
Click on any of the pictures below to shop for the products used to create this new year card.
In just a few days, the calendar rolls over to 2024! Let’s celebrate with some fun handmade, desktop calendars. (See this past post for a couple of other cute designs.)
Today’s calendar design features a sneak peak from Stampin’ Up!’s January-April 2024 Mini Catalog. The Doggone Friendly stamp set is perfect for any and all dog lovers. You can purchase it beginning January 4, 2024, when the catalog goes live. (#162729–$20)
This full background stamp suits all of our family well! Don’t you just love all of the dog faces? So many breeds to choose from. I created this calendar for my sister who has a Boston Terrier named Reggie.
Doggone Friendly 2024 Desktop Calendar
Basic Black card stock base measures 4 1/4 x 11, scored at 2 3/4 and 5 1/2
Layer for the base of the calendar: Real Red card stock measuring 5 1/4 x 4, Basic White measuring 5 x 3 3/4, stamped with the Doggone Friendly stamp set with Memento, Basic Black measuring 3 1/2 x 3 1/2. Add notepad.
Calendar layer measurements: Basic Black card stock measuring 5 1/4 x 4, Basic White measuring 5 x 3 3/4 stamped with the Doggone Friendly stamp set in Memento, Basic Black card stock measuring 3 1/2 x 2 3/4. Add calendar.
Created the focal piece by stamping the Doggone Friendly stamp set with Memento on white and die cutting the dog I wanted to feature with a circle from the Stylish Shapes Dies. Layered this on a circle punched with Real Red card stock. Added a bow from the Baker’s Twin Essentials Pack. Finished it off with three Black Matte Dots.
I know my sister will love this calendar, especially when it features her dog.
Be sure to watch the video below for step-by-directions from my craft room in Mesa, Arizona. Although the video features a different calendar design, the basic instructions still hold true.
How to Video
Thanks so much for visiting my blog today. Please let me know how I can help in your paper crafting journey. Need more inspiration? Subscribe to my free, email newsletter. I send two to three newsletters each month that feature a free paper crafting video, a card making tutorial, and updates on Stampin’ Up! news and specials. Click here to get started.
Kim
Click on any of the pictures below to shop for the products to create this calendar at home. Remember: The Doggone Friendly Stamp Set becomes available for purchase Thursday, January 4, 2024.
fWith the bulk of my Christmas cards created and in the mail, I turned to creating some holiday and winter-themed thank you cards. It’s nice to have some on hand to thank people for the thoughtful gifts they bring.
In today’s post, I share a fun thank you card created with die cut shapes. Don’t you think this snowman is adorable?
Stylish Shapes Dies Thank You
Here is a list of of the pieces I used to create this card:
Body: Three Basic White circles die cut with the second, third, and fourth largest circles from the Stylish Shapes Dies
Arms: Basic Black Card Stock die cut with the smallest banner from the Stylish Shapes Dies
Hat: Basic Black Card Stock die cut with the fourth largest square from the Stylish Shapes Dies
Hat: Basic Black Card Stock die cut with the labels from the Cracker & Treat Box Dies
Sentiment: Gorgeously Made stamp set
Face: Drawn in by hand using a variety of Stampin’ Write Markers
Buttons: Adhesive-Backed Sparkle Gems
Scarf from Beary Cute stamp set (or use red ribbon)
Thick Basic White Card Stock base measuring 8 1/2 x 5 1/2, scored and folded at 4 1/4
Designer Series Paper layer from A Walk in the Forest measuring 5 1/4 x 4
How to Video
This Facebook Live replay from my craft room in Mesa, Arizona, offers step-by-step instructions to help you make this card at home.
Thanks so much for visiting my blog today. I hope you enjoyed this cute handmade thank you card.
Subscribe to my free, email newsletter and get more inspiration. I send two to three newsletters each month that include free card making tutorial, a paper crafting video, and Stampin’ Up! news and updates. Click here.
Kim
Click on any of the graphics below to shop for the products to make this card.
Who loves a fun fold card? A fun fold gives me an opportunity to be creative in my card making and surprise and delight the recipient at the same time. Today’s card appears to be a traditional front-opening card. However, it’s not. The tree itself is where the card actually opens. See the photo below.
For this project, I use Stampin’ Up!’s Merriest Trees Bundle. It’s a favorite in the September-December 2023 Mini Catalog. This tree and die cutting technique I use today also lends itself to making some cute packaging tags or even standalone Christmas cards.
Merriest Trees Fun Fold
Here are some basic directions for making this card:
Basic White Card Stock base measures 5 1/2 x 4 1/4
Real Red Card Stock panel measuring 5 1/4 x 4 die cut with Tiny Christmas Trees Die (retiring and on sale)
Dotted piece of Vellum Basics measuring 4 3/4 x 3 1/2
Thick Basic White Card Stock measuring 8 1/2 x 3 1/2 burnished well and folded in half
Large tree stamped in Garden Green ink on above piece making sure the top of tree “runs off the page” at the top of the fold. (Be sure to watch the video below to see how this works.)
Die cut with large tree die, making sure the top of the tree is off the paper. You’re creating a folded card image.
Stamp sentiment in Real Red ink on die cut label (Cracker &Treat Box Dies)
Real Red ribbon
Iridescent Pearl Basic Jewels colored with Real Red Stampin’ Blends Combo Pack
How-To Video
As a Stampin’ Up! demonstrator in Mesa, Arizona, I love to show you what I’ve been working on in my craft room. This Facebook Live replay from 12/5/2023, shows step-by-step instructions for creating this fun fold.
Thank you so much for visiting my blog today. I hope you’re inspired to try this project. See the list of products I used below.
Need more inspiration? Subscribe to my free, email newsletter. I send two to three newsletters each month that include a free card-making tutorial, paper crafting video, and updates to Stampin’ Up! updates and specials. Click here.
Kim
Click on any of the pictures below to purchase the products needed to make this Christmas card at home.
When you don’t know what to get someone for Christmas, the go-to is usually to purchase gift cards. So it’s nice to have a fun and festive way to “wrap” those gift cards.
Today, I share a fun fold gift card holder that uses Stampin’ Up!’s Cheers to the Season stamp set and the A Walk in the Forest 12 x 12 Designer Series Paper. (Just a couple of quick notes: The Cheers to the Season stamp set is being retired and is on sale for $17.20. The A Walk in the Forest DSP is also being retired, and is available while supplies last. Click here to visit Stampin’ Up!’s online store to see what’s being retired and what’s discounted from the September-December 2023 Mini Catalog. Be sure to grab what you want before it’s gone. I don’t want you to be disappointed if something goes out of stock.)
Cheers to the Season Gift Card Holder
Here are a few measurements to help you create this fun fold gift card holder.
Cherry Cobbler card stock base measuring 5 1/2 x 4 1/4
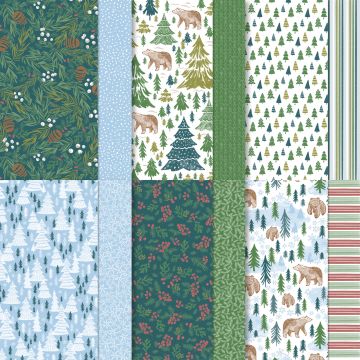
A Walk in the Forest Designer Series Paper measuring 5 1/4 x 4, 4 1/4 x 3, and 4 1/4 x 2
Cherry Cobbler card stock measuring 9 3/4 x 4 1/2 scored at 3 1/4 and 6 1/2
Very Vanilla measuring 4 1/4 x 3
Very Vanilla circle die cut with Stylish Shapes Die
Linen Thread colors with Cherry Cobbler Stampin’ Blend
Festive Pearls
The inside of the card looks like this. (See above.)
Below, I created the same card using Stampin’ Up!’s Joy of Noel stamp set and the Joyful 12 x 12 Specialty Paper. (Both of these products appear on the retiring list, as well.)
And, here’s another one (below) using Stampin’ Up! Merry Bold & Bright Designer Series Paper and the Joy to You stamp set (both retiring).
And, I have a video with step-by-step instructions from my craft room in Mesa, Arizona, where I’m a Stampin’ Up! demonstrator. Be sure to catch the Facebook live replay below.
How to Video
Thanks so much for visiting my blog today! I hope you’re inspired to make some fun holders for those gift cards you purchase this year. Please let me know if you have any questions about the stamping technique or products used.
Kim
Click on any of the pictures below to shop for the products you need to create this card at home. Give me a shout if you need a product list for either of the other fun fold gift card holders.
Sign up for my newsletter and get a free tutorial!
Get Updates!
Join our mailing list to receive the latest updates from Kim!
You have Successfully Subscribed!
Current Catalogs
Follow Me
Categories
Disclaimer
The content in this blog is the sole responsibility of Kim Quade as a Stampin’ Up!® Independent Demonstrator. The use of and content of classes, services or products offered is not endorsed by Stampin’ Up!