How many days until Christmas? I’m not counting yet! But I do know I give a lot of gift cards. That’s where gift card holders come in handy.
Today’s project features a gift card holder that doubles as a greeting card. It fits in one of Stampin’ Up!’s regular envelopes. And it is so easy to make.
Here are the measurements beginning from the top down for the Peaceful Place Gift Card Holder:
Basic White: 1/2 inch x 3 (sentiment)
Peaceful Place Designer Series Paper: 4 1/4 x 2 3/4
White Base: 7 1/2 x 4 3/4, scored at 1 inch and 4 1/4 inch
Black Back: 5 1/4 x 3 3/4
DSP for inside piece: 1 x 4 3/4
The holder also uses the Evergreen Border Punch found in Stampin’ Up!’s Annual Catalog and the Peaceful Deer Stamp Set offered in the July-December 2021 Mini Catalog,
I made a few other samples that fit well for other occasions.
Peaceful Place Gift Card Holder Video
Be sure to watch this video to see how easily the holder goes together.
Thanks so much for stopping by today. I’d love to help you on your paper crafting journey. I’m a Stampin’ Up! demonstrator in Mesa, Arizona. I hold classes and special events.
I also offer free, email newsletters that include tutorials, videos, and Stampin’ Up! updates. click here to subscribe. (And then remember to check your email inbox for a verification email from Aweber.)
Kim
Do you want to create your own? Click on any of the graphics below to shop directly from my online store.
I grew up in Fargo, North Dakota, and spent most of my life in the Midwest. Fall always brought the changing colors of the trees and leaves, offering gorgeous views. Since moving to Arizona more than two years ago, fall looks a little different. We still see a few color variations, but not as brilliant as I’m used to.
Even though I don’t experience a “traditional” fall, I still love to create cards and projects commemorating the season that follows summer. For this card, I used Stampin’ Up!’s Picture This Dies in conjunction with the Banner Year Stamp Set.
Picture This Dies Fall Card
This set of two dies offers a unique way to use our rubber stamps. I’ve had so much fun filling the spaces with a variety of images and sentiments. See this post for a variety of other card using the die set.
For me, the Banner Year Stamp Set works perfectly. I can showcase the smaller images, and it covers Halloween, fall, winter, and Christmas.
In addition, I also used the Timber Embossing Folder and a variety of ink pads to create this fun, fall card. Look for a list of supplies at the end of this post.
Also, be sure to watch the video below to see how this card came together.
Thanks so much for stopping by today. Are you looking for more paper crafting and card-making inspiration? Subscribe to my free, email newsletter by clicking here. I send two to three newsletters a month that include a free tutorial, video, tips and tricks, and updates on Stampin’ Up! specials and products.
Kim
Click on any of the graphics below to shop directly from my online store.
Going to the mailbox is exciting when you’re expecting your monthly shipment of Paper Pumpkin, Stampin’ Up!’s all-inclusive crafting kit. Say good-bye to the bills and junk mail, and say hello to a fun and easy crafting experience.
Paper Pumpkin Monthly Crafting Kit
Each month, each cute box contains all the ingredients you need to complete the project, including:
an exclusive stamp set;
a mini ink pad;
coordinating die cuts, labels, stickers, and embellishments, as needed;
instructions; and
adhesives.
(Stampin’ Up! includes an acrylic block when you order your first kit. That block works for all future Paper Pumpkin kits and projects.)
The graphic above shows the supplies from September’s kit, which allows you to create 12 treat boxes that can be made in a variety of designs–from pumpkins to apples. Use the ink pad, stamp set, and kit extras to create alternate projects, like the ones I made below.
Harvest & Haunts Paper Pumpkin Alternatives
Peaceful Christmas–October Paper Pumpkin Kit
Each month, Stampin’ Up! designs and releases an exclusive kit. In October, the kit is called Peaceful Christmas. With sprinkles of snow, shimmering silver skies, and heartwarming holiday wishes, it includes enough elements and embellishments to create 10 Christmas cards and coordinating envelopes. Get a head start on you holiday card making! It coordinates with the Peaceful Cabin Bundle in Stampin’ Up!’s July-December 2021 Mini Catalog.
Stampin’ Up! offers two ways to subscribe:
A month-to-month subscription costs $22 per month + tax (shipping is included). Click here to subscribe.
Be sure to subscribe by the 10th of each month, to ensure happy mail in your mailbox.
These kits offer an enjoyable crafting experience. Imagine yourself creating with your kids or grandkids or a sister or a good friend. Or just spend some quality “me” time making something handmade. Think of giving a subscription as a gift.
Thanks so much for stopping by today. Please let me know if you have questions or if I can help you subscribe to Paper Pumpkin.
Looking for additional crafting inspiration? Sign up for my free, email newsletter by clicking here (and then check your inbox for a verification message from Aweber). I send two to three newsletters each month that include a free tutorial, video, and Stampin’ Up! updates, and special offers.
Kim
Click on any of the graphics below to shop directly from my online store.
From the moment I saw the Hats Off Bundle in Stampin’ Up!’s Annual Catalog, I knew I needed it in my collection. I figured I would use it a lot for my husband’s family — a family of avid baseball fans. It’s been rewarding to create hats for everyone’s favorite team using the Playful Alphabet Dies.
See this blog post for a sampling of other cards created with the fun bundle.
And, this bundle came to the rescue again as I needed a baby boy card. I was happy to create a fresh and fun looking, handmade greeting card with supplies I actually have on hand.
Playful Alphabet Baby Card
I used the following products for today’s card:
Hats Off Bundle (#158361). Includes the Hats Off stamp set and Hat Builder Dies. Buy them as a bundle and save 10 percent.
Stitched with Whimsy Dies (#155314)
Playful Alphabet Dies (#152806)
Subtles 6 x 6 Designer Series Paper Stack (#155229) — Balmy Blue pattern
Foam Adhesive Sheets (#141825) — these are used to “pop” up the letters and give them some depth.
Thanks so much for visiting my blog! I’m a Stampin’ Up! demonstrator in Mesa, Arizona, where I teach classes and host special events. I’d love to have you join me in class or on my team or even for my weekly Facebook live held each Tuesday at 8:30 a.m. Arizona time.
Please let me know if you have questions about this card or any other paper crafting projects. I’d love to help. Looking for more inspiration? Subscribe to my free, email newsletter by clicking here. I send two to three emails each month that include a tutorial, video, updates on Stampin’ Up! sales and promotions, and special subscriber offers.
Kim
Click on any of the graphics below to shop directly from my online Stampin’ Up! store.
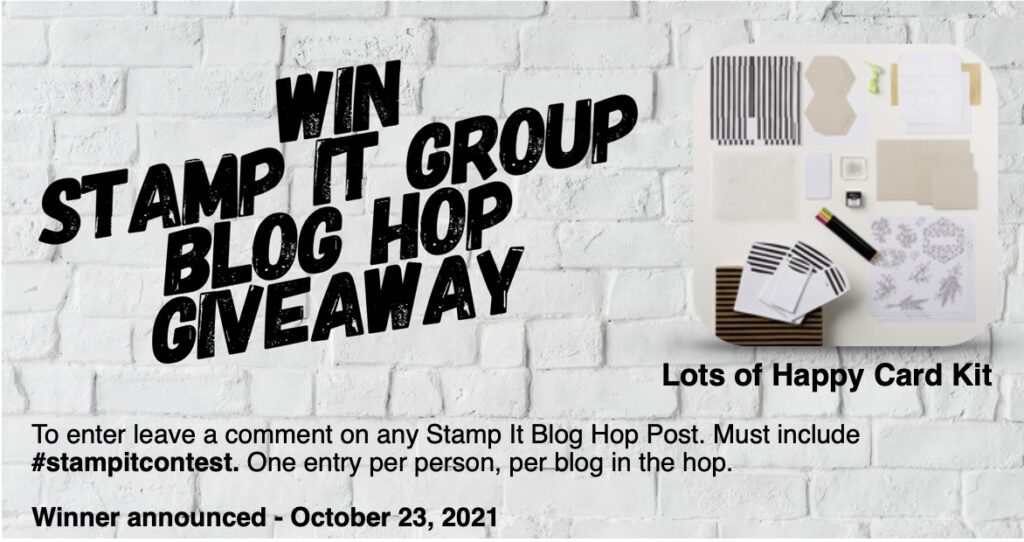
Welcome to Team Stamp It’s monthly blog hop! Thanks for taking the time to join us. Today, we share Halloween- and fall-themed, handmade greetings cards and paper crafting projects. I hope you find inspiration as you visit each blog on the hop using the list at the end of this post. Be sure to leave a comment with the hashtag #stampitcontest. You could win a Lots of Happy Card Kit.
My card features a host of products and a fun technique, most importantly the rubbing alcohol and Stampin’ Blends technique. I love the results this technique produces. See this additional blog post for other examples of this.
Rubbing Alcohol and Stampin’ Blends Technique
Here are some basic directions to achieve this cool background.
Scribble or color with your choice of Stampin’ Blends on a piece of Stampin’ Up!’s vellum.
Pour some 91 percent Isopropyl Alcohol into a small container.
Dip a paint brush into the alcohol and drip and/or touch the liquid to the colored markings.
Watch it do its magic or use a straw or your breath to move the colors around.
Let it dry.
Once the vellum is dry, I adhere a piece of Stampin’ Up!’s Adhesive Sheets to the back of the vellum.
I remove the adhesive backing and attach it to a piece of card stock. The example above shows Basic White.
For today’s card, I die cut the piece with a layer from the Stitched Rectangle Dies.
Use the piece any way you like!
Playful Alphabet Halloween Card
I also used a few other products to complete this design:
Here’s a quick video to help you understand the process.
Remember, visit all of the blogs on the hop and leave a comment with the hashtag #stampitcontest. You could win the Lots of Happy Card Kit.
Congrats to last month’s winner: Linda Danis
List of Blog Hoppers:
Ready for more inspiration? Subscribe to my free email newsletter. I send two to three emails each month that include a free tutorial, video, and Stampin’ Up! updates. Click here. Then, remember to check your email for a confirmation from AWeber.
Click on any of the graphics below to shop directly from my online store 24/7. Please let me know if you have any questions about this project or others on my blog.
Sign up for my newsletter and get a free tutorial!
Get Updates!
Join our mailing list to receive the latest updates from Kim!
You have Successfully Subscribed!
Current Catalogs
Follow Me
Categories
Disclaimer
The content in this blog is the sole responsibility of Kim Quade as a Stampin’ Up!® Independent Demonstrator. The use of and content of classes, services or products offered is not endorsed by Stampin’ Up!