Sympathy cards are perhaps some of the most difficult to make. However, these cards, especially when they’re handmade, mean so much to those who receive them. The images and sentiments in Stampin’ Up!’s Ginkgo Branch Bundle offer just the right elements to craft heartfelt sympathy and thinking of you cards. Find this bundle on page 57 of Stampin’ Up!’s January-April 2023 Mini Catalog. Purchase the Ginkgo Branch stamp set and coordinating Ginkgo Branch Dies as a bundle and save 10 percent.
Ginkgo Branch Card Samples
In today’s post, I share a variety of card samples using this bundle. I appreciate the large stamped image as well as the die cuts to make something quickly. Be sure to watch the YouTube video below (a Facebook live replay), to see a variety of card samples and ideas using this bundle. (Hint: Keep watching to see some cards that bring in different patterned papers and sentiments from other sets.)
I can’t decide which color I like best: Smoky Slate and Night of Navy? Soft Suede and Very Vanilla? Night of Navy and Very Vanilla?
For all three sympathy cards, I used one of the embossing folders offered in Stampin’ Up!’s new Online Exclusives: Basics 3D Embossing Folders. Available for $30, the three-pack includes a flower design, hobnail-glass dots, and crosshatch design. The Online Exclusives include brand-new paper crafting products available only online. You won’t find them in any catalog. Stampin’ Up! plans to release new Online Exclusive Products every four months. Click here to explore the offerings.
Gingko Branch Sympathy How-To Video
Thanks so much for visiting my blog today. I love sharing what I’m working on from my craft room in Mesa, Arizona, as a Stampin’ Up! demonstrator. Be sure to watch this page for additional samples using the Ginkgo Branch Bundle.
Need more inspiration? Sign up to receive my free email newsletter. I send two to three newsletters each month that include a free card-making tutorial, paper crafting video, updates on Stampin’ Up! news and notes, and subscriber-only offers. Click here and then watch your email for a message from AWeber. They want to be sure you want to receive my messages.
Kim
Click on any of the graphics below to shop for the ingredients used to create the project shown at the beginning of this blog post. Please let me know if you have questions about Stampin’ Up! products used on the other cards.
If you’re looking for a fun and versatile flower stamp set with a coordinating punch, Stampin’ Up!’s Petal Park Bundle meets and exceeds that expectation. Find it beginning on page 30 of the Stampin’ Up! January-April 2023 Mini Catalog. I’ve been playing with it for a couple of weeks, and I enjoy pairing it with the coordinating Regency Park 6 x 6 Designer Series Paper, as well as additional stamp set sentiments and images.
Click on the links below to see other posts using this bundle:
In this post, I include the finished product of what I’ve been creating in my craft room in Mesa, Arizona, as a Stampin’ Up! demonstrator. The ideas start to flow when I get to playing. I hope you enjoy these and are inspired.
The card featured at the beginning of this post uses a fun fold. The how-to video at the end of this post gives the measurements and provides step-by-step instructions, showing you how I put this handmade greeting card together. This birthday card also uses a sentiment from Stampin’ Up!’s Go To Greetings, the “sprinkles” from the Beautifully Happy stamp set, and Enamel Dot Essentials Embellishments.
Here’s a look at the inside of the card.
I’ve created so many cards with the Regency Park 6 x 6 paper, I have some small pieces (strips left). They’re perfect for use with the card below. I pulled the sentiment from the Fragrant Flowers stamp set.
The flowers in the set work well with Stampin’ Up!’s Picture This Dies. Aren’t they fun in this card below? The Regency Park 6 x 6 Designer Series Paper includes flower images that can be punched with the coordinating Petal Park Builder Punch. I grabbed the sentiment form the Something Fancy stamp set.
Petal Park Card Samples Video
Thanks so much for visiting my blog today. I hope you’ve enjoyed a few samples of this fun, bright, and easy-to-use bundle.
Need more inspiration? Sign up to receive my free, email newsletter. I send two to three newsletters each month that include a free card-making tutorial, a paper crafting video, updates on Stampin’ Up! news and specials, and special “subscriber only” offers. Click here to subscribe. Then watch your email for a message from AWeber. They want to be sure you really want to receive my newsletters.
Kim
Click on any of the graphics below to shop online for these paper crafting products.
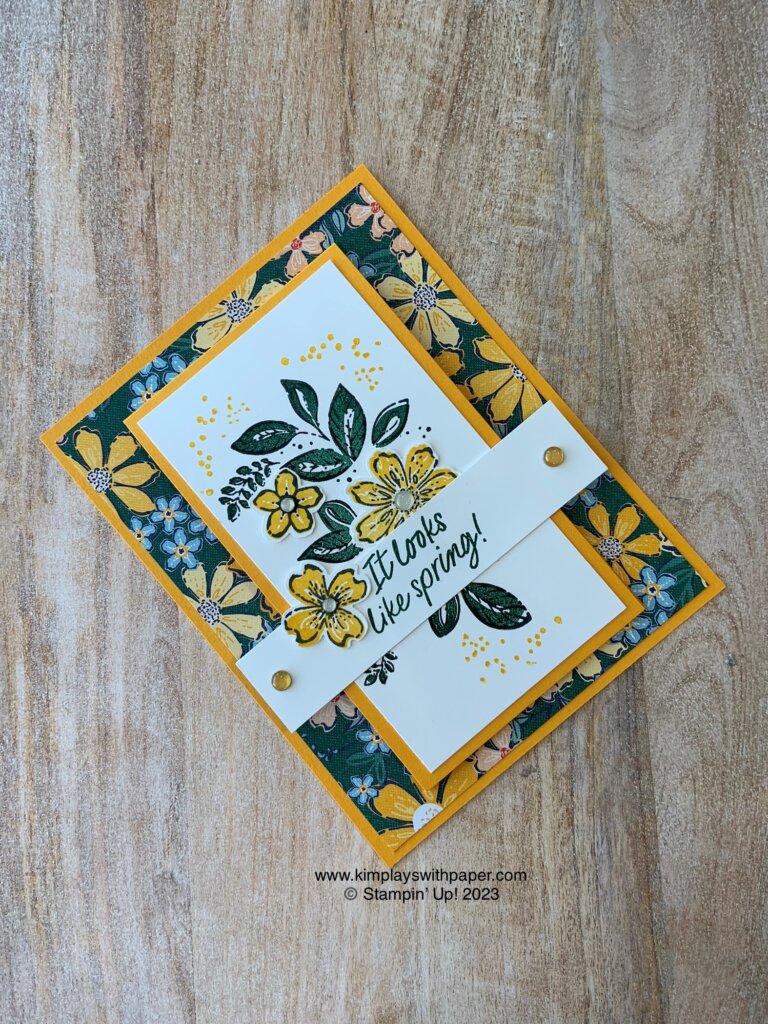
Welcome to Team Stamp It’s February Blog Hop! Thanks so much for joining us. This month, we feature all things spring. Visit all of the stampers participating in the blog hop to gather inspiration for your spring paper crafting. Leave a comment on each blog with the hashtag #stampitcontest. You could win the Sit Stay Relax Host Stamp Set.
Petal Park Bundle for Spring
For me, spring says flowers. And, when it comes, to flowers, Stampin’ Up! offers an awesome variety of flower-themed stamps, patterned paper, and coordinating dies and punches. I chose to showcase the Petal Park Bundle (Petal Park Stamp Set and Petal Park Builder Punch — buy them together and save 10 percent) and the coordinating Regency Park 6 x 6 Designer Series Paper. Find these paper crafting products beginning on page 30 of Stampin’ Up!’s January-April 2023 Mini Catalog. I also designed this card with a different opening. (See the photo below.)
Here are a few details about this card:
Mango Melody base measures 5/12″ x 4 1/4″
Regency Park Designer Series Paper measures 5 1/4″ x 4″
Mango Melody for front measures 9 1/2″ x 2 3/4″ and is scored at 4 3/4″ to make a “mini” card that attaches to card front
Two pieces of Basic White measure 4 1/2″ x 2 1/2″ and one 3/4″ x 4 1/4 for the sentiment
Sentiment from Thanks a Bunch Stamp Set. (Just a note: This set is available free with a $50 purchase before tax and shipping during SaleABration which ends February 28, 2023. Be sure to place an order and choose it as your free item before it’s no longer available.)
“Sprinkles” stamp from Beautifully Happy Stamp Set (free during SaleABration with a $100 order)
Ink includes Memento Black, Shaded Spruce, and Mango Melody.
Added Adhesive-Backed Milky Gems
The Petal Park Stamp sets features the two-step stamping technique. Click here to see a post for another card sample and instructional video using this bundle.
Here’s another fun card sample using this same design. The card below uses two SaleABration products — Thanks a Bunch stamp set and Dandy Designs 12 x 12 Designer Series Paper (available free only through February 28, 2023, with minimum purchases).
Thanks so much for visiting today. Just a reminder to check out all of the other cards and projects using the list at the end of the post. Leave a comment with the hashtag #stampitcontest. Congrats to last month’s winner: Cindy Knarr!
Imagine all the possible color combinations with this beautiful flower stamp set from Stampin’ Up! Beautifully Happy offers a two-step stamping experience. Separate stamps allow you to customize the flower image in a variety of colors. And, the sentiments cover the most general occasions such as thank you, birthday, and thinking of you.
And, what’s even better is that this set is free with a $100 purchase before tax and shipping during SaleABration. In addition, the Designer Series Paper piece comes from the Dandy Designs 12 x 12 Designer Series Paper, also available free with a $100 order during SaleABration. Offer ends February 28, 2023, or while supplies last. Click here to see the SaleABration items available free with a $100 purchase. This link shows you what’s available free with a $50 order before tax and shipping from the online store. Be sure to take advantage of these free offerings. SaleABration runs only one time this year.
Beautifully Happy Birthday Card
Here are a few details of this handmade birthday card sample:
Fresh Freesia card base measuring 11 x 5 1/4 scored at 5 1/2
Basic White base measuring 5 1/4 x 4 (2)
Dandy Designs DSP piece measures 5 1/4 x 1
Ink: Memento, Fresh Freesia, Granny Apple Green, Daffodil Delight
Fresh Freesia 3/8″ Open Weave Ribbon
Opaque Adhesive-Backed Gems
View this video to see how this card comes together.
Thanks so much for visiting my blog today. Need more inspiration? Click here to receive my free, email newsletter. I send two to three newsletters each month that include a free card making tutorial, paper crafting video, and updates on Stampin’ Up! news and specials.
Kim
Click on any of the links below to shop for this rubber stamping products used to create this card.
Stampin’ Up!’s January-April 2023 Mini Catalog offers a great variety of brand-new bundles. Purchase a stamp set in conjunction with the coordinating dies or punch and receive a 10 percent discount. This is a great way to maximize your value.
Today, I feature a card using several brand-new products from this min catalog including the Something Fancy Bundle, the Regency Park 6 x 6 Designer Series Paper, and the coordinating Petal Park Builder Punch.
Please enjoy this free tutorial offering step-by-step instructions to make this thank you card.
PAPER – Night of Navy Cardstock (100867), Basic White Cardstock (159276), Regency Park 6 x 6 Designer Series Paper (DSP) (160559)
INK – Night of Navy (147110)
OTHER – Petal Park Builder Punch (160576), Night of Navy 3/8” Bordered Ribbon (160581), Adhesive-Backed Milky Dots (160582), Stampin’ Seal (152813), Mini Glue Dots (103683), Multipurpose Liquid Glue (110755), Take Your Pick Tool (144107), Stampin’ Cut & Emboss Machine (149653)
Cutting & Scoring:
Night of Navy Cardstock — 8 ½” x 5 ½”, scored at 4 ¼” and folded in half; scrap
Basic White Cardstock – 5 ¼” x 4”, scrap
DSP – 5 ¼” x 4” (Petal Pink dotted design), 4 ¾” x 3 ½” (Balmy Blue dotted design), punched Petal Pink and Balmy Blue flowers from DSP
Ribbon – 20”
Instructions:
Stamp the thank you sentiment from the Something Fancy stamp set in Night of Navy ink on the scrap piece of Basic White. Die cut with image shown above. At the same time, die cut the larger nesting image from the Night of Navy scrap. Adhere the two pieces together.
Glue the 4 ¾” x 3 ½” DSP to the 5 ¼” x 4” DSP.
Wrap the Night of Navy 3/8” Bordered Ribbon around this piece and tie a bow, fashioning it toward the left-hand side of the card.
Adhere all to the Night of Navy base.
With Stamin’ Dimensionals, add the sentiment to the card front, straddling the ribbon, snuggling the left side near the bow.
Add the punched flowers to the top left and bottom right of the sentiment with Glue Dots as shown above.
Using the Take Your Pick Tool, add the Night of Navy and Petal Pink Adhesive-Backed Milky Dot gems to the flower centers.
Glue the white cardstock to the inside of the card.
Here are a couple of other versions of this same greeting card. I just love how changing the Designer Series Paper designs gives the card just a little different look.
Thanks so much for visiting my blog. I hope you’re inspired to create this handmade card. Click here to see a fun fold (z fold) card that uses the Regency Park Designer Series Paper and the coordinating Petal Park Builder Punch.
Newsletter Sign Up
Need more inspiration? Sign up to receive my free, email newsletter. I send two to three newsletters each month that include a card-making tutorial, paper crafting video, and updates on Stampin’ Up! news and specials. Click here and then check your email for a note from AWeber. They want to confirm you wish to receive my emails.
Kim
Click on any of the photos below to shop directly from my online store to purchase the Stampin’ Up! products used to create this handmade card.
Sign up for my newsletter and get a free tutorial!
Get Updates!
Join our mailing list to receive the latest updates from Kim!
You have Successfully Subscribed!
Current Catalogs
Follow Me
Categories
Disclaimer
The content in this blog is the sole responsibility of Kim Quade as a Stampin’ Up!® Independent Demonstrator. The use of and content of classes, services or products offered is not endorsed by Stampin’ Up!