Welcome to the Maui Achievers November 2020 Blog Hop.
Welcome to our monthly Maui Achievers Blog Hop. We’re a group of Stampin’ Up! demonstrators from around the world who have achieved the Stampin’ Up! bonus of the Maui incentive trip. We celebrate this achievement by organizing a monthly hop which helps us continue to inspire you creatively.
You may be starting here or have come from someone else’s blog – either way there’s a list at the end of this post to help you move around all the different blogs and get many amazing ideas. We all have our country listed – so if you’re looking for a demonstrator, these are top demonstrators in their country and would love to help you with your Stampin’ Up! shopping or if you’d like to join our Stampin’ Up! teams. Visit all of the blogs and leave a comment. We love to hear from you.
Triangle Santa Hat Card
Like most card makers and crafters, all the beautiful paper attracts my attention, including Stampin’ Up!’s Red Velvet found on page 63 of Stampin’ Up! August-December Mini Catalog. You get two sheets of 12 x 12 soft flocked card stock for $6. It works well for both punches and dies. I decided to have some fun with it and created a Santa hat! In fact, I couldn’t decide on some of the elements, so I made two.
This first card includes:
Pear Pizzazz card stock base
Heartwarming Hugs Designer Series Paper cut at 5 1/2 inches by 4 1/4 inches
Pear Pizza layer cut at 5 inches by 3 1/2 inches and embossed with Subtle Embossing Folder
Pom pom created with Small Bloom Punch and run through the Tasteful Textile Embossing Folder
Hat band created with piece from Rectangle Dies and run through the Tasteful Textile Embossing Folder
Letters die cut with Playful Alphabet Dies and Red Velvet. (I attached Adhesive Sheets to the dies before running them through the Stampin’ Cut & Emboss machine. That makes it easier to apply letters to the card front.)
Red Rhinestone embellishments
Thanks so much for stopping by today! Be sure to visit all of the blog to grab some paper crafting inspiration.
Kim
List of Blog Hoppers
List of Products Used
Click on any of the graphics below to go directly to my online store to purchase the supplies to create this card.
Whimsical and fun, the super cute animals work well for both kid and adult cards and projects. They also lend themselves well to coloring. Although I used Stampin’ Up!’s Stampin’ Blends, you could also use color pencil, watercolor pencils, Water Painters, Stampin’ Write Markers, or even Crayons to dress us these holiday themed graphics.
This guy is just precious. I stamped him with Black Memento Ink and colored him with Stampin’ Up!’s Crumb Cake and Real Red Stampin’ Blends. The sentiment comes from the Banner Year stamp set, and the piece is layered on one of the designs from the “Tis the Season 6 x 6 Designer Series Paper.
You can’t get more fun than an ice skating polar bear! He’s colored with the Cherry Cobbler and Old Olive Stampin’ Blends to match the color scheme of the Heartwarming Hugs Designer Series Paper.
This card features singing mice! I also used the 6 x 6 Christmas Classic Designer Series Paper (available with the new Curvy Celebrations offering). Once again, I colored with Stampin’ Blends. This is just perfect for the piano teacher for whomI created this card. The sentiment comes from the Itty Bitty Christmas stamp set.
I hope you’ve enjoyed my Warm and Toasty Card Samples. Please let me know how I can help you in your paper crafting journey. If you’re not currently working with a Stampin’ Up! demonstrator, I’d love it if you would choose me.
I’m offering a Heartwarming Hugs Free Tutorial today as well as a video.
I love a lot of things about this card. It:
Showcases the Heartwarming Hugs Designer Series Paper.
Is festive!
Features the Gift Wrapped stamp set and coordinating Gift Bow Builder Punch.
Goes together very easily and can be adapted to a variety of papers and sentiments.
Heartwarming Hugs Free Tutorial
Stampin’ Up! Supplies:
STAMPS – Gift Wrapped Bundle (155155)
PAPER – Heartwarming Hugs Designer Series Paper (153492), Pear Pizzaz (131201), Real Red (102482), Whisper White (100730)
INK – Real Red (147084), Mossy Meadow (147111)
OTHER – Gold Cord-Wonder of the Season Ribbon Combo Pack (153537), Mini Glue Dots (103683), Paper Snips (103579), Stampin’ Seal (152813), Stampin’ Dimensionals (104430)
Cutting & Scoring:
Pear Pizzazz Card Stock – 8 ½” x 5 ½” – score at 4 ¼”, 3” x 3” scrap
Real Red Card Stock – 5 1/4” x 4”
Whisper White – 4 ½” x ¾”, 5 ¼” x 4”
Heartwarming Hugs Designer Series Paper – three varied designs – 1 ½” x 3 ¾”
Gold Cord – 8”
Instructions:
Fold the 8 ½” x 5 ½” Pear Pizzazz Card Stock in half at the score line.
Using Stampin’ Seal, afix the three pieces of Heartwarming Hugs DSP onto the Real Red piece, equally spaced.
Adhere this piece to the Pear Pizzazz base.
Stamp the “A Very Merry Christmas” sentiment with Real Red ink on the Whisper White 4 ½” x ¾” piece toward the right-hand side, leaving space to add the bow later.
Adhere the sentiment to the front of the card with Glue Dots.
Stamp a bow from the Gift Wrapped stamp set with Mossy Meadow ink onto the 3” x 3” Pear Pizzazz scrap.
Punch the image using the coordinating Gift Bow Builder Punch.
With Stampin’ Dimensionals, place the bow on the card front, on top of the sentiment piece, to the left of the print, as shown in the photo above.
Create a bow with the Gold Cord. Attach to the top of the paper bow in the center with a Glue Dot.
Attach the 5 ¼” x 4” Whisper White panel to the inside of the card.
Thank you for stopping by today! Please let me know if you have questions about this card or any other paper crafting project. I’d love to be you Stampin’ Up! demonstrator.
Kim
Video Directions
List of Products Used
Click on any of the graphics below to shop directly from my online store.
I’m sharing a Thanksgiving card in gold for today’s Team Stamp It’s October 2020 Blog Hop.
Welcome to our monthly blog hop where members of Tami White’s Stampin’ Up! talented team share a collection of cards and projects. This month’s theme is Thanksgiving and fall. Be sure to visit each blog and leave a comment with the hashtag #stampitcontest. One person will win a Boho Indigo Medley Card Kit. Look for the list of blog hoppers at the end of this post.
Happy Thanksgiving in Gold
Stampin’ Up!’s Gold Cards and Envelopes provided the inspiration for my card today. Find them on page 51 of the August-December 2020 Mini Catalog. You receive a package of 10 cards and coordinating metallic gold envelopes for $10. These Very Vanilla bases feature gold detailing around the edges, perfect to frame a photo or stamped image. They help you create quick and easy cards that are beautiful, too!
To make the leaf accents, I grabbed the leaf from the Rooted in Nature stamp set. I heat embossed the leaf with Gold Embossing Powder. With the sponge daubers, I then added different colors of ink to the embossed image. The colors used include: Crushed Curry, Blackberry Bliss, Cherry Cobbler, Pumpkin Pie, and Old Olive. I wiped away any excess ink with a paper towel.
With the coordinating leaf die from the Nature’s Roots Dies, I die cut with the Stampin’ Cut and Emboss Machine and adhered three leaves to the card with Glue Dots.
The sentiment comes from the Banner Year stamp set and is stamped with Blackberry Bliss. The Holiday Rhinestone Basic Jewels add some blingy accents.
Thanks for visiting Kim Plays with Paper today. Be sure to follow the links below to visit all of the blogs and leave a comment. Congratulations to LaVonne Smejkal . She won the prize for last month’s hop.
For visual instructions, please take a look at this video.
Showcasing #simplestamping using Designer Series Paper.
#simplestamping
Recently, Stampin’ Up! has focused on #simplestamping: the art of creating a handmade card with just rubber stamps, ink, and paper. After all, these provide the underpinnings of paper crafting. It allows us to focus on the basics of the craft, and we realize we can make beautiful projects with a handful of supplies. It’s a great place to start for beginning stampers, and it challenges seasoned stampers to step away from the extras.
Each month, Stampin’ Up! issues a #simplestamping challenge. For October, it calls for using rubber stamps, ink, paper, and ribbon with a thank you card.
Designer Series Paper Sale
I combined the challenge with the Designer Series Paper sale effective through October 31, 2020. Fifteen of Stampin’ Up!’s double-sided, patterned papers are 15 percent off. It includes selections from both the 2020-2021 Annual Catalog and the August-December 2020 Mini Catalog. See the PDF here, or click on the photos at the end of the post to check them out and shop.
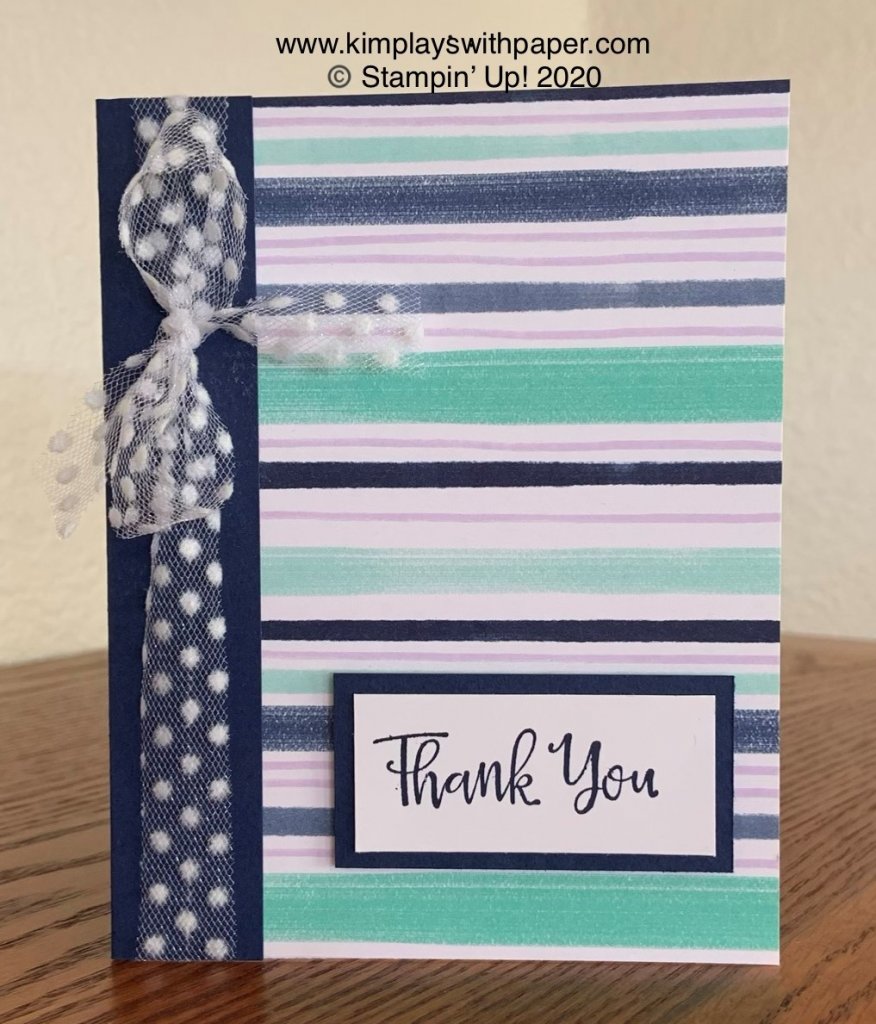
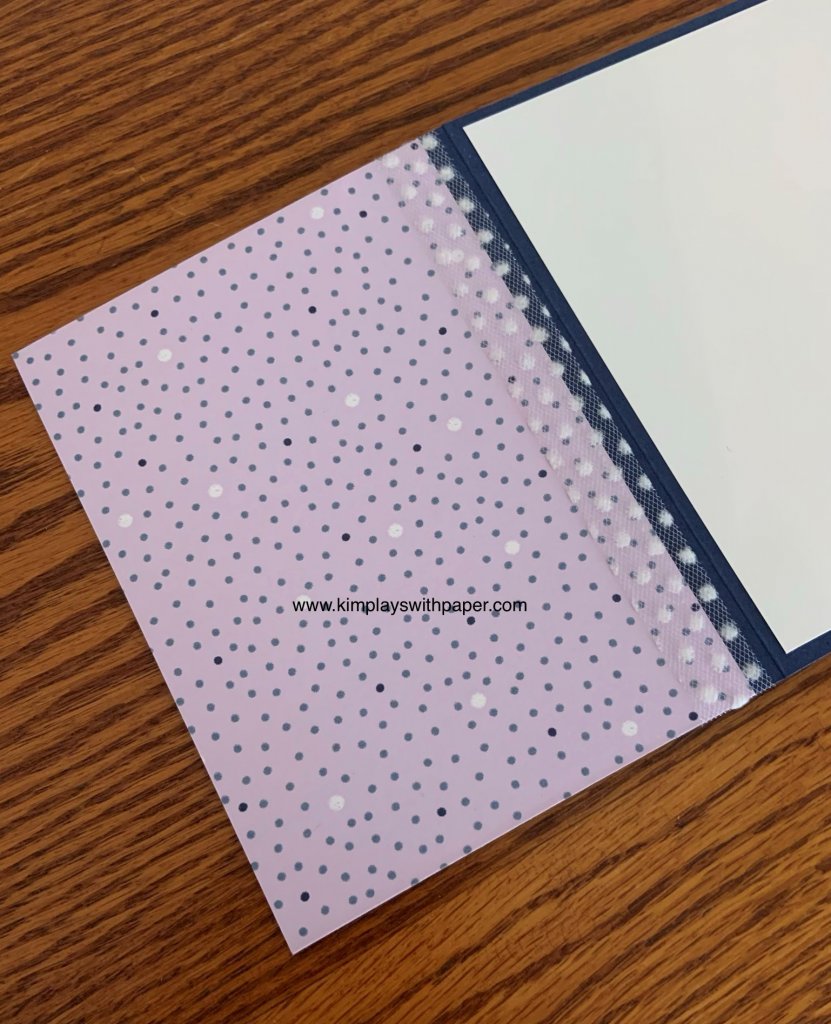
I love this card design because it showcases both sides of the paper. That’s often the most difficult part of crafting: choosing which side to use! Note: It uses the Playing with Patterns.
Here are a few cutting details. (Be sure to watch the video below showing how this design goes together. See other cards using the paper currently offered on the sale.)
Card stock for the base: 5 1/2 x 5 1/4 inches, scored at 1 inch on the 5 1/4-inch side.
A piece of patterned paper cut at 5 1/2 x 4.
Complementary ribbon.
A sentiment.
Thanks for stopping by today. Please message me or leave a comment if you have questions about today’s card or the paper sale. Click here to begin shopping. If you’re not currently working with another demonstrator, I’d love to help you with your card-making and memory keeping projects.
Join me Tuesday mornings at 8:30 a.m. Pacific Time for a Facebook Live on my Facebook business page. I show fun and easy stamping projects.
Sign up for my newsletter and get a free tutorial!
Get Updates!
Join our mailing list to receive the latest updates from Kim!
You have Successfully Subscribed!
Current Catalogs
Follow Me
Categories
Disclaimer
The content in this blog is the sole responsibility of Kim Quade as a Stampin’ Up!® Independent Demonstrator. The use of and content of classes, services or products offered is not endorsed by Stampin’ Up!