Welcome to the February 2021 Maui Achievers Blog Hop!
We’re a group of Stampin’ Up! demonstrators from around the world who have achieved the Stampin’ Up! bonus of the Maui incentive trip. We celebrate this achievement by organizing a monthly hop which helps us continue to inspire you creatively.
You may be starting here or have come from someone else’s blog – either way there’s a list at the end of this post to help you move around to all the different blogs and gather many amazing ideas. We have all listed our country – so if you’re looking for a demonstrator, these are top demonstrators in their country and would love to help you with your Stampin’ Up! shopping or if you’d like to join our Stampin’ Up! teams. Visit all of the blogs and leave a comment. We love to hear from you.
Get Inspired
As crafters and creators, we all experience those days when we need a little inspiration. Maybe you’ve lost your mojo. Perhaps you’re just feeling blah. How do you get inspired to dust off the ink and make a card?
I often reach for Stampin’ Up!’s catalogs, browsing the many pages of samples created by the company’s talented design artists. The inspiration for this card popped out at me from page 32 of the January-June 2021 Mini Catalog. The sample of the 3 x 3 card on the top right-hand corner caught my eye. But I really wanted to create a full-size version. I made a few adjustments, substituted like products for some I don’t have, and there it was.
I’m so excited about how this turned out! Inspired, I’m thinking of ways I can mix these products up with different color combinations and shapes.
Thanks for stopping by today. Please contact me if you have questions about this card or other paper crafting questions. Be sure to visit all of the blogs listed below for more inspiration.
February 2021 Maui Achievers Blog Hop
Stampin’ Up! Products Used to Create this Card
Click on any of the graphics below to go directly to my online store to purchase these items.
Stampin’ Up!’s January-June 2021 Mini Catalog has been live for one month already. It’s filled with an awesome variety of new stamp sets, die cuts, punches, Designer Series Paper, ribbon, and more. I hope you’ve had a chance to play with some of the products.
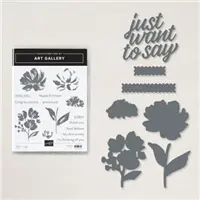
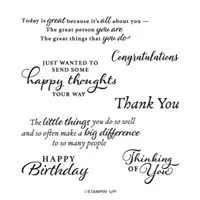
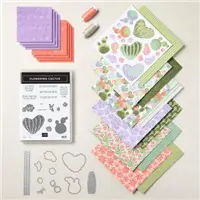
As you may know, my list of faves include the Flowering Cactus Medley and the Friendly Flamingo Bundle. (I’ve created and posted quite a few samples using these products.) Every so often, I need a bunch of cards — in a hurry. I really like the font showcased in the Happy Thoughts stamp set. The sentiments lend themselves well to all of the occasions I use the most: They include: Happy Birthday, Thinking of You, Thank You, and Congratulations.
I found a clean and simple sketch (inspired by Mary Bush), that allows me to use the above sentiments. The variety of Designer Series Paper also lets me change the look and feel of the card. I call it my Clean and Simple Happy Thoughts card.
Clean and Simple Happy Thoughts
Here are the basic cutting and card stock measurements. (Also, look for a how-to video at the end of the post):
Card stock base: 8 1/2 x 5 1/2
Card stock layer: 3 1/4 x 4 1/4
Designer Series Paper of your choice: 3 x 4 (the free Sale-A-Bration choices work well as do any of Stampin’ Up!’s patterned paper)
Label with Tasteful Labels Dies (the Stitched Rectangles also work well here)
Coordinating ribbon and embellishments
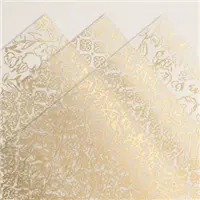
This card uses the Flower & Field Designer Series Paper you can earn free during SaleABration with a $50 order before tax and shipping.
This card features Stampin’ Up!’s Paper Blooms Designer Series Paper that you can earn free with a $50 purchase (before tax and shipping) during SaleABration.
Clean and Simple Happy Thoughts Video
Sale-a-Bration Runs through February 28
This is Stampin’ Up!’s most exciting sale of the year. Receive free product with minimum purchases of $50 and $100. Choose from nine different products, including stamp sets and Designer Series Paper. Take this opportunity to get free items and stock up an array of beautiful paper.
Thanks so much for stopping by today. I hope my ideas inspire you to create something today! If you’re not currently working with a Stampin’ Up! demonstrator, I’d love to help you in your paper crafting journey.
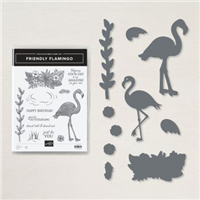
Today’s card features two of my favorite products from Stampin’ Up!’s January-June 2021 Mini Catalog. The Friendly Flamingo Bundle and the Blending Brushes.
I created a fun background with the Blending Brushes found on page 62. You receive three brushes for $12. I’ve included a free tutorial below and a video showing how I used the brushes to create several backgrounds.
OTHER –Mini Glue Dots (103683), Stampin’ Seal (152813), Pearl Basic Jewels (144220), Blending Brushes (153611), Adhesive Sheets (152334)
Cutting & Scoring:
Bermuda Bay – 8 ½” 5 ½”, scored at 4 ¼”, 4 ½” x 3 ¼”
Basic White – 5 ¼” x 4”, 4 ¼” x 3”, 4” x 3”, scrap
Calypso Coral – 5 ¼” x 4”
Instructions:
Fold the Bermuda Bay card stock in half on the score line.
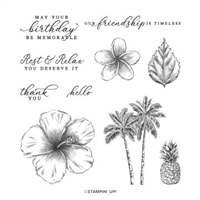
Stamp the palm tree (focusing on the fronds only) from the Timeless Tropical stamp set with Calypso Coral ink around the edges of the Calypso Coral 5 ¼” x 4” piece of card stock.
Adhere this stamped Calypso Coral piece onto the Bermuda Bay base.
Using the Blending Brushes, and using one color at a time, apply the Crumb Cake, Misty Moonlight, and Bumblebee ink onto the 4 ¼” x 3” piece of Basic White card stock, starting from the bottom and working up.
Layer the Adhesive Sheet onto the 4” x3” Basic White card stock.
Stamp the flamingo image from the Friendly Flamingo stamp set onto that piece. Die cut with coordinating die.
With Calypso Coral ink, stamp the “Just Be You” sentiment in the upper left-hand corner of the blended piece.
Remove the adhesive backing from the flamingo and adhere the image to the blended piece with the sentiment.
Adhere this piece onto the 4 ½ x 3 ¼” Bermuda Bay card stock.
Using Stampin’ Seal or Glue Dots, place this onto the Bermuda Bay/Calypso Coral base.
Stamp a small flower from the Friendly Flamingo stamp set on the Basic White scrap with Bermuda Bay ink.
Die cut with coordinating die.
Adhere flower to the flamingo’s neck.
Embellish with a Pearl Basic Jewel.
Add the 5 ¼” x 4” Basic White card stock to the inside of the card.
Please enjoy this video showing you a how I used the brushes and some ideas for handmade greeting cards.
Thank you for visiting my blog today. I’d love to include you on my email newsletter list. Click here to subscribe.
Kim
Blending Brush Card Sample–List of Products Used
Click on any of the photo graphics below to go directly to my online store to shop 24/7.
Welcome to the Maui Achievers January Blog Hop. We’re a group of Stampin’ Up! demonstrators from around the world who have achieved the Stampin’ Up! bonus of the Maui incentive trip. We celebrate this achievement by organizing a monthly hop which helps us continue to inspire you creatively.
You may be starting here or have come from someone else’s blog – either way there’s a list at the end of this post to help you move around all the different blogs and get many amazing ideas. We all have our country listed – so if you’re looking for a demonstrator, these are top demonstrators in their country and would love to help you with your Stampin’ Up! shopping or if you’d like to join our Stampin’ Up! teams. Visit all of the blogs and leave a comment. We love to hear from you.
Blending Brush Backgrounds
Stampin’ Up!’s January-June 2021 Mini Catalog features a host of brand-new products. It includes everything from exclusive stamp sets, coordinating dies and punches, Designer Series Paper, ribbon, embellishments, and tools.
The Blending Brushes (on page 70) offer a new opportunity to add dimension to your paper crafting projects. These brushes lend themselves to a host of techniques. I’ve started using these velvety soft brushes to create backgrounds.
The card above uses elements from the Flowering Cactus Product Medley. I’ve been “stuck” on the medley and thought the blending brushes create a beautiful background (just like the desert sunsets). The cactus sits against a soft scene created with Crumb Cake, Misty Moonlight, and Bumblebee ink sponged on with the brushes.
The card above features two stamps each available free with a $50 purchase (before tax and shipping) during Stampin’ Up’s SaleABration promotion. (Card inspired by Theresa Huffman). Working from the bottom up, the blended colors are Misty Moonlight, Calypso Coral, and Bumblebee. I just love the soft effect delivered with the use of the Blending Brushes.
Thanks for stopping by today. Be sure to visit all of the sites on the Maui Achievers January Blog Hop.
Kim
Maui Achievers January Blog Hop Participants
List of Product Used
Click on any of the photo graphics below to go directly to my online store to shop 24/7. I appreciate your support!
Stampin’ Up!’s Sale-A-Bration promotion has always been my favorite time of the year. It’s so exciting! Before I became a demonstrator, I saved my birthday and Christmas money. I splurged and received a bunch of new stamp sets and other crafting products. Who doesn’t love free product?
It’s that time again! Receive your choice of free and exclusive product when you make minimum purchases of $50 and $100. The promotion runs through February 28 and includes nine different stamp sets and Designer Series Paper. The selections make it easy for you to create a variety of cards for varying occasions. Here’s a PDF of the catalog. If you want a hard copy, please contact me.
The card above uses the Approaching Perfection stamp set and Oh, So Ombre 6 x 6 Designer Series Paper. Both are available with $50 purchases (before tax and shipping).
Approaching Perfection Free Stamp Set
Card details:
Blackberry Bliss card stock base
Calypso Coral Layer – 5 1/4 x 4 inches
Oh, So Ombre DSP – 5 x 3 3/4 inches
Calypso Coral strip – 5 x 1 1/2 inches
Oh, So Ombre strip – 5 x 1 1/4 inches
Layering Circles
Stitched Shapes
Calypso Coral ink
Be sure to watch the video below to see how I accomplished the masking technique and the ink to stamp technique.
Here are a few more card samples using this set. I have a bunch of birthdays this month, so these cards will be put to good use.
This card using the Granny Apple Green design of the Oh, So Ombre DSP. I colored the ribbon with Stampin’ Up!’s Night of Navy Stampin’ Blends.
I added Night of Navy card stock and Holiday Rhinestone Basic Jewels with the die cut from Stitched So Sweetly.
Definitely a #simplestamping card here. Rubber stamps, ink, and paper in Petal Pink and Night of Navy.
Another #simplestamping card using a free Sale-A-Bration item: Paper Blooms.
Approaching Perfection Free Stamp Set Video
Thanks for stopping by today! I appreciate your time! If you’re not currently working with another Stampin’ Up! demonstrator, I’d love to help you in your paper crafting journey.
Kim
Click on any of the images below to shop directly from my online store 24/7.
Sign up for my newsletter and get a free tutorial!
Get Updates!
Join our mailing list to receive the latest updates from Kim!
You have Successfully Subscribed!
Current Catalogs
Follow Me
Categories
Disclaimer
The content in this blog is the sole responsibility of Kim Quade as a Stampin’ Up!® Independent Demonstrator. The use of and content of classes, services or products offered is not endorsed by Stampin’ Up!