All paper crafters take note! World Card Making Day is Saturday, October 7, 2023 Celebrate with a virtual stamp-a-long sponsored by Stampin’ Up! Click here to see all of the details and to register.
The event features cards created with three of Stampin’ Up!’s bundles including Circle Sayings, Earthen Textures and a brand-new, sneak peek offering from an upcoming catalog: Heartfelt Hexagon (Item number 162889 for $37.75). You’ll love the sentiments and the ease of using a punch to create cute and quick cards.
Today, I share three cards created with this stamp set and punch bundle.
The sympathy card above uses a piece of Designer Series Paper from the Masterfully Made 12 x 12 paper (5 1/2″ x 4 1/4″), a layer of vellum (5″ x 3 3/4″), and Berry Burst leaves punched with the Bough Punch and from the Soft Shimmer 12 x 12 Specialty Paper.
Below, I use the Glorious Gingham 6 x 6 Designer Series Paper (Berry Burst and Blueberry Bushel each measuring 2″ x 4 3/4″) to make a quick and easy birthday card. The embossing folder is part of the Basics 3D Embossing Folder Collection found online in Stampin’ Up!’s Online Exclusives.
And, next is a thinking of you card using Stampin’ Up!’s Countryside Inn 12 x 12 Designer Series Paper and another embossing folder from the Basics 3D Embossing Folder Collection.
Don’t you just love the versatility of the stamp set and punch combo? During World Cark Making Day, you’ll gain even more ideas on how to use this bundle.
Heartfelt Hexagon Card Samples Video
Thanks so much for visiting my blog today. I encourage to sign up for the free World Card Making Day event. It’s a great opportunity to stamp with others and gain so card-making inspiration. Please contact me if you have questions or if I can help in any way!
Kim
Click on the photos below to shop from my online store to purchase the products to create the sympathy card.
Each month, Stampin’ Up! issues a #simpletstamping challenge to its demonstrators. This month: Make a handmade card with a hello theme with just rubber stamps, ink, and paper and a punch. It’s all about getting back to the very basics of stamping.
Today, I share my card for this month’s challenge. I use the brand-new Circle Sayings Bundle. The bundle includes the Circle Sayings stamp set and a 2 3/8-inch circle punch. Buy the set and punch as a bundle and save 10 percent. Look for it in Stampin’ Up!’s brand-new 2023-2024 Annual Catalog on page 17. It goes live May 2. Be sure to put this bundle on your wish list.
It’s perfect for creating quick and easy cards. And it includes a variety of sentiments that work well for all occasions: thank you, birthday, hello, smile, thinking of you, and celebrate. Mix and match the images and sentiments to create the perfect card.
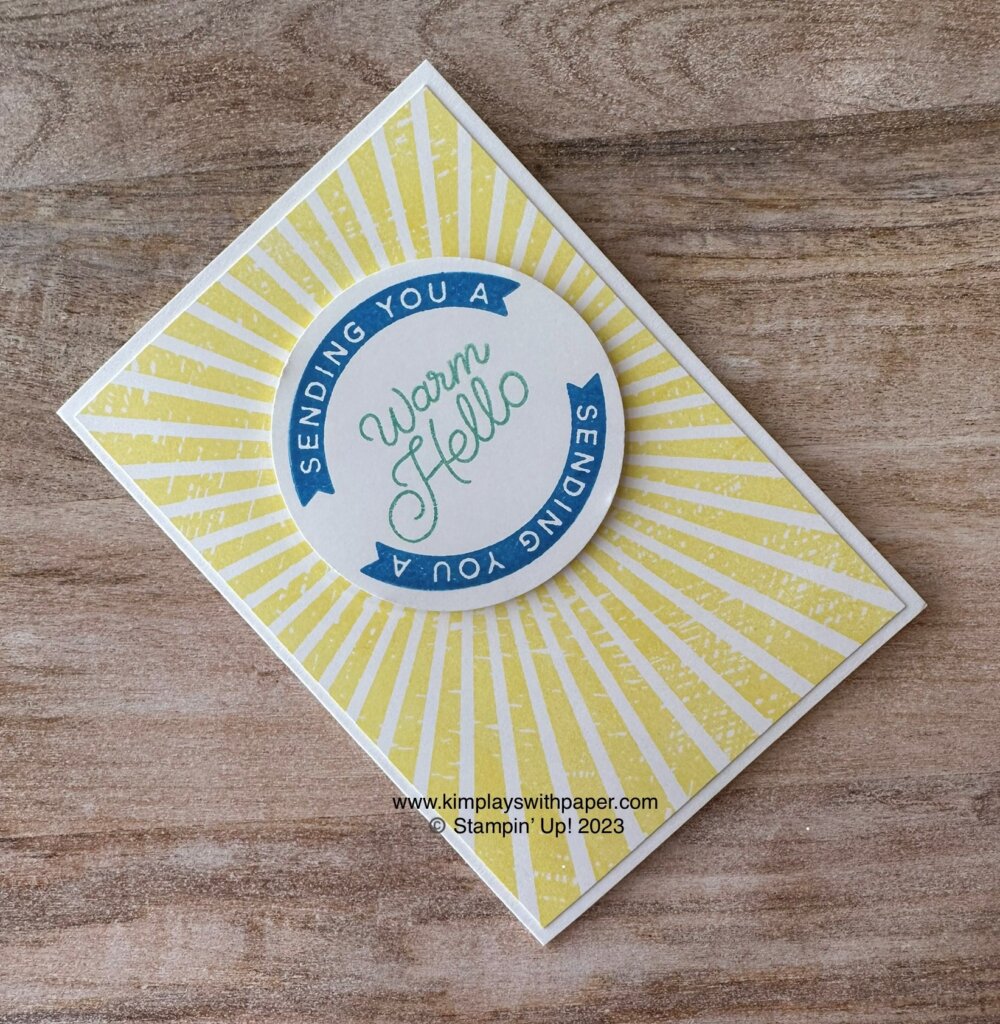
Circle Sayings #simplestamping Card
Here are a few details of this card:
Used Stampin’ Up!’s Basic White Notecards and Envelopes. You receive 20 pre-cut and scored notecards and 20 envelopes for $8. Not only are these a great value, but they save time, too.
Rays of Light Stamp Set for the background. Stamped with the new Lemon Lolly Classic Stampin’ Pad
“Sending You A” sentiment stamped with the new Azure Afternoon Classic Stampin’ Pad
“Warm Hello” sentiment stamped with Pool Party ink
Quick note: I punched the circle first (I generally stamp first, punch second) and then stamped the “Sending You ” sentiment. I found it easier to place the sentiment at the top and bottom. But do whatever works best for you.
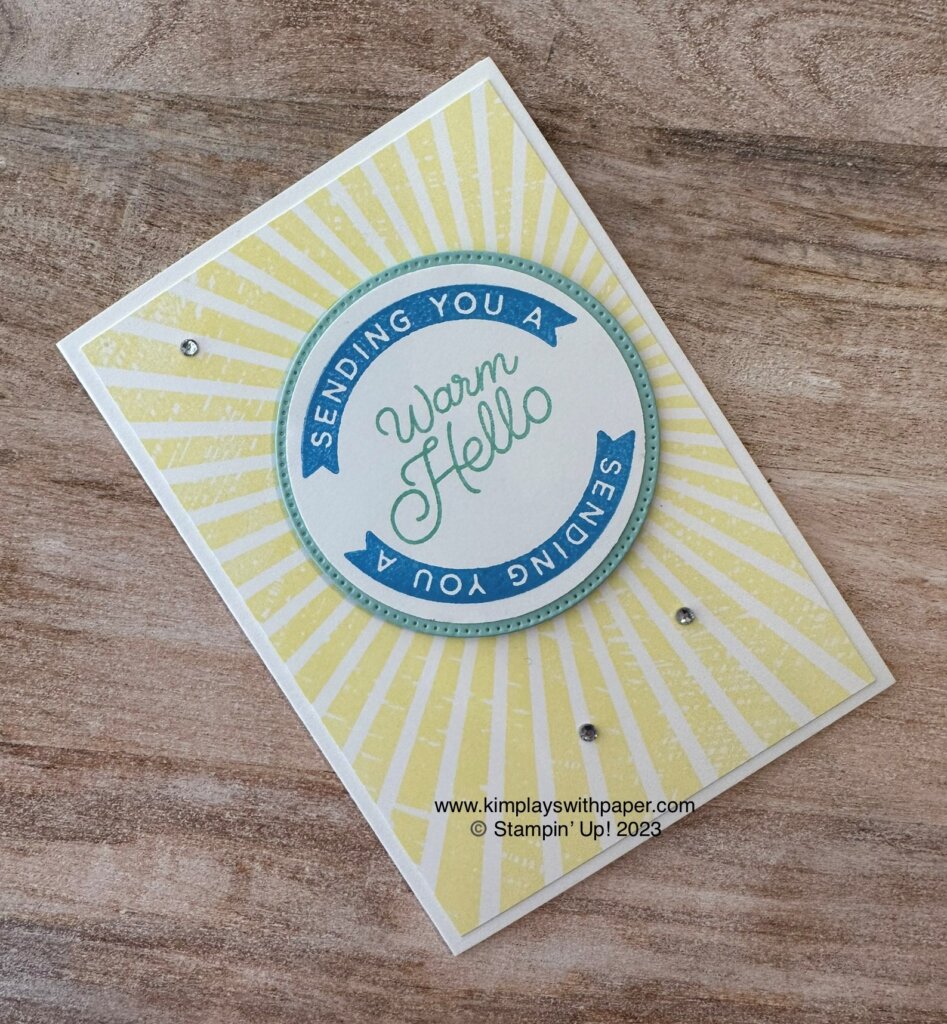
Here is a “stepped up” version of the card above. I added a Pool Party stitched circle from the Stylish Shapes Dies and some Basic Rhinestone Jewels.
Thanks so much for visiting my blog today. Enjoy this #simplestamping card and make some of your own to send.
Kim
Click on any of the links below to shop directly from my online store to purchase the products used to make this card. Just a note: If you’re visiting before May 2, remember that some of the items aren’t available until then.
Card-making inspiration comes from many places. For today’s card and free tutorial, I spotted a sketch on Pinterest and adapted it to fit the Season of Chic stamp set. Find it on page 99 of Stampin’ Up!’s Annual Catalog.
Click here to see another blog post with additional cards using this sketch.
PAPER – Petal Pink (146985), Pool Party (159259), Texture Chic 12 x12 Designer Series Paper (158808), Basic White Cardstock (159276)
INK – Pool Party (147107), Petal Pink (147101), Soft Suede (147115)
OTHER – Stylish Shapes Dies (159183), Stitched Rectangle Dies 151820) Pool Party Stampin’ Blends (154894), Pearl Basic Jewels (144219), Stampin’ Seal (152813), Stampin’ Dimensionals (104430), Mini Glue Dots (103683), Stampin’ Cut & Emboss Machine (149653)
Cutting & Scoring:
Petal Pink – 11” x 4 ¼”, scored at 5 ½” and folded in half
Pool Party – 1 ¾” x 5”
Basic White Card Stock – 2” x 5”, 3 ½” x 1”, 5 ¼” x 4”
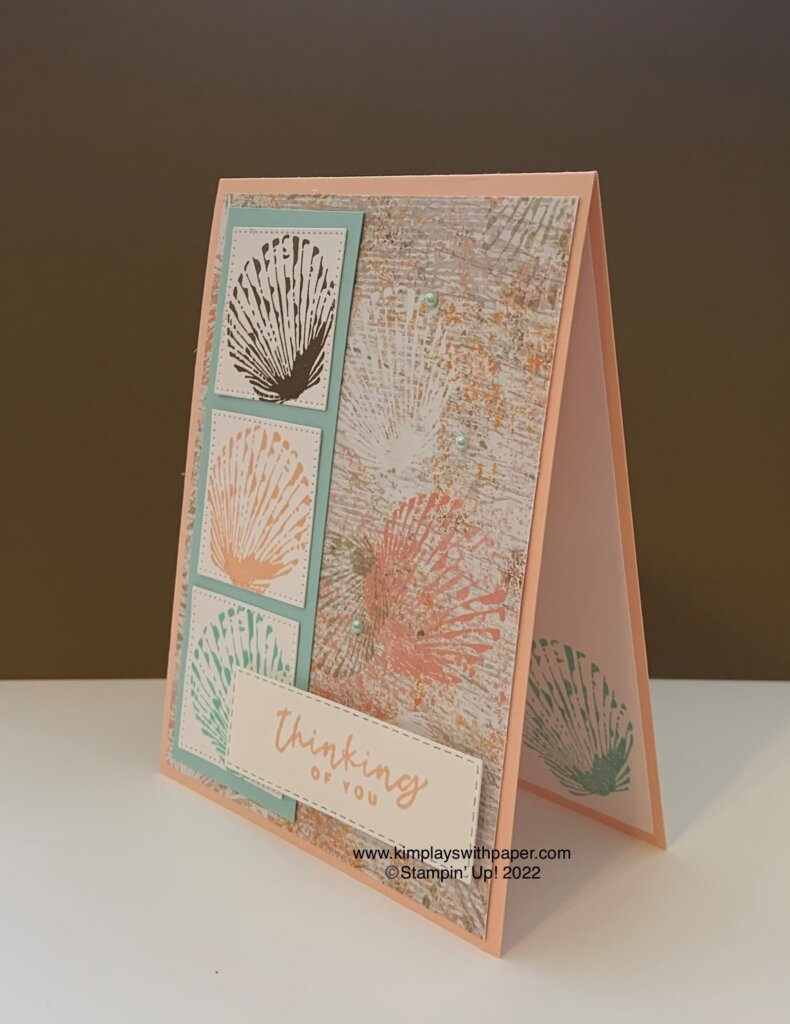
Texture Chic DSP – 5 ¼” x 4” (seashell pattern)
Instructions:
With the 1 ½” square from the Stylish Shapes Dies, die cut three squares from the 2” x 5” Basic White Card Stock.
Die cut a Stitched Rectangle 3” x 3/4” from the 3 ½” x 1” Basic White Card Stock.
Stamp the seashell on each square: one with Pool Party, one with Soft Suede, and one with Petal Pink.
Ink the sentiment with Pool Party and stamp on the rectangle.
Add the DSP to the Petal Pink card front.
Adhere squares on the Pool Party Card Stock. With adhesive of choice, glue this piece to the DSP on the lefthand side, as shown above.
Place Stampin’ Dimensionals on the back of the sentiment and place on the card front.
Color three pearls with the Pool Party Stampin’ Blends.
Add pearls to card front.
Stamp a seashell on the remaining Basic White Card Stock and adhere to center of card.
Thanks so much for visiting my blog today. Get more ideas by signing up to receive my free email newsletter. Click here. I send two to three newsletters each month that include a free tutorial, video, and updates on Stampin’ Up! news.
Kim
Click on any of the graphics below to shop directly from my online store.
I was scrolling Pinterest one day. That’s all i need to say, right? But a card by Colleen Magness caught my eye. She shared a video demonstrating the die stenciling technique. So fun! I had to try it for myself. In case, you haven’t seen it, I’m sharing my interpretation of her technique.
Blessings of Home Die Stenciling Technique
This is how it works:
Choose a stamp set with a die. Flower sets generally work well. Here, I use Blessings of Home. (Find it on page 75 of Stampin’ Up!’s 2022-2023 Annual Catalog. ) The Nature’s Prints stamp set also works well. See a sample of that card below.
Die cut the flower image. It helps to use Thick Basic White card stock.
Stamp the flower image on your card front. (I used a die cut from the new Deckled Rectangle Dies.)
Lay the stencil over the top of the flower.
With a blending brush, apply ink to the image within the stencil portion. I used the same color ink for both. (Blackberry Bliss)
Remove the stencil.
Cool technique, right?
You can then add your own Designer Series Paper, sentiment, and embellishments. Here, I added used a piece of patterned paper from the Design a Daydream 12 x 12 Designer Series Paper (have a party and you could earn this free), a sentiment from the Art Gallery stamp set, White Seam Binding, and Pearl Basic Jewels colored with Black Berry Bliss Stampin’ Blends.
See the card below for a card that uses a Pool Party color scheme in conjunction with the die stenciling technique.
The card above uses the Nature’s Print stamp set
Blessings of Home Die Stenciling Technique Video
Thanks so much for visiting my blog today! I hope you enjoyed learning a new card-making technique. Look through your stamp collection to see which bundles will work for this project.
Need more inspiration? Sign up to receive my free, email newsletter by clicking here. I send two to three emails each month that include a free tutorial, video, and updates regarding Stampin’ Up! news and specials.
Kim
Click on any of the pictures below to shop directly from my online store.
The bundle includes the Cactus Cuties photopolymer stamp set and Cactus Builder Punch. Purchase them as a bundle and save 10 percent.
Cactus Cuties Card Samples
This card uses patterned paper from the 6 x 6 2 In Color 2021-2023 Designer Series Paper Assortments. These are also available in 2020-2022 In Color Assortments as well as Brights, Regals, Subtles,and Neutrals. I selected Polished Pink, Evening Evergreen, and Soft Succulent.
Stampin’ Up!’s large color palette makes it easy to stamp the cactus in a variety of colors. It offers a lot of green hues: Granny Apple Green, Mossy Meadow, Old Olive, Garden Green, Shaded Spruce, Soft Sea Foam, Pear Pizzazz, Mint Macaron, and Just Jade. Imagine all of the possibilities!
The card above uses Pear Pizzazz, Garden Green, and Poppy Parade.
The clean and simple card above uses a strip of Designer Series Paper from SaleABration’s Sunshine & Rainbows. (You might have a package of this laying around.)
I chose the color combination of Crushed Curry and Cajun Craze for the card above and used Stampin’ Up!’s note cards. Precut and scored, you receive 20 cards and envelopes for $20. Very easy to use to create a lot of cards in a hurry.
Another with the easy note cards. Love the little glimmer flowers.
Cactus Cuties Card Samples Video
Thanks so much for stopping by my papercrafting blog today. I hope you found some inspiration. I’d love to have you subscribe to my free email newsletter. I send two to three newsletters a month that include a free tutorial, video, and updates about Stampin’ Up! products and specials. Click here and then watch your email for a confirmation from Aweber.
Kim
Click on any of the graphics below to shop directly from my online store.
Sign up for my newsletter and get a free tutorial!
Get Updates!
Join our mailing list to receive the latest updates from Kim!
You have Successfully Subscribed!
Current Catalogs
Follow Me
Categories
Disclaimer
The content in this blog is the sole responsibility of Kim Quade as a Stampin’ Up!® Independent Demonstrator. The use of and content of classes, services or products offered is not endorsed by Stampin’ Up!