Welcome to Team Stamp It’s January Blog Hop! Thanks so much for joining us. This month, we feature cards and projects with a Valentine theme. Get inspiration from a variety of talented stampers. Be sure to leave a comment on each blog for a chance to win the Birthday Sparkle Kit.
For my project, I’m sharing a Valentine card using a book binding fun fold.
Below, I offer some measurements to help you get started making this card. Be sure to watch the video below to see how it all comes together.
Bubble Bath cardstock measuring 11 x 4 1/4, scored and folded at 5 1/2 and 6 3/4
Made with Love 12 x 12 Designer Series Paper measuring 3 3/4 x 3 3/4 and 3 3/4 x 3/4
Basic Black cardstock measuring 4 x 4 and 1 x 4
Image stamped in Designer Series Paper with Real Red ink
Bubble Bath 1/8-inch Faux Linen Ribbon
Linen Thread
Embellish with hearts punched with the Bee Builder Punch (Real Red) and Basic Black
Traditional Sparkling Sequins
Here’s a view of the inside of the card:
How to Video
From my craft room in Mesa, Arizona, I offer step-by-step instructions for creating this book binding fun fold.
I do hope you’ve enjoyed this Valentine project. Remember to visit all of the blogs participating in the hop to gain more inspiration. Leave a comment for your chance to win the Birthday Sparkle Kit.
Congrats to last month’s winner:
Thanks so much for visiting. Please let me know if you have questions about this card or other projects. I’m happy to help.
Kim Quade, Stampin’ Up! demonstrator in Mesa, Arizona
Visit the Other Blogs
Click on the links below to visit the other stampers.
Supply List
Click on any of the graphics below to shop for the paper crafting products to create this card at home:
This week, I’ve been playing with some brand-new Stampin’ Up! products: the Banner Sayings Bundle and the Lasting Linen background stamp set.
These products are part of Stampin’ Up!’s newest Online Exclusives release. See the fresh products in a PDF flyer by clicking here. Or, hop right to the online store by clicking here.
Today’s card features the Banner Sayings Bundle — a fun stamp set filled with an array of awesome sentiments and a punch offering three different banner punch features.
Measurements and Details
Thick Basic White cardstock base measuring 8 1/2 x 5 12, scored and folded at 4 1/4
Floral Impressions 12 x 12 Designer Series Paper measuring 5 1/4 x 4
Basic White cardstock piece die cut with Textured Notes Dies
Five DSP strip punched with the Three Banner Punch
Sentiment stamped with Secret Sea ink on Basic White cardstock. Punch with Three Banner Punch.
2025-2027 In Color Flat Pearls
Earlier this week, I shared two other cards using the Banner Sayings Bundle and the Lasting Linen Stamp Set. See the cards below. Click on the pictures to see the post.
I hope you enjoy these samples. Please let me know if you have questions about them. I’d love to help.
Need more inspiration? Subscribe to my free, email newsletter. I send three to four newsletters each month that include a paper crafting video, a card making tutorial, and updates to Stampin’ Up! news and specials. Click here.
Kim Quade, Stampin’ Up! demonstrator in Mesa, Arizona
Supply List
Click on any of the graphics below to shop for the products to create this card at home;
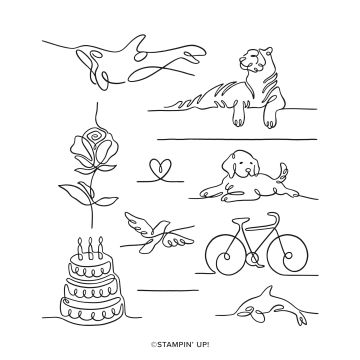
When I’m lucky enough to visit the beach, I’m always on the lookout for dolphins. So I just had to use these sweet little guy included in the Along These Lines Photopolymer Stamp Set.
I combined the image with the Rectangle Column Fold I’ve shared all week. Check out these other cards that use this same fun fold:
Below, I provide some basic information to help you make this card at home. Be sure to watch the video to see how this card comes together.
Cloud Cover Cardstock base measuring 8 1/4 x 5 1/2. Score at 1/2, 2, 2 1/2, and 4
Cloud Cover Cardstock measuring 4 1/4 x 3 and 2 3/4 x 4
Designer Series Paper (2025-2027 In Color 6 x 6 Designer Series Paper) measuring 5 1/4 x 1 1/4 (2), 3/8 x 5 1/4, 4 x 2 3/4, and 3 3/4 x 5 1/4
Secret Sea circle die cut with Stylish Shapes Dies
Image from Along These Lines stamped with Memento ink. Sentiment from Beautiful Motifs stamped in Secret Sea. Punch image with 2 3/8-inch circle punch.
2025-2027 In Color Flat Pearls
How To Video
Be sure to watch the video below to see how this card comes together. Although it showcases the Jar of Joy stamp set, it gives step-by-step directions for creating the Rectangle Column Fold.
Thanks so much for visiting my blog today. I love sharing the handmade cards I create from my craft room in Mesa, Arizona. Please let me know if you have questions about this or any other paper crafting projects. I’m here to help.
Kim Quade/Stampin’ Up! demonstrator Mesa Arizona
Along These Lines Fun Fold Supply List
Click on any of the links below to shop from my online store to purchase the products to create this card at home:
Welcome to Team Stamp It’s October Blog Hop! We’re so glad you joined us! This month, we feature cards and projects with a Thanksgiving theme. Be sure to visit each blog. Leave a comment and you could win a Christmas Everywhere Kit .
My post today features Stampin’ Up!’s Mini Pocket Envelope Dies. Find these as part of Stampin’ Up!’s Online Exclusives. What is an Online Exclusive? These are paper crafting products you can view online only. You won’t find them in any of Stampin’ Up!’s catalogs. Let me know if I can help you find and/or order these.
I love this die because it creates super cute treat packages, gift card holders, and table favors. Imagine making these and placing them on your table at Thanksgiving. Or, create and decorate and fill with tip money for servers during the holidays. There are lots of ways to use this fun die in coordination with other rubber stamps, patterned papers, and embellishments.
Mini Pocket Envelope Dies for Thanksgiving
The table favor on the left uses:
Mini Pocket Envelope Dies
Glorious Gingham 6 x 6 Designer Series Paper (Pecan Pie design)
Vellum Card Stock die cut with a circle from the Stylish Shapes Dies
Leaf punched with Bough Punch and the 2023-2025 In Color Luster Specialty Designer Series Paper (Copper Clay)
Frond die cut from Earthen Textures Dies and the 2023-2025 In Color Luster Specialty Designer Series Paper (Wild Wheat)
Blossom punched with Bough Punch in Gold Foil
Sentiment from Earthen Textures stamped in Copper Clay on Very Vanilla and punch edwith Layering Oval Punch
Simply Elegant Trim (gold)
Festive Pearls (gold)
The table favor on the right uses:
Mini Pocket Envelope Dies
Wild Wheat from the 2023-2025 In Color 6 x 6 Designer Series Paper
Vellum die cut with a circle from the Stylish Shapes Dies
Leaf punched with Bough Punch and the 2023-2025 In Color Luster Specialty Designer Series Paper (Pebbled Path)
Frond die cut from Earthen Textures Dies and the 2023-2025 In Color Luster Specialty Designer Series Paper (Wild Wheat)
Blossom punched with Bough Punch in Gold Foil
Sentiment from Earthen Textures stamped in Wild Wheat on Very Vanilla and punched with Layering Oval Punch
Linen Thread
2023-2025 In Color Dots (Pebbled Path)
Thanks so much for visiting my blog today. Visit all of the stampers to gain inspiration for your Thanksgiving crafting. Leave a comment for a chance to win the Christmas Everywhere Kit.
Congratulations to last month’s winner: Sharon Land
List of participating blogs and stampers (just click on each link below)
Do you ever get card ideas in your head and they just have to come out? That describes me with today’s card. I thought it would be really fun to use Stampin’ Up!’s Trucking Along stamp set in conjunction with the Pick of the Patch Bundle. My vision saw a big pumpkin riding in the back of the truck. Isn’t it fun?
A quick note about the Trucking Along Bundle. The stamp set is available as an Online Exclusive (meaning you’ll find it on Stampin’ Up!’s online store). The Trucking Along Builder Punch is slated to be available October 9, 2023. But, from my video below, see how easy it is to cut the truck by hand.
Trucking Along Bundle
Here are a few fun details about this card:
Pumpkin Pie card stock base measuring 8 1/2 x 5 1/2 scored at 4 1/4
Wood grain piece (from All About Autumn Designer Series Paper) measuring 5 1/4 x 4
Pumpkin Pie card stock layering measuring 4 1/2 x 3 1/4
Basic White measuring 4 1/4 x 3
Truck outline stamped with Memento and body stamped with Night of Navy (cut by hand)
Pumpkin and stem (Pick of the Patch) in Pumpkin Pie ink and Old Olive ink (pumpkin cut by hand, stem punched with coordinating punch)
Pumpkin Pie Designer Series Paper measuring 3/4 x 3 3/4
Sentiment from Pick of the Patch stamped with Pumpkin Pie
Leaf from Pick of he Patch stamped with Pumpkin Pie and punched with coordinating punch
I’m just so tickled with how this turned out. I hope you enjoy it, too. Be sure to watch the video below to see all the steps to creating this fun, fall-themed card.
How To Video
Thanks so much for visiting my blog today. For more inspiration, subscribe to my free, email newsletter. I send two to three newsletters each month that include a free card-making tutorial, a paper crafting video, and updates on Stampin’ Up! news. Click here. Then check your inbox for a confirmation asking that you really want to receive my emails.
Click on any of the pictures below to shop directly from my online store for the products to create this card at home.
Sign up for my newsletter and get a free tutorial!
Get Updates!
Join our mailing list to receive the latest updates from Kim!
You have Successfully Subscribed!
Current Catalogs
Follow Me
Categories
Disclaimer
The content in this blog is the sole responsibility of Kim Quade as a Stampin’ Up!® Independent Demonstrator. The use of and content of classes, services or products offered is not endorsed by Stampin’ Up!