Welcome to Team Stamp It’s January blog hop. Prepare to be inspired! We’re so glad you joined us! This month, we feature Valentine cards and projects. Be sure to visit all of the participating stampers and leave a comment with the hashtag #stampitcontent. You could win a Take Your Pick Tool.
For the last couple of weeks, I’ve been playing with Stampin’ Up!’s Country Bouquet Bundle (buy the stamp set and punch as a bundle and save 10 percent). The punch has been so popular, it’s on backorder for a bit, but the stamp set itself is a winner. Especially if you want to make a variety of Valentine cards. Find the bundle and the suite beginning on page 8 of Stampin’ Up!’s January-April 2023 Mini Catalog.
Country Bouquet in Gold
The large heart image features a two-step stamping technique. You can choose two coordinating colors to create the heart, or do like me and heat emboss both images with gold embossing powder. I love how it turned out. It makes a great handmade Valentine card for a loved one.
A few details:
Used Stampin’ Up!’s Stitched Rectangle Dies to cut the first three layers of Very Vanilla and Petal Pink card stock
Heat embossed the heart and sentiment with gold embossing powder, using the Stampartus to help me best position both stamps of the image.
Colored baker’s twine with Petal Pink Stampin’ Blends
Added the Pastel Adhesive-Backed Sequins
Embossed the bottom Very Vanilla layer with the Timeworn Type 3D Embossing Folder
Click here to see another post and video with other cards using the Country Floral Lane Suite of paper crafting products.
Thanks so much for being here. I hope you’re inspired to create some handmade cards of your own. Remember to visit all of the blogs and leave a comment. Congrats to last month’s winner: Cliffie Wilson
You could win a Take Your Pick Tool just by commenting.
Can you believe it’s time to think about creating your handmade cards for Valentine’s Day? It’s less than a month away! In today’s post, I share a sample of Valentine cards made with Stampin’ Up!’s Country Floral Lane Suite of products. Find this suite beginning on page 8 of Stampin’ Up!’s January-April 2023 Mini Catalog.
The suite includes:
Country Bouquet Stamp Set
The Country Bouquet Punch (purchase these first two as a bundle and save 10 percent)
Country Gingham 6 x 6 Designer Series Paper
Pastel Adhesive-Backed Sequins
Country Floral Lane 12 x 12 Designer Series Paper
Real Red & Burlap Ribbon
Country Floral Lane Samples
In the handmade greeting card at the top, I also use the heart frame from the Framed Florets Dies. It works perfectly here for Valentine cards. I also love that the Country Bouquet Punch coordinates with the Country Floral Lane Designer Series Paper. You can punch the images directly from the paper in addition to punching the stamped images.
The next card uses the two-step feature of the Country Bouquet Stamp Set. I stamped with both Sweet Sorbet and Mint Macaron (using the Stamparatus) and then punched the image with the Heart Punch Pack. Look at those Heart Pearls! I colored them with the Sweet Sorbet Stampin’ Blends and added them to the card. Be sure to watch the video at the end of this post to see how these cards are made.
This final card uses strips of Designer Series Paper (each measuring 1 x 3) from both the Country Gingham 6 x 6 Designer Series Paper and the Country Floral Lane 12 x 12 Designer Series Paper.
How To Paper Crafting Video
Check out this post here to see two twisted easel fun folds using products from this suite.
Thanks so much for visiting my blog today. I hope you’re inspired to start creating your own homemade Valentine cards.
Need more inspiration? Sign up to receive my free email newsletter. I send two to three emails each month that include a free card-making tutorial, paper crafting video, and updates on Stampin’ Up! news and specials.
Kim
Click on any of the photos below to purchase the products used to create these cards.
Welcome to the Stamper’s Dozen monthly blog hop. We’re so glad you joined us! This month, we feature handmade greeting cards and paper crafting projects using items from Stampin’ Up!’s SaleABration brochure. Be sure to visit all of the blogs on the hop to gain inspiration. Links are at the end of this post.
What is SaleABration? It’s Stampin’ Up!’s most exciting sale of the year. Now through February 28, earn your choice of free products with purchases of $50 and $100 before tax and shipping. Click here to view the PDF of this catalog.
Adorable Owls Twisted Easel Card
My handmade card features the Adorable Owls Stamp Set with the twisted easel fun fold. These cute little owls add a lot of fun to any card. (This stamp set can be earned free with a minimum $50 purchase.)
In addition to the Adorable Owls, I used the Country Floral Lane 12 x 12 Designer Series Paper from Stampin’ Up!’s January-April 2023 Mini Catalog.
At first glance, this little card appears to open normally. But gently grab corner and it folds. Use the sentiment on the bottom piece as a “kickstand” to make the card stand up.
I started with a Sweet Sorbet card stock base measuring 8 1/2 x 4 1/4. On the long side, score at 4 1/4. Turn the left side of the card stock, and score diagonally from the top left corner to the bottom right corner. Fold the card in half. On the left side, bring the bottom left tip to the middle top, folding on the score line. Add a Basic White base measuring 4 x 4 and the Country Lane Designer Series Paper measuring 3 3/4 x 3 3/4. Decorate as you wish. Use the same measurements for the bottom piece. Stamp a sentiment and pop up on the bottom to use as a “kickstand.”
This video shows step-by-step visual instructions.
Here’s a sample of another one I created.
Thanks so much for visiting my blog today. Please let me know if you have questions.
Kim
Stamper’s Dozen Blog Hoppers
Click on all of the links below to see cards and projects created by other crafters.
if you’re looking for a way to make a stack and quick and easy cards, I have a solution for you. Stampin’ Up’s Dainty Flowers Designer Series Paper offers gorgeous patterned paper designs. Just add a card base, sentiment or a ribbon or embellishment, and you’re good to go! The paper does all of the work for you. Earn this paper free with a $50 purchase before tax and shipping during Stampin’ Up!’s SaleABration through February 28 or while supplies last. Click here to view a PDF of the current SaleABration brochure.
Please enjoy the free tutorial below. Click here to view more samples created with this beautiful patterned paper.
OTHER – Fresh Freesia 3/8” Open Weave Ribbon (155615), 2021-2023 In Color Opal Rounds (159185), Stampin’ Seal (152813), Mini Glue Dots (103683), Multipurpose Liquid Glue (110755)
Cutting & Scoring:
Rich Razzleberry Cardstock — 8 ½” x 5 ½”, scored at 4 ¼” and folded in half; 4 7/8” x 3 5/8”
Basic White Cardstock – 5 ¼” x 4”
DSP – 5 ¼” x 4” (Fresh Freesia dotted design), 4 ¾” x 3 ½” (oval floral design)
Ribbon – 8”
Instructions:
Stamp the thank you sentiment from the Shaded Summer stamp set in Rich Razzleberry ink in the middle of the oval floral design of the 4 ¾” x 3 ½” DSP.
Adhere this stamped piece to the 4 7/8” x 3 5/8” Rich Razzleberry Cardstock.
With adhesive of choice, adhere the 5 ¼” x 4” DSP (Fresh Freesia dotted design) to the Rich Razzleberry card base.
Add the stamped panel to the card front.
Tie the ribbon in a bow and attach to the card with a Glue Dot.
Add three Fresh Freesia opal rounds.
Glue the white cardstock to the inside of the card.
Thanks so much for visiting my blog today. I hope you enjoyed the free, card-making tutorial.
Kim
Click on any of the photos below to shop directly from my online store for the products used to create this thank you card.
Stampin’ Up!’s January-April 2023 Mini Catalog and SaleABration celebration are now live! What does that mean for you?
The mini catalog offers a ton of brand-new paper crafting products for everything from Valentine’s Day to spring and Easter and everything in between. Click here to see a PDF copy of this catalog.
The SaleABration celebration allows you to earn free exclusive stamp sets and Designer Series Paper with minimum purchases — nine choices in all. This promotion runs through February 28. Click here to see a PDF of this catalog.
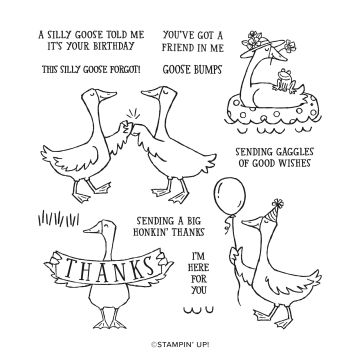
Silly Goose Card Samples
As a demonstrator, I got the opportunity to preorder from the new mini catalog. I chose a number of fun things, but the Silly Goose stamp set caught my eye because I have a friend with the last name of Goos, and her birthday is this month. Today, I share a couple of cards I created for the set. Click here to see another post with other samples.
In addition to this fun set, I used the Day at the Farm 12 x 12 Designer Series Paper. Earn it free with a minimum $50 order before tax and shipping during SaleABration. The fun designs go perfectly with the goose images.
One item to note: The Silly Goose stamp set is available in both the clear photopolymer style and the rubber cling style for the same price. When ordering this set (and a handful of others in the new catalog), be sure to watch for these designations in the description. If you’re unsure, please contact me.
Thanks so much for visiting my blog today. I’m so excited about the new catalog and SaleABration. I look forward to sharing many other samles in the coming months.
Kim
Click on any of the graphics below to shop directly from my online store:
Sign up for my newsletter and get a free tutorial!
Get Updates!
Join our mailing list to receive the latest updates from Kim!
You have Successfully Subscribed!
Current Catalogs
Follow Me
Categories
Disclaimer
The content in this blog is the sole responsibility of Kim Quade as a Stampin’ Up!® Independent Demonstrator. The use of and content of classes, services or products offered is not endorsed by Stampin’ Up!