Hello, and welcome to the December Stampin’ Up! Trip Achiever Blog Hop. We’re so glad you joined us. As a group, we’ve worked our Stampin’ Up! businesses enough to earn the Annual Incentive Trip. This is no small accomplishment; less than 1% of demonstrators worldwide achieve this. The stampers in this group come from different countries around the world. Be sure to visit all of the participating stampers to gain a host of crafting inspiration. Look for a list of hoppers at the end of this post.
The year 2024 is just around the corner! So that means it’s time to create some fun, handmade desktop calendars. I love to make these every year and give them as gifts. Today, I show you a version that includes a notepad. The layout follows the same principles as an easel card.
Petal Park 2024 Desktop Calendar
I love this project because you can use a variety of stamps, inks, and papers to create individualized calendars for your friends and family. Check back this week to see other themes I’ve created.
Here are a few basic directions:
Boho Blue card stock base measures 4 1/4 x 11, scored at 2 3/4 and 5 1/2
Layer for the base of the calendar: Night of Navy card stock measuring 5 1/4 x 4, Countryside Inn Designer Series Paper measuring 5 x 3 3/4, Boho Blue measuring 3 1/2 x 3 1/2. Add notepad.
Calendar layer measurements: Night of Navy card stock measuring 5 1/4 x 4, Countryside Inn Designer Series Paper measuring 5 x 3 3/4, Boho Blue card stock measuring 3 1/2 x 2 3/4. Add calendar.
Created the flowers using Stampin’ Up!’s Petal Park stamp set and coordinating Petal Park Builder Punch with Night of Navy and Boho Blue Classic Stampin’ Ink Pads. The sentiment comes from the Easter Bunny stamp set. And, the label is die cut with Basic White card stock from the Countryside Corners Dies. Stamped with Night of Navy ink. Added pearls to the flowers.
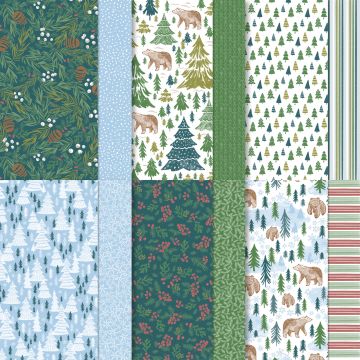
Here’s another version using the Ink Botanicals Designer Series Paper, Petal Park stamp set, Petal Park Builder Punch, and the sentiment from Playing the Rain (heat embossed with white embossing powder).
Petal Park 2024 Desktop Calendar How To Video
Be sure to watch the video below to see and hear step-by-step directions for creating this fun calendar. Watch until the end to see other fun samples.
Thanks so much for stopping by today.
Kim
Remember to visit all of the blogs. See the list below and click on the links to follow along.
Stampin’ Up! Product List
Click on any of the photos below to shop for the products to create this project at home.
When you don’t know what to get someone for Christmas, the go-to is usually to purchase gift cards. So it’s nice to have a fun and festive way to “wrap” those gift cards.
Today, I share a fun fold gift card holder that uses Stampin’ Up!’s Cheers to the Season stamp set and the A Walk in the Forest 12 x 12 Designer Series Paper. (Just a couple of quick notes: The Cheers to the Season stamp set is being retired and is on sale for $17.20. The A Walk in the Forest DSP is also being retired, and is available while supplies last. Click here to visit Stampin’ Up!’s online store to see what’s being retired and what’s discounted from the September-December 2023 Mini Catalog. Be sure to grab what you want before it’s gone. I don’t want you to be disappointed if something goes out of stock.)
Cheers to the Season Gift Card Holder
Here are a few measurements to help you create this fun fold gift card holder.
Cherry Cobbler card stock base measuring 5 1/2 x 4 1/4
A Walk in the Forest Designer Series Paper measuring 5 1/4 x 4, 4 1/4 x 3, and 4 1/4 x 2
Cherry Cobbler card stock measuring 9 3/4 x 4 1/2 scored at 3 1/4 and 6 1/2
Very Vanilla measuring 4 1/4 x 3
Very Vanilla circle die cut with Stylish Shapes Die
Linen Thread colors with Cherry Cobbler Stampin’ Blend
Festive Pearls
The inside of the card looks like this. (See above.)
Below, I created the same card using Stampin’ Up!’s Joy of Noel stamp set and the Joyful 12 x 12 Specialty Paper. (Both of these products appear on the retiring list, as well.)
And, here’s another one (below) using Stampin’ Up! Merry Bold & Bright Designer Series Paper and the Joy to You stamp set (both retiring).
And, I have a video with step-by-step instructions from my craft room in Mesa, Arizona, where I’m a Stampin’ Up! demonstrator. Be sure to catch the Facebook live replay below.
How to Video
Thanks so much for visiting my blog today! I hope you’re inspired to make some fun holders for those gift cards you purchase this year. Please let me know if you have any questions about the stamping technique or products used.
Kim
Click on any of the pictures below to shop for the products you need to create this card at home. Give me a shout if you need a product list for either of the other fun fold gift card holders.
The Stampers Dozen October Blog Hop is underway! Thanks so much for joining us. This month, we feature cards with fun folds. Be sure to visit all of the blogs on the hop to gain a ton of paper crafting inspiration. Find a list of participating stampers at the end of his post.
Joy to you Flip Fun Fold
Today, my card features a flip fun fold using two stamp sets from Stampin’ Up!’s September-December 2023 Mini Catalog: Joy to You and Beary Cute.
Here are some of the card details.
Cherry Cobbler cardstock measuring 5 1/2 x 6 1/2, scored at 2 1/4 and one piece measuring 2 3/4 x 4 1/4 (scored at 3 3/4)
A Walk in the Forest Designer Series Paper: 1 piece measuring 5 1/4 x 2 and 1 piece measuring 5 1/4 x 1/2
Basic White: 1 piece measuring 5 1/4 x 4 and 1 piece measuring 3 1/2 x 2 1/2
Garden Green Ribbon
Festive Pearls (Cherry Cobbler)
In addition to the flip fun fold, this card features the marker-to-stamp technique. Be sure to watch the video below to see how I used Stampin’ Write Markers to apply the color to the stamp. This technique allows me to be creative and use different colors for my image.
Here’s a look at the inside of the card.
Flip Fun Fold How-To Video
Thanks so much for visiting my blog today. Be sure to view all of the blogs on the hop. Talented stampers will be showcasing a variety of other fun fold.
Welcome to the Stampers Dozen Blog Hop. Thanks so much for joining us. Today, we feature fall-themed greeting cards and projects. Be sure to visit all of the blogs. Leave us a comment. We love to hear what you have to say.
My card features Stampin’ Up!’s Autumn Leaves Bundle. Find it on pages 42- 44 of Stampin’ Up!’s September-December 2023 Mini Catalog. I also use the super popular All About Autumn 6 x 6 Designer Series Paper (available in mid- to late-October). And, this card is a fun fold. Specifically, an easel fold.
This card layout works well as a display card, and it lends itself to a variety of stamps, papers, and themes.
Autumn Leaves Easel Card
Use these measurements to help you get started.
Pretty Peacock Card stock card base: 8 ½ x 5 ½ scored at 4 1/4 and 2 1/8
Two Cajun Craze card stock panels measuring 5 1/4 x 1 7/8
All About Autumn 6 x 6 Designer Series Paper: 2 pieces measuring 5 x 1 5/8
Cajun Craze stock strip: 2 pieces measuring 2 x ¾
Cajun Craze Stylish Shapes square
Die cut leaves from the All About Autumn Designer Series Paper and one leaf from Cajun Craze to use as a “kick stand”
Heat embossed with copper
Linen thread
Very Vanilla card stock measuring 5 1/4 x 4
The video below shows how to create an easel card like the one featured today. However, the video uses a different stamp set and patterned papers. But it gives you step-by-step instructions for creating this easel fun fold.
Thanks so much for visiting my blog today. Click on the links below to gain additional paper crafting inspiration for fall projects.
For more inspiration, subscribe to my email newsletter. I send two to three newsletters each month that include a free card-making tutorial, a paper crafting video, and updates on Stampin’ Up! news and specials. Click here. Then check your InBox for a confirmation. Aweber wants to be sure you really want to receive my messages.
Click on any of the photos below to shop directly for the products used to create this card.
Have you had a chance to page through Stampin’ Up!’s brand-new September-December 2023 Mini Catalog? (If not, click this link to view a PDF.) The catalog features great paper crafting product geared toward fall, Halloween, Thanksgiving, winter, holiday, Christmas, new year’s, and more.
Today, I share a fun fold easel card using the Pick of the Patch Bundle (buy the stamp set and the punch as a bundle and save 10 percent). Find this bundle on page 51 of the holiday mini catalog. I love this bundle because it offers sentiments perfect for other uses. See this post for a free tutorial offering step-by-step directions for creating a fall card.
Pick of the Patch Easel Card
Use these measurements to help you get started. Be sure to watch the video at the end of this post to see exactly how this Halloween easel card comes together.
Pumpkin Pie Card stock card base: 8 ½ x 5 ½ scored at 4 1/4 and 2 1/8
Two Basic Black card stock panels measuring 5 1/4 x 1 7/8
Them Bones 12 x 12 Designer Series Paper: 2 pieces measuring 5 x 1 5/8and a square cut from Stylish Shapes Dies
Pumpkin Pie card stock strip: 2 pieces measuring 2 x ¾
Basic White and Basic Black card stock die cut with square from Stylish Shapes Dies
Feel free to adapt this layout. Use the stamps and papers you have in your stash to make your own fun fold easel card.
Easel Card How to Video
Thanks so much for visiting my blog today. I hope you’re inspired to go into your craft room and create.
Get more inspiration by subscribing to my free, email newsletter. I send two to three newsletters each month that include a free card-making tutorial, a paper crafting video, and updates on Stampin’ Up! news and specials. Click here. Then check your InBox for a message from Aweber. They need you to confirm you really want to receive my emails. Thanks!
Kim
Click on any of the graphics below to purchase the supplies needed to create this card at home.
Sign up for my newsletter and get a free tutorial!
Get Updates!
Join our mailing list to receive the latest updates from Kim!
You have Successfully Subscribed!
Current Catalogs
Follow Me
Categories
Disclaimer
The content in this blog is the sole responsibility of Kim Quade as a Stampin’ Up!® Independent Demonstrator. The use of and content of classes, services or products offered is not endorsed by Stampin’ Up!