Sharing a new fun fold today with Stampin’ Up!’s February Product of the Month: the Painted Illusions 12 x 12 Designer Series Paper. Receive this double-sided patterned paper for just $5 when your online store purchase reaches $75 or more before tax, shipping, and any redeemed rewards. The package contains 12 sheets: three each of four double-sided designs.
I used this paper to create a Diamond Tower Pop Up Fun Fold. (I first worked with this fun fold during our team’s mystery stamping, and it’s fun to create different versions.) Be sure to watch the video below to see how this card comes together.
Measurements and Details
Granny Apple Green cardstock base measuring 4 1/4 x 11. Score at 1 1/2, 3 1/2, 5 1/2, 7 1/2 and 9 1/2.
Two DSP pieces measuring 4 x 1 3/4 and two pieces measuring 4 x 1 1/4
Two Basic White cardstock pieces measuring 4 x 1 3/4
Granny Apple Green cardstock pieces measuring 1 x 1, each scored at 1/2
Granny Apple Green cardstock circle die cut with Stylish Shapes Dies
Painted Illusions DSP punched with 2 3/8-inch Circle Punch
Sentiment (Lovely Arrangements) stamped (Pretty Peacock) on Basic White label die cut with Lovely Arrangements Dies
Leaves die cut with Granny Apple Green cardstock
Rhinestone Basic Jewels
Here’s another sample using Stampin’ Up!’s Boardwalk Fun Bundle and the Beach Boardwalk 12 x 12 Designer Series Paper.
How to Video
From my craft room in Mesa, Arizona, I offer step-by-step instructions for creating this Diamond Tower Fun Fold in coordination with Stampin’ Up!’s Product of the Month: Painted Illusions 12 x 12 Designer Series Paper.
Thanks so much for visiting my blog today! I hope you enjoyed this fun fold project! Please let me know if you have questions about this or any other creations.
Kim Quade, Stampin’ Up! demonstrator in Mesa, Arizona
Supply List
Click on any of the graphics below to shop for the products to create this card at home:
It’s that time of year when we’re looking for ways to package those little and/or last-minute gifts. In today’s post, I show you how to create an easy gift bag using plain brown bags, like lunch bags and Stampin’ Up!’s patterned paper. Be sure to watch the video below to see step-by-step instructions.
Measurements and Details
Start with a bag of your choice, such as a lunch bag or other bag from a craft or big box store. Use the Paper Trimmer to adjust the size of the bag. My bag measures 3 1/2 x 7. I trimmed to 3 1/2 x 5.
Choose coordinating card stock. The project featured above used Real Red cardstock. The front piece measures 5 x 3 1/2. The back piece measures 7 x 3 1/2 and is scored at 2 inches.
Decorate bag as desired with sentiments. I used the Jolly Delivery stamp set and the Three Banner Punch with Real Red & White Baker’s Twine.
Here’s a picture of four bags I created with different papers from Stampin’ Up! Which is your favorite? Papers used (left to right): Christmas Tags & More, North Pole Delivery, Modern Christmas, and Traditions of Christmas.
How to Video
From my craft room in Mesa, Arizona, I demonstrate how I created this cute little bags, perfect for gift giving.
Thanks so much for visiting my blog today! I hope you enjoyed this project. Please let me know if you have questions about this or any other rubber stamping card or item.
Kim Quade, Stampin’ Up! demonstrator in Mesa, Arizona
Supply List
Click on any of the graphics below to shop for the products to create this bag at home:
Oh, my gosh, can you just see yourself giving some of these cut treat bags to friends and co-workers and trick-or treaters? These bags easily hold a variety of candy and non-candy treats. I originally created these little bags (inspired by the Plaid Poodle) with Stampin’ Up!’s Gathering Together 12 x 12 Designer Series Paper, one of my current favorites. See that post here.
Below, I offer some cutting and scoring directions. Be sure to watch the video to see how this actually comes together.
Gathering Together 12 x 12 Specialty Designer Series Paper measuring 6 x 12.
Score at 3 3/4, 5 3/4, 9 1/2, and 11 1/2 on the 12-inch side. Score at 1 1/4 on each side of the 6-inch side.
See the diagram below for trimming directions. (The x marks the places you cut out the card stock.)
Pumpkin Pie circle from Stylish Shapes Dies
Die cut bats from the Spooky Halloween Dies, the spider from the Fright Night Dies, and the letters from the Mini Alphabet Dies. Remember to use your adhesive sheets.
How to Video
From my craft room in Mesa, Arizona, I give step-by-step directions for creating this bag. In the video, I create the bag with Stampin’ Up!’s Gathering Together 12 x 12 Designer Series Paper, but I also show alternatives, including the Spooky Sweet bag.
Thanks so much for visiting my blog today! I hope you enjoy this project and are inspired to create your own. Please let me know if you have questions about this or any other paper crafting projects. I’m happy to help!
Kim Quade, Stampin’ Up! demonstrator in Mesa, Arizona
Project Supply List
Click on any of the graphics below to shop for the products to create this fun gift bag at home:
It’s not a secret that my favorite patterned-paper-of-the-moment is Stampin’ Up!s Gathering Together 12 x 12 Designer Series Paper. I love the foil accents and the rich fall colors. And, I love that I get a chance to use my Cajun Craze card stock.
I made these for a team gathering with different papers and belly bands, adorned with a Gold Foil leaf embossed with the Gathering Leaves Embossing Folder.
I’ve used this Designer Series Paper in a number of projects throughout the last month.
Click on the links below to check out the blog posts:
In today’s project, I use the paper to create a fun gift bag. (Project inspired by the Plaid Poodle.)
Details and Measurements
Below, I offer some cutting and scoring directions. Be sure to watch the video below to see how this actually comes together.
Gathering Together 12 x 12 Specialty Designer Series Paper measuring 6 x 12.
Score at 3 3/4, 5 3/4, 9 1/2, and 11 1/2 on the 12-inch side. Score at 1 1/4 on each side of the 6-inch side.
See the diagram below for trimming directions. (The x marks the places you cut out the card stock.)
Gold Foil die cut with the maple leaf die in the Gathering Moments Bundle and embossed with the Gathering Leaves Embossing Folder.
Belly band using coordinating Gathering Together DSP measuring 1 1/4 x 10.
Gold Striped 3/8-inch ribbon.
How to Video
From my craft room in Mesa, Arizona, I give step-by-step instructions for creating this fun gift bag.
Thanks so much for visiting my blog today. Throughout the month of October, receive a free card kit with the a $50 purchase (before tax, shipping, and redeemed rewards) from my online store. Spend $75 (before tax, shipping, and redeemed rewards), and you’ll receive the card kit (one each of four designs) and a package of the Cajun Craze & Gold Dots. Click here to read about the card kit. Click here to shop from my online store.
Please let me know if you have questions about this or any other paper crafting project. I’m happy to help!
Kim Quade, Stampin’ Up! demonstrator in Mesa, Arizona
Supply List
Click on any of the graphics below to shop for the products to create this bag at home:
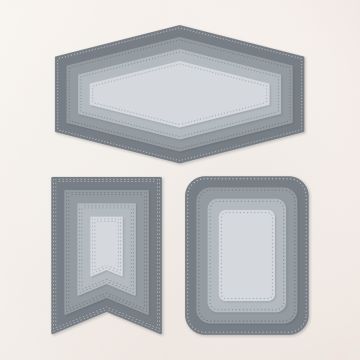
For my monthly in-person classes in my home in Meza, Arizona, I love to give every participant a treat packet. In September, I created this cute Halloween treat packet using Stampin’ Up!’s Nested Essential Dies, the Mini Alphabet Dies, and some Halloween Dies. No stamping here!
The elongated hexagon-shaped dies reminded me of a coffin, so I created a design that allowed me to include a chocolate treat.
Here’s what the treat packet looks like from the side. It fits a Fun-Size candy bar.
Measurements and Details
Here are a few details to help you make this packet at home:
Die cut the largest hexagon shape from the Nested Essentials Dies with Basic Black cardstock.
Use the second largest hexagon shape from the Nested Essentials Dies to cut a shape from the Spooky Sweet 12 x 12 Designer Series Paper (grey pattern)
Die cut letters using the Mini Alphabet Dies. (I recommend using Adhesive Sheets.)
Die cut two bats and one spider from the Spooky Halloween Dies and the Fright Night Dies in Basic Black
I added a Black & Gold Ribbon
The “kickstand” and candy bar hold measures 1 x 8 and is scored at 4 inches and 5 inches. Be sure to watch the video below to see how this treat packet comes together.
How to Video
Isn’t this packet super fun? Let me know if you have questions about it or any other stamping project. I’m happy to help.
Thanks so much for visiting my blog today!
Kim Quade, Stampin’ Up! demonstrator in Mesa, Arizona
Project Supply List
Click on any of the graphics below to shop for the products to make this treat packet.
Sign up for my newsletter and get a free tutorial!
Get Updates!
Join our mailing list to receive the latest updates from Kim!
You have Successfully Subscribed!
Current Catalogs
Follow Me
Categories
Disclaimer
The content in this blog is the sole responsibility of Kim Quade as a Stampin’ Up!® Independent Demonstrator. The use of and content of classes, services or products offered is not endorsed by Stampin’ Up!