In today’s share, I combine the Silly Safari stamp set with the Rectangle Column Fold (fun fold) to create this super cute birthday card.
Measurements and Details
Below, I provide some basic information to help you make this card at home. Be sure to watch the video to see how this fun fold comes together.
Crumb Cake Cardstock base measuring 8 1/4 x 5 1/2. Score at 1/2, 2, 2 1/2, and 4
Crumb Cake Cardstock measuring 4 1/4 x 3 and 2 3/4 x 4
Designer Series Paper (Timeless Plaid 6 x 6 Designer Series Paper) measuring 5 1/4 x 1 1/4 (2), 3/8 x 5 1/4, 4 x 2 3/4, and 3 3/4 x 5 1/4
Image stamped with Memento Black and colored with Pecan Pie Stampin’ Blends. Sentiment stamped in Pecan Pie ink. Image punched with 1 7/8″ Circle Punch and layered on Cajun Craze and Pecan Pie Cardstock.
Linen Thread
Neutral Matte Dots (Pecan Pie)
How-To Video
From my craft room in Mesa, Arizona, I offer step-by-step instructions for creating this Rectangle Colum Fold Fun Fold card. (Just a quick note: This video depicts the creation of a holiday card using the Jar of Joy stamp set. But it uses the same fold.)
I hope you like this cute card and the fun fold. Please let me know if you have questions about this card or any other paper crafting project. I’m happy to help!
If you love playing with new paper crafting products, be sure to check out Stampin’ Up!’s newest Online Exclusives release. Click here to visit the online store. Or, click here to view a PDF flyer.
Don’t miss the Sunflower 3D Embossing Folder. This stunning sunflower design adds a touch of nature to any paper crafting project. And, it lends itself to a variety of techniques. With this card, I showcase Stampin’ Up!’s two-tone cardstock and the sanding technique.
The technique is simple. Add card stock to the embossing folder. Roll it through your Stampin’ Cut & Emboss Machine. Remove cardstock from folder. Lightly sand the surface to expose the white center.
Try this technique with other embossing folders and other two-tone cardstock colors. Choose from more than fifty colors.
Sunflower Embossing Folder Birthday Free Tutorial
Stampin’ Up! Supplies:
STAMPS – Loveliest Tree (163714)
PAPER – Basic Black Cardstock (121045), Daffodil Delight Cardstock (119683), Daffodil Delight 12 x 12 Two-Tone Cardstock (166669)
INK – Versamark (102282)
OTHER – Sunflower 3D Embossing Folder (166145), Mixed Labels Dies (164652), Black & Very Vanilla Large Check Ribbon (161982), Neutral Matte Dots (165561), Heat Tool (129053), Basics WOW! Embossing Powder (165679), Stampin’ Seal (152813), Mini Glue Dots (103683), Multipurpose Liquid Glue (110755), Stampin’ Cut & Emboss Machine (149653)
Cutting & Scoring:
Daffodil Delight Cardstock – 8 ½” x 5 ½”, scored and folded at 4 ¼”
Basic Black Cardstock – 5 ¼” x 4” and a scrap
Daffodil Delight 12 x 12 Two-Tone Cardstock – 5” x 3 ¾”
Ribbon – 18”
Instructions:
Emboss the 5 x 3 ¾” Daffodil Delight Two-Tone Cardstock with the Sunflower 3D Embossing Folder.
Lightly sand the embossed paper. The white core will show through. This is the look you want.
Adhere this piece to the Basic Black 5 ¼” x 4” Cardstock.
Wrap the ribbon around this panel and tie a bow.
Heat emboss the birthday sentiment from the Loveliest Tree stamp set with white embossing powder on the Basic Black cardstock scrap.
Die cut with the small label from the Mixed Labels Dies.
With Stampin’ Diimensionals, adhere the sentiment on the card front on the right-hand side as shown in the sample.
Add three black gems from the Neutral Matte Dots.
Thanks so much for visiting my blog today. I hope you enjoy this free tutorial. Please let me know if you have questions about this card or any other stamping project.
Kim Quade/Stampin’ Up! demonstrator, Mesa, Arizona
Supply List
Click on any of the graphics below to shop for the products to create this card at home:
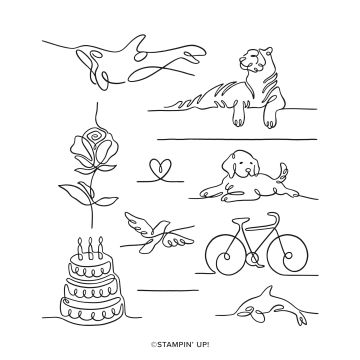
All this week I’ve playing with the images from Stampin’ Up!’s Along These Lines Photopolymer Stamp Set. I’ve paired it with other stamp sets for sentiments and with a variety of patterned papers. The more I play, the more I’m inspired.
In addition to the Along These Lines set, this card uses the Silly Safari Photopolymer Stamp Set, the Celebratory Sips Designer Series Paper, and the Florals in Bloom Designer Series Paper.
Thanks so much for visiting my blog today. I hope you enjoy this card. Please let me know if you have questions about this or any other stamping related project.
Need more inspiration? Subscribe to my free, email newsletter. I send three to four newsletters each month that include a paper crafting video, a card making tutorial, and updates to Stampin’ Up! news and specials. Click here to subscribe.
Kim
Along These Lines Party Animal Supply List
Click on any of the photos below to shop from my online store to get the supplies to create this card at home. I appreciate you choosing to shop with me.
When I received the Along These Lines stamp set as a prize at OnStage (Stampin’ Up!’s annual demonstrator gathering), I wasn’t sure how I was going to use it. Find these stamp set in Stampin’ Up!’s 2025-2026 Annual Catalog as well as in the online store.
Well, I was inspired this week. And, today, I share a few of the cards I created with the images in this set and sentiments from other Stampin’ Up! offerings. I hope you like what I made.
I kept the cards simple, using one of my go-to layouts.
Details and Measurements
Here are some details to help you make this card at home:
Early Espresso card stock base measuring 8 1/2 x 5 1/2, scored and folded at 4 1/4
Basic White card stock measuring 5 1/4 x 4
Country Woods Designer Series Paper measuring 5 1/4 x 2 1/4
Early Espresso card stock measuring 5 1/4 x 1/2
Sentiment from Loveliest Tree stamped with Early Espresso ink
Image stamped with Memento ink and colored with Crumb Cake light Stampin’ Blend
Linen Thread
Adhesive-Backed Metallic Gems
This next card offers a sympathy sentiment (Loveliest Tree stamp set) for a pet sympathy card.
And here’s a birthday card using the Beautiful Bokeh 6 x 6 Designer Series Paper. I colored the cake with Fresh Freesia and Balmy Blue Stampin’ Blends.
This next card uses the thank you sentiment from the Beautiful Motifs stamp set and 2025-2027 In Color Designer Series Paper (Strawberry Slush).
How-To Video
From my craft room in Mesa, Arizona, I offer step-by-step instructions for creating this handmade greeting card.
Thanks so much for visiting my blog today. I hope you enjoy these projects. Please let me know if you have questions about these cards or any other stamping-related project. I’m happy to help.
Need more inspiration? Subscribe to my free, email newsletter. I send three to four newsletters each month that include a card making tutorial, a paper crafting video, and updates to Stampin’ Up! news and specials. Click here to get started.
Kim
Along These Lines Birthday Card Supply List
Click on any of the graphics below to shop from my online store and purchase the supplies to create this card at home.
Sometimes you just need a quick and easy card. But you still want it to be one you’re proud to send. It’s just stamps, ink, and paper, and you could make a stack of these in no time. In today’s post, I share a simple handmade greeting card using Stampin’ Up!’s Layered Thoughts Photopolymer Stamp Set. Find this on page 34 of Stampin’ Up!’s just-released 2025-2026 Annual Catalog.
I love the large sentiments, making it easy to create a quick card. And, I love that the set includes the sentiments I use the most.
Secret Sea Cardstock measuring 8 1/2 x 5 1/2, scored and folded at 4 1/4
One pattern of the Boho Vibes Designer Series Paper measuring 5 1/4 x 4
Another pattern of the Boho Vibes Designer Series Paper measurign 4 x 3
Basic White Cardstock measuring 4 x 2
Image stamped with Secret Sea Classic Stampin’ Pad
2025-2027 In Color Flat Pearls (Secret Sea)
I hope you enjoyed this card. Feel free to swap out the paper and sentiments for something you have in your stash.
Thanks so for visiting my blog today. Need more inspiration? Subscribe to my free, email newsletter. I send three to four newsletters each month that include a paper crafting video, a card making tutorial, and updates to Stampin’ Up! news and specials. Click here to subscribe.
Sign up for my newsletter and get a free tutorial!
Get Updates!
Join our mailing list to receive the latest updates from Kim!
You have Successfully Subscribed!
Current Catalogs
Follow Me
Categories
Disclaimer
The content in this blog is the sole responsibility of Kim Quade as a Stampin’ Up!® Independent Demonstrator. The use of and content of classes, services or products offered is not endorsed by Stampin’ Up!