Earlier this week, Stampin’ Up! released a brand-new offerings of Online Exclusives. See them online here. Or click this link to view a flyer. I ordered the Jar of Joy Photopolymer Stamp Set first! I love playing with new paper crafting goodies, and I created a host of fun Christmas cards, just in time for Christmas in July.
In a previous post, I shared a host of holiday card examples featuring the Jar of Joy stamp set and the punch. I played with more traditional Christmas colors for those. See the post here.
For today’s card, however, I chose a more non-traditional approach. I use the colors of Bubble Bath, Petunia Pop, and Smoky Slate. Are you a traditionalist with a lean toward red and green? Or do you prefer non-traditional Christmas colors?
Measurements and Details
These details help you get started:
Smoky Slate card stock base measuring 8 1/2 x 5 1/2, scored and folded at 4 1/4
Bubble Bath card stock panel measuring 5 1/4 x 4, die cut with the Pattern of Friendship Die
Smoky Slate circle die cut with the Spotlight on Nature Dies
Petunia Pop Classic Stampin’ Pad
Petunia Pop 1/4″ Iridescent Ribbon
2024-2026 In Color Flat Pearls
Thanks so much for visiting my blog today. I hope you enjoy this project. Please let me know if you have questions about this card or any other stamping projects.
Kim
Jar of Joy in Pink Supply List
Click on any of the pictures below to shop from the online store so you can make this project at home.
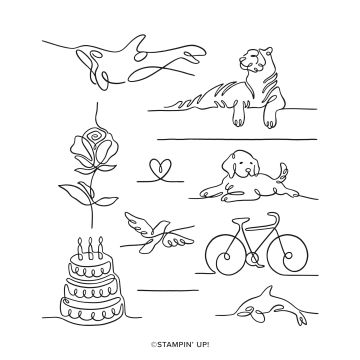
All this week I’ve playing with the images from Stampin’ Up!’s Along These Lines Photopolymer Stamp Set. I’ve paired it with other stamp sets for sentiments and with a variety of patterned papers. The more I play, the more I’m inspired.
In addition to the Along These Lines set, this card uses the Silly Safari Photopolymer Stamp Set, the Celebratory Sips Designer Series Paper, and the Florals in Bloom Designer Series Paper.
Thanks so much for visiting my blog today. I hope you enjoy this card. Please let me know if you have questions about this or any other stamping related project.
Need more inspiration? Subscribe to my free, email newsletter. I send three to four newsletters each month that include a paper crafting video, a card making tutorial, and updates to Stampin’ Up! news and specials. Click here to subscribe.
Kim
Along These Lines Party Animal Supply List
Click on any of the photos below to shop from my online store to get the supplies to create this card at home. I appreciate you choosing to shop with me.
Welcome to Team Stamp It’s June Blog Hop! Thanks so much for joining us. This month, we feature cards and projects designed with a summer theme in mind. Be sure to visit each blog on the hop. Leave a comment on each for a chance to win the Painted Wishes Kit.
Here are some measurements to help you get started.
Cloud Cover card stock measuring 11 x 4 1/2, scored and folded at 5 1/2
Daffodil Delight card stock measuring 5 1/4 x 4
A piece of the Boho Vibes 6 x 6 Designer Series Paper, cut into three strips each measuring 5 x 1 1/8
Spotlight on Nature Dies with Basic White card stock
Stamp bike image with Memento black ink. Color bike with Cloud Cover and Daffodil Delight Stampin’ Blends.
Use Balmy Blue ink to stamp the Hello Summer sentiment. Stamp sun with Daffodil Delight.
2025-2027 In Color Flat Pearls
I hope you like this project. Just a quick note: You can use this versatile layout with other stamp sets, images, sentiments, and patterned papers.
Thanks for visiting my blog today. Be sure to visit all of the blogs on the hop to gain more crafting inspiration. You could win the Painted Wishes Kit just by leaving a comment.
Congratulations to last month’s winner: Carol Busby
List of Blog Hoppers
Click on the links below to follow along on the hop to gain more paper crafting inspiration.
Along These Lines Summer Fun Supply List
Click on any of the graphics below to shop for the products to create this card at home:
This week I’ve been playing with Stampin’ Up!’s Party Alphabet Dies, showing you a few ways you can use them. I know there are lots and lots of possibilities.
Today, I offer a free step-by-step tutorial to help you make this card. Enjoy
Free Card-Making Tutorial
Stampin’ Up! Supplies:
STAMPS – None
PAPER – Gorgeous Grape Cardstock (146987), Daffodil Delight (119683), Basic White Cardstock (166780), Fresh Freesia Cardstock (155613), Floral Impressions 12 x 12 Designer Series Paper (165603)
INK – None
OTHER – Party Alphabet Dies (165623), Stylish Shapes Dies (159183), White ¼” Ribbon (165562), Purple Shimmer Gems (162611), Highland Heather Stampin’ Blends Combo Pack (154887), Stampin’ Seal (152813), Mini Glue Dots (103683), Multipurpose Liquid Glue (110755), Stampin’ Cut & Emboss Machine (149653)
Cutting & Scoring:
Gorgeous Grape Cardstock – 8 ½” x 5 ½”, scored and folded at 4 ¼”; 3” x 3”
Daffodil Delight Cardstock – 3” x 3”
Fresh Freesia Cardstock – 3” x 3”
Basic White Cardstock – 5 ¼” x 4”
DSP – Fresh Freesia Pattern 5 ¼” x 4” and Pool Party Pattern 3” x 3”
Ribbon – 9”
Instructions:
Adhere the Fresh Freesia patterned DSP to the Gorgeous Grape card base.
Die cut the 3” x 3” Gorgeous Grape Cardstock and the 3” x 3” Daffodil Delight Cardstock with the largest square from the Stylish Shapes Dies. Adhere on top of DSP, making sure the squares overlap in the center.
Die cut the letters H and I from the Party Alphabet Dies from the 3” x 3” Fresh Freesia Cardstock. Die cut the Pool Party pattern DSP with the largest square from the Stylish Shapes Dies.
Adhere the letters to say “hi” on the DSP.
Place Stampin’ Dimensionas on the back of this square and place on card front in the center.
Color the ribbon with the light Highland Heather Stampin’ Blend. Tie in a bow and place on card front, as shown, with a Glue Dot.
Add three Gorgeous Grape gems to card front.
Place 5 ¼” x 4” Basic White panel in the middle of the card.
Thanks so much for visiting my blog today. I hope you enjoyed this free tutorial.
Kim
Party Alphabet Free Tutorial Supply List
Click on any of the pictures below to shop from the online store so you can create this card at home.
At almost three-inches in height, Stampin’ Up!’s Party Alphabet Dies offer so many options for paper crafting — from creating cards to banners to scrapbooks and more.
In today’s post, I share a handful of handmade card samples using these awesome dies. I like the idea of a monogram card. How much fun is this? And, while unusual for me, no stamping is involved.
Purchase the Party Alphabet Dies as a bundle with the Party Banner Dies and save 10 percent.
Details and Measurements
I offer a few measurements and product information to help you get started:
Darling Duckling cardstock base measuring 11 x 4 1/4, scored at 5 1/2. Die cut with the fifth largest die from the Party Banners Dies. Be sure to watch the video below to see how to create this card base using the Party Banners Dies.
A piece of Secret Sea Designer Series Paper from the 2025-2027 In Color Designer Series Paper pack die cut with the sixth largest die from the Party Banners Dies measuring 5 1/4 x 4
Darling Duckling card stock measuring 4 x 3 die cut with the seventh largest die from the Party Banners Dies.
Secret Sea card stock measuring 3 3/4 x 2 3/4 die cut with the eighth largest die from the Party Banners Dies. At the same time, die cut your desired letter. Plan to use the extra letter for another project.
Make a stack of these to give to a friend, or create some to use for your personal stationery. With Stampin’ Up!’s large selection of patterned papers, the options are many.
Here’s another fun card using the Party Alphabet Dies and the Party Banner Dies. This card features a Pool Party banner embossed with the Dotted Circles Embossing Folder as well as a piece of the Turtle-Y Awesome Designer Series Paper.
How about a fun shaker card using a piece of Mixed Media Floras Designer Series Paper? Who wouldn’t love receiving this?
And, here’s another using the oval dies from the Impressions Abloom Dies. I also embossed the letter with the Eyelet 3D Embossing Folder.
How-To Video
From my craft room in Mesa, Arizona, I offer step-by-step directions for creating the card featured at the beginning of the post.
Thanks so much for visiting my blog today. I hope you enjoy this project and are inspired to create something for yourself and/or others.
Kim
Party Alphabet Monogram Supply List
Click on any of the graphics below to shop for the products to create this card at home.
Sign up for my newsletter and get a free tutorial!
Get Updates!
Join our mailing list to receive the latest updates from Kim!
You have Successfully Subscribed!
Current Catalogs
Follow Me
Categories
Disclaimer
The content in this blog is the sole responsibility of Kim Quade as a Stampin’ Up!® Independent Demonstrator. The use of and content of classes, services or products offered is not endorsed by Stampin’ Up!