I’m always looking for different ways to use the images and dies in the bundles I buy from Stampin’ Up! The large maple leaf in the Gathering Together Dies remind me of a fun fold I created last year with the Hearts of Elegance Dies (now retired). See that post here.
Details and Measurements
Early Espresso card stock base measuring 5 1/2 x 4 1/4
Basic Beige card stock panel measuring 5 1/4 x 4 embossed with the Gathering Leaves Embossing Folder
Two maple leaf images from the Gathering Moments Dies die cut with the Gathering Together 12 x 12 Designer Series Paper
Sentiment from the Gathering Moments Stamp Set stamped with Early Espresso ink, die cut with a label from the Stylish Shapes Dies
Gold Striped 3/8-inch Ribbon
Adhesive-Backed Metallic Gems
Here’s what the inside of the card looks like. Note: I added a piece of Basic Beige card stock to the back of the Early Espresso base so you can write a message.
I love how easy this fun fold is. Be sure to watch the video below to see how this card comes together.
How to Video
From my craft room in Mesa, Arizona, I offer step-by-step instructions for creating this maple leaf fun fold card.
Thanks so much for visiting my blog today. I hope you enjoy this easy fun fold.
Need more inspiration? Subscribe to my free, email newsletter. I send three to four newsletters each month that include a paper crafting video, a card making tutorial, and updates to Stampin’ Up! news and specials. Click here to subscribe.
Get a free card kit to make four cards using the Gathering Moments Bundle with a $50 purchase in October (before tax, shipping, and redeemed rewards). See this post for more information.
Kim Quade, Stampin’ Up! demonstrator in Mesa Arizona
Supply List
Click on any of the graphics below to shop for the products to create this card at home.
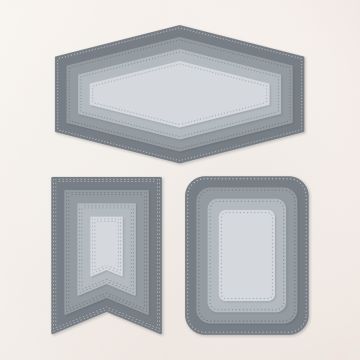
For my monthly in-person classes in my home in Meza, Arizona, I love to give every participant a treat packet. In September, I created this cute Halloween treat packet using Stampin’ Up!’s Nested Essential Dies, the Mini Alphabet Dies, and some Halloween Dies. No stamping here!
The elongated hexagon-shaped dies reminded me of a coffin, so I created a design that allowed me to include a chocolate treat.
Here’s what the treat packet looks like from the side. It fits a Fun-Size candy bar.
Measurements and Details
Here are a few details to help you make this packet at home:
Die cut the largest hexagon shape from the Nested Essentials Dies with Basic Black cardstock.
Use the second largest hexagon shape from the Nested Essentials Dies to cut a shape from the Spooky Sweet 12 x 12 Designer Series Paper (grey pattern)
Die cut letters using the Mini Alphabet Dies. (I recommend using Adhesive Sheets.)
Die cut two bats and one spider from the Spooky Halloween Dies and the Fright Night Dies in Basic Black
I added a Black & Gold Ribbon
The “kickstand” and candy bar hold measures 1 x 8 and is scored at 4 inches and 5 inches. Be sure to watch the video below to see how this treat packet comes together.
How to Video
Isn’t this packet super fun? Let me know if you have questions about it or any other stamping project. I’m happy to help.
Thanks so much for visiting my blog today!
Kim Quade, Stampin’ Up! demonstrator in Mesa, Arizona
Project Supply List
Click on any of the graphics below to shop for the products to make this treat packet.
Halloween lovers take note! Today, I’m sharing a fun Halloween card using a fun fold — the gate fold with a belly band. In addition, I use a fun element called a “wobble.” Be sure to watch the video below to see how this card comes together and how the wobble works.
Basic Black cardstock base measuring 8 1/2 x 5 1/2 scored on each of the long ends at 2 1/8
Two pieces of Spooky Sweet 12 x 12 Designer Series Paper measuring 5 1/4 x 1 7/8
Stylish Shape circle die cut from Spooky Sweet DSP
Haunted House die cut from Basic Black card stock (backed with Daffodil Delight card stock)
Bats, spiders, and spider webs die cut from Basic Black card stock (it helps to use adhesive sheets on the back of the card stock).
Belly Band created from Basic Black Two-Tone card stock measuring 9 1/2 x 1 1/4
Basic White panel measuring 5 1/4 x 4 for the inside
Sentiment stamped with Pumpkin Pie ink
This is what the card looks like when it’s open:
How to Video
From my craft room in Mesa, Arizona, I offer step-by-step instructions for creating this Halloween gate fold card.
Thanks so much for visiting my blog today. I hope you enjoyed this card. Please let me know if you have questions about this creation or other Stampin’ Up! paper projects.
Kim Quade, Stampin’ Up! demonstrator in Mesa, Arizona
Project Supply List
Click on any of the graphics below to shop for the products to create this card at home.
I’m a huge fan of pretty paper! And, there are a lot of pretty papers available right now in Stampin’ Up!’s offerings. One of them is the Gathering Together 12 x 12 Specialty Designer Series Paper. This festive paper features a variety of patterns, from subtle plaids to delicate leaves and acorns. It has awesome touches of champagne foil.
For today’s featured card, I used just one of the designs of this pretty patterned paper.
Measurements and Details
Basic Beige cardstock base measuring 8 1/2 x 5 1/2, scored and folded at 4 1/4
Gathering Together 12 x 12 Specialty Designer Series Paper (Cajun Craze pattern) measuring 5 1/2 x 4 1/4
Early Espresso cardstock panel measuring 5 1/4 x 4. Die cut large maple leaf from the Gathering Moments Dies. Dry emboss with Gathering Leaves Embossing Folder.
Find the right words for any occasion with Stampin’ Up!’s More Messages Bundle. This versatile bundle includes the More Messages Stamp Set with a variety of common greetings and sentiments, along with the coordinating More Messages Dies that create stunning backdrops for your text. Find this bundle as one of Stampin’ Up!’s Online Exclusives.
The great bundle also helps you create a bunch of cards at one time. Use sketches and your favorite layouts in conjunction with more messages. Stamp and die cut the sentiments to have on hand for when you need them.
Today, I share three quick and easy cards using this bundle as well as the Florals in Bloom 12 x 12 Designer Series Paper, another Online Exclusive offering. Be sure to watch the video below to see how the bundle works and how easy these three cards come together.
Measurements and Details (Hooray Card)
Cloud Cover cardstock base measuring 8 1/2 x 5 1/2, scored and folded at 4 1/4
Secret Sea pattern from Florals in Bloom DSP measuring 5 1/2 x 3
Striped Cloud cover pattern from Florals in Bloom DSP measuring 3 x 4 1/4
Stylish Shapes circle (3 inch diamater) die cut from Florals in Bloom DSP pattern
Secret Sea ink
Secret Sea 3/8-inch Faux Linen Ribbon
2025-2027 In Color Flat Pearls
The card below uses another fun layout. The card base is Strawberry Slush, a Darling Duckling layer (4 1/4 x 3), and strips of Florals in Bloom Designer Series Paper measuring (l-r): 3 1/2 x 1/2, 3 1/2 x 3/4, 3 1/2 x 1, 3 1/2 x 1 1/4.
Here’s another quick and easy layout. The card base is Peach Pie, the DSP measures 5 1/4 x 4, Peach Pie cardstock 3 1/4 x 4 1/4 and floral pattern measuring 4 x 3.
What do you think? Ready to give this bundle a try?
How to Video
From my craft room in Mesa, Arizona, I give step-by-step directions for using this bundle and creating the quick and easy cards shown here.
Thanks so much for visiting my blog today. Please let me know if you have questions about these cards or any other stamping projects.
Kim Quade, Stampin’ Up! demonstrator in Mesa, Arizona
Paper Crafting Supply List
Click on any of the graphics below to shop for the products to create this card at home:
Sign up for my newsletter and get a free tutorial!
Get Updates!
Join our mailing list to receive the latest updates from Kim!
You have Successfully Subscribed!
Current Catalogs
Follow Me
Categories
Disclaimer
The content in this blog is the sole responsibility of Kim Quade as a Stampin’ Up!® Independent Demonstrator. The use of and content of classes, services or products offered is not endorsed by Stampin’ Up!