Sep 22, 2016 | Kim's Creations |
Hello Stampers!When I saw a version of this card created by Kirsteen Gill, I really wanted to make one. I just love the ghosts! And you won’t believe what they are created with. Stampin’ Up!’s Paisleys Framelits Dies! Their cute little faces are stamped with stamps from the Spooky Fun set.
And, the house and tree scene is trimmed from the Halloween Night Specialty Designer Series Paper. It just makes for an easy, peasy, quick and cute card.
Enjoy!
Sep 1, 2016 | Kim's Creations |
Check out these Special Offers from Stampin’ Up! Shop directly from my online store 24/7 from the convenience of your home! Click here.
Aug 31, 2016 | Kim's Creations |
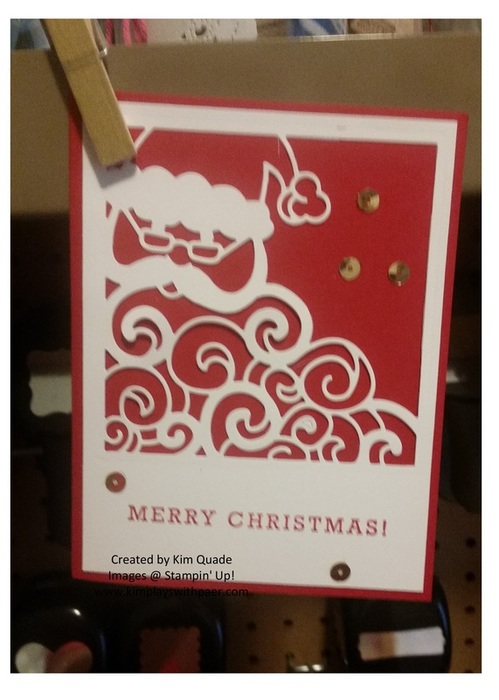
Hello Stampers!The new Stampin’ Up! catalog is filled with a lot of fun products for Halloween, fall, Thanksgiving, winter, and Christmas. This Detailed Santa Thinlits Die and coordinating Greetings from Santa stamp set is just one of the fabulous new offerings. I’ve created a very simple and easy card but one that can be jazzed up in so many ways.
Click on the catalog cover below to look inside. Click here to purchase products from the Holiday catalog..
Enjoy!
Aug 29, 2016 | Kim's Creations |
Hello Stampers!I admit I’ve shied away from creating shaker cards; I thought they were just too much work. But, with the right products provided by Stampin’ Up!, they are really fun.
The Layering Circles Framelits, the Window Sheets, the Foam strips, and the Sequin embellishments make creating shaker cards a breeze. All of the products used to create this card can be found in Stampin’ Up!’s Annual Catalog. (The Holiday Catalog makes its debut Thursday, September 1.)
Let’s see if I can simplify the process.
1. I die cut a circle with the Layering Circles Framelit from a piece of Crumb Cake Card Stock cut at 5 1/4 inches by 4 inches.
2. I then put that sheet through the Big Shot using the Sparkle Embossing Folder.
3. On the back side, I affixed a Window Sheet over the opening (I recommend Fast Fuse or Tear and Tape.)
4. i used one of the Foam Strips and created a circle just a tad larger than the opening.
5. I ran my Embossing Buddy on the Window Sheet and the inside edges of the Foam Strip to prevent the sequins from sticking to the edges.
6. I added a pinch of sequins into the well.
7. I removed the adhesive and placed my Whisper White card stock (that’s been stamped with the snowflake image) on top.
8. Voila! Shaker created.
Very simple and very fun! Give it a try! Send me an email or comment if you have questions. All of the products used to create this card can be purchased 24/7 from myonline store.
Enjoy!